12
INSTALLATION
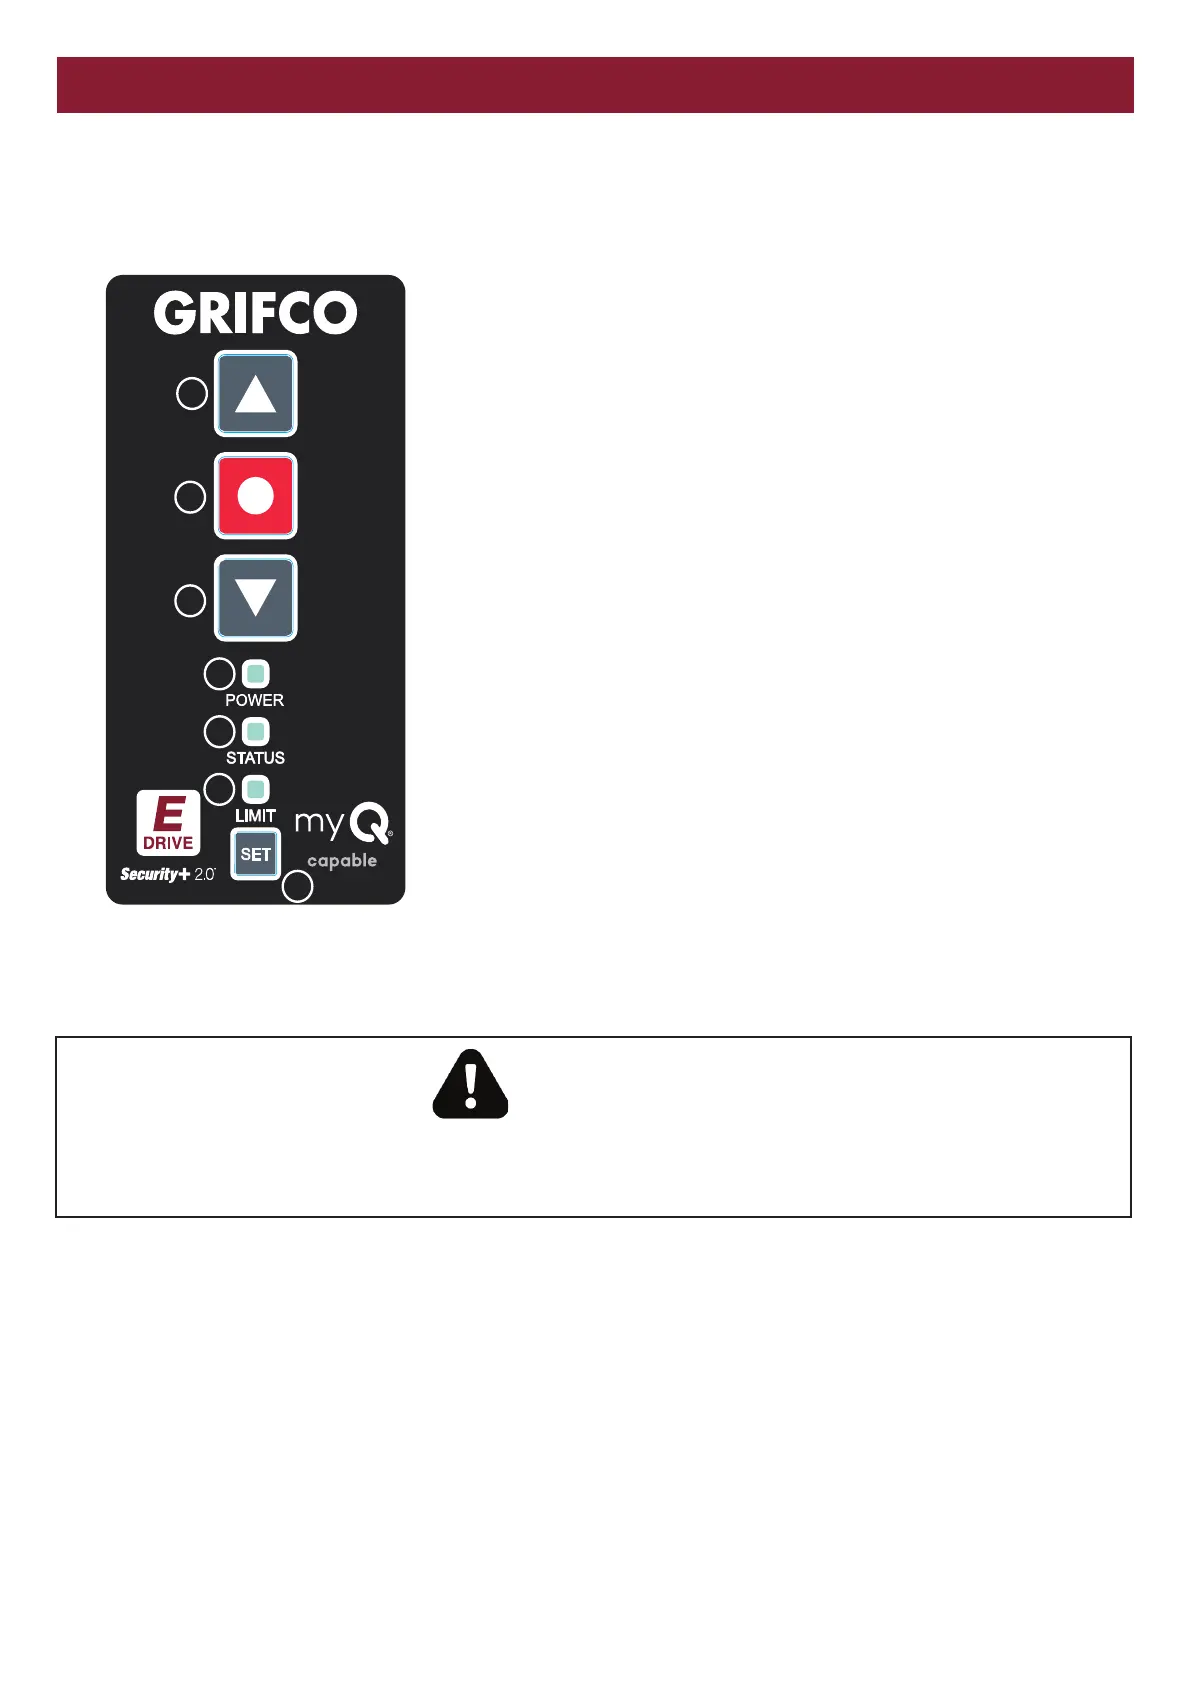
Controller
The E-Drive controller is the user interface for the opener. It consists of four buttons for control and setup, as well as three indicators to
display the opener status.
1. UP Moves the door upwards
2. STOP Stops the door
3. DOWN Moves the door downwards
4. POWER Shows when the unit is mains powered
5. STATUS Shows the status of the unit (refer to ‘Troubleshooting’).
6. LIMIT When lit indicates limits (or stopping positions) are not set,
the door will only operate in SAFETY inch mode until limits
are set (or reset).
7. SET Used primarily to set limits and enter configuration modes.
Installing the Controller
The controller is connected to the MCB via a low voltage control cable provided within the controller enclosure. Using the conduit
entries provided (also enclosed) run the cable through conduit. Be sure not to cut or damage the cable and therefore cause installation
issues and void warranty.
WARNING
MECHANICAL
Install the controller in a position where the door is visible. Failure to do so may result in serious injury or death to persons trapped
beneath the door. Minimum mounting height is 1.5 metres from floor level.
CAUTION: Do not force the controller cable! Excess stretching and manipulation can cause cable failure. Plug ends must
not be gripped with pliers.
To connect the controller to the E-Drive opener, identify the most appropriate entry of the MCB enclosure for your installation. Open the
MCB enclosure and fit the conduit fitting, allowing enough cable to reach the controller (RJ45) socket. Place the opposing end of the
controller cable through the conduit entry of the controller enclosure and pull through any excess cable. Plug the RJ45 end into the
socket located within the controller assembly. Use the space provided within the controller enclosure to neatly coil any excess cable.
NOTE: If the supplied controller cable is not long enough for your installation, a Grifco® Controller Extension Kit is available
(P/N ESK01).
 Loading...