16
ENTRAPMENT PROTECTION AND ACCESSORIES INPUTS
Devices such as Infrared (IR) Beams and Safety Bump Edges allow safe automatic or latch closing of the door and can be wired into
the MCB via an appropriate cable entry. Grifco® Entrapment Protection Devices such as the Protector System and Bump Edge are
wired into the quick connect inputs located next to the door behaviour DIP switches on the MCB.
Entrapment Protection Options
IR1: Monitored Grifco® Entrapment Protection Device, or NC
(normally closed) switching input
IR2: Monitored Grifco® Entrapment Protection Device, or
NC (normally closed) switching input
BUMP: Monitored 8K2 Resistor type Bump Edge input.
Setting Up Entrapment Protection Device
To install an Entrapment Protection Device, ensure the door is at the open limit position and then follow the instruction manual
that comes with the device. All Entrapment Protection Devices and monitored Bump Edges require at least one simulated
obstruction or activation to be learned by the opener. Once learned, the latch down mode will be allowed when set.
NOTE: some IR Entrapment Protection Devices require a minimum distance of more than 1m between the sensor and
reflector to function correctly.
Erasing Entrapment Protection Devices
To erase the learnt Entrapment Protection Devices from the MCB press and hold the RST button for 10 seconds or until
the green LED on the MCB blinks rapidly.
Accessory Power
The E-Drive has
an
unregulated 24 Volt, DC output connection labelled (VDC) located near the Entrapment Protection Device inputs.
Accessories connected to this output should not draw more than a maximum 150mA. For additional loads, use a separately
mounted power supply.
NOTE: Grifco GPS IR beams
(such as GPS15 and GPS772) must NOT be connected to the VDC output.
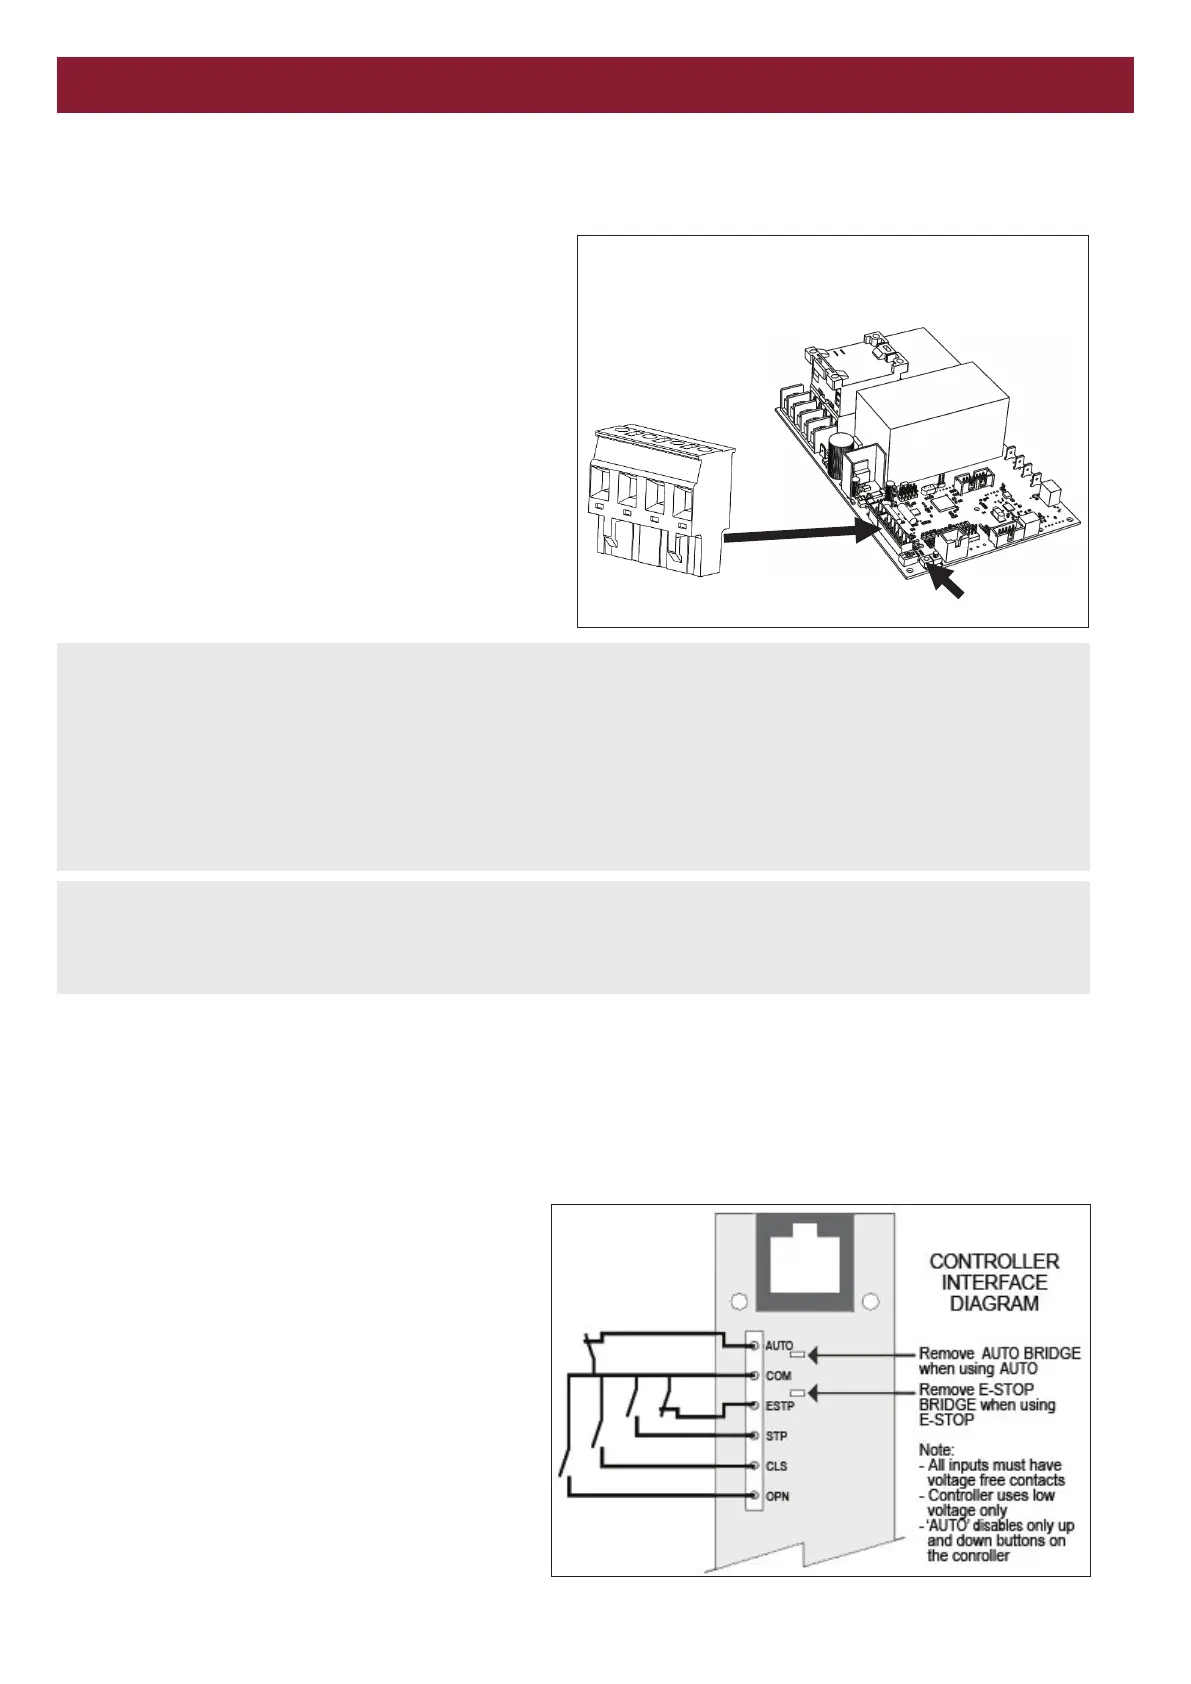
Additional Switchgear (e.g. dedicated open/close and
Auto Mode etc)
The E-Drive can be easily interfaced by the reverse side of
the controller push button panel. To do so you will need
terminal blocks (P/N TB210) available from your local
commercial door dealer or Chamberlain®.
NOTE: A controller must always be plugged in for the
opener to function. When utilising the AUTO or ESTP
terminals the respective bridge must be removed (refer
right).
RSTBuon
 Loading...