Pomona, CA Clemmons, NC Nashville, TN
Tel: 908-351-5400 www.haywardpool.com
USE ONLY HAYWARD GENUINE REPLACEMENT PARTS
40
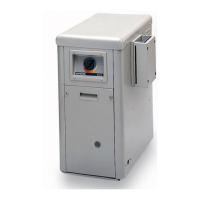
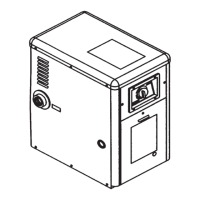
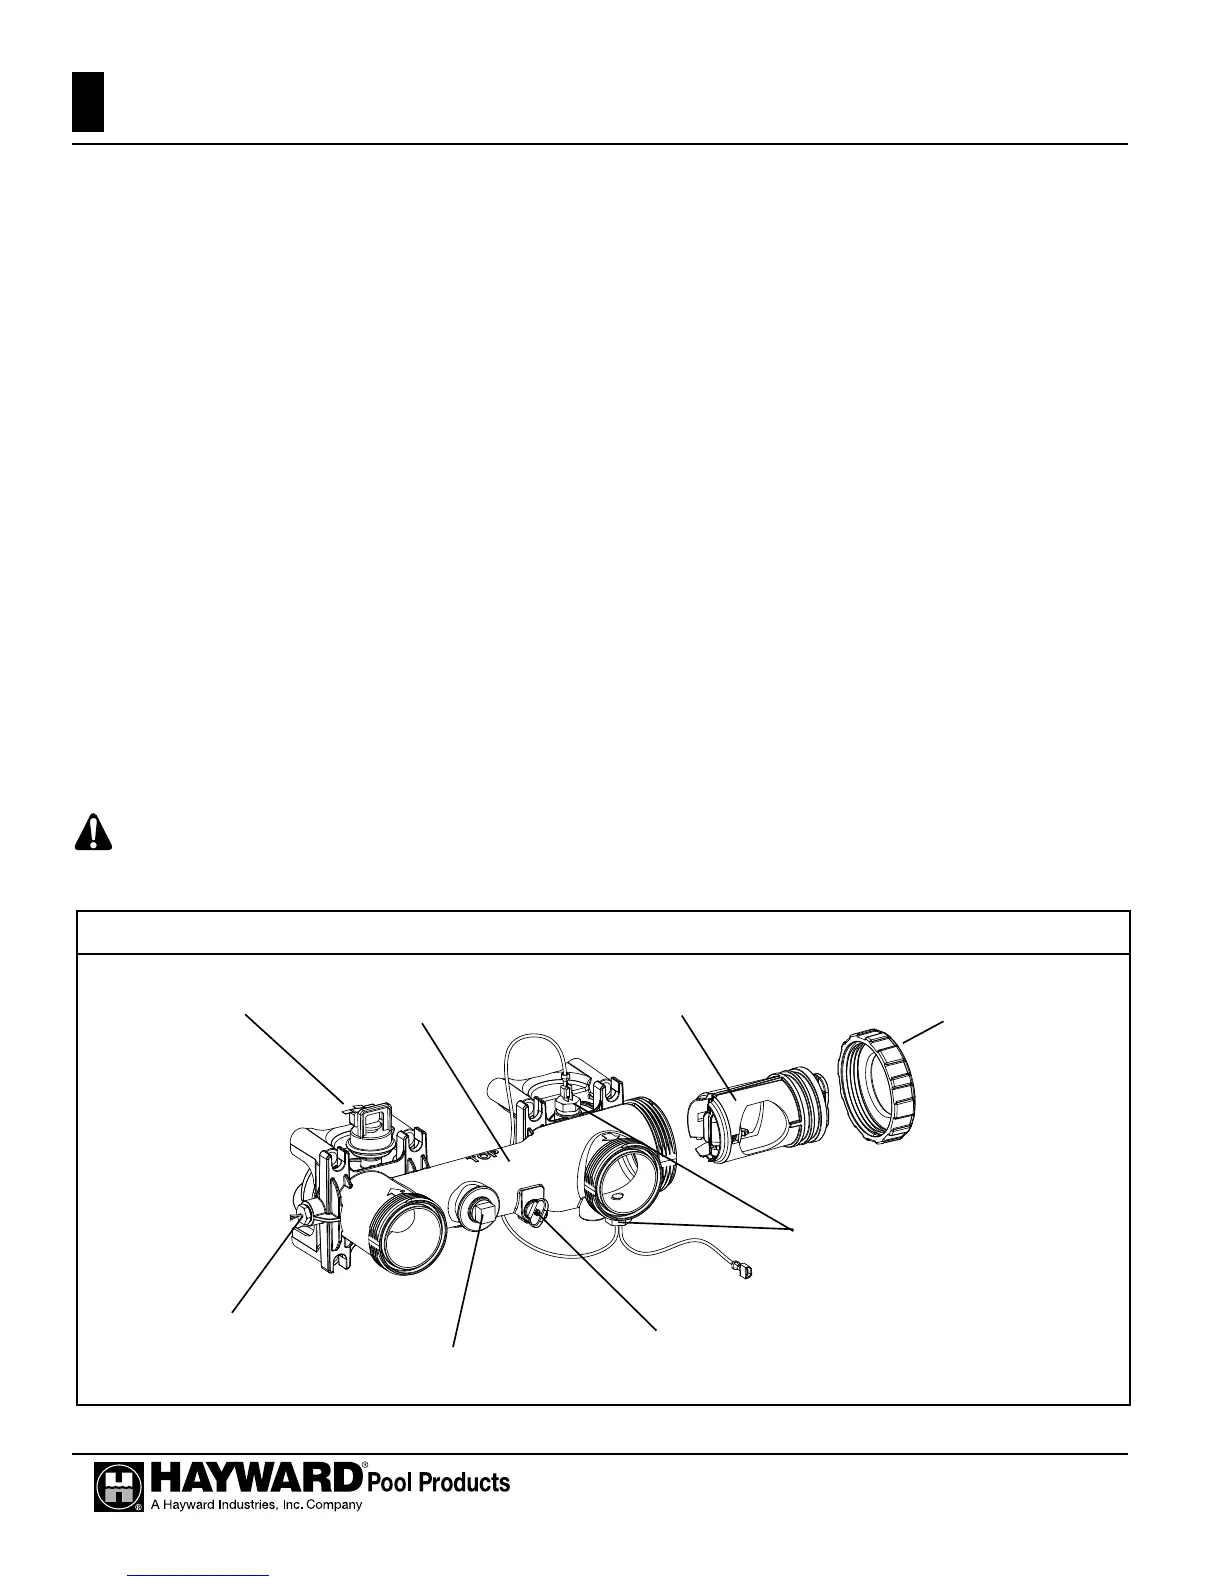
Figure 28: Heat exchanger header components
Cartridge
Retaining Nut
Water Pressure
Switch
Thermistor
Pressure Relief
Valve Port
Drain Plug
Temperature
Limits
Bypass Service
Cartridge
Inlet/Outlet
Header
'/%A&A&B!+*.!*.%+!.h:*%&B./]
This procedure applies to installations where the heater is located higher than the pool water level. If it
is necessary to drain a pool heater located below the pool water level, you must either partially drain the
pool, or isolate the pool heater from the pool using valves.
1. Set the heater to STANDBY mode using the keypad.
2. Turn the electricity to the heater OFF at the circuit breaker panel.
3. Turn the heater gas valve OFF using the knob on the valve (see Figure 26).
4. Turn the heater’s gas supply OFF at the main shut-off valve outside the heater cabinet.
5. Be sure the circulating pump is OFF.
6. On models with plastic headers, remove the plastic drain plug (see Figure 28). On models with
bronze headers (ASME models), open the brass drain valve located on the header (see Figure 21).
7. Allow all water to drain from the heater.
8. On models with plastic headers, re-install the plastic drain plug. On models with bronze headers
(ASME models), close the brass drain valve located on the header.
("/A&B!(+%/+N,"]
1. Inspect and clean the heater, being sure the heater is free of leaves and debris prior to startup.
2. Be sure inlet and outlet piping are properly attached to the heater and the drain valve is closed.
7XUQWKH¿OWUDWLRQV\VWHPSXPS³21´DQGDOORZWKHV\VWHPWRUXQORQJHQRXJKWRSXUJHDOOWKHDLU
from the lines.
7XUQWKHJDVVXSSO\WRWKHKHDWHU³21´
6HWWKHWHPSHUDWXUHFRQWUROXVLQJWKHNH\SDGWR³322/´RU³63$´DQGDGMXVWWKHVHWSRLQWWRWKH
desired temperature setting.
,IRSHUDWLQJGLI¿FXOWLHVDUHHQFRXQWHUHGFRQWDFWDTXDOL¿HGVHUYLFHFRPSDQ\IRUDVVLVWDQFH
ATTENTION: Heater installation, checkout, and start-up should now be completed. BE SURE to
leave the Owner’s Manual with the pool owner.

 Loading...