EN
12/38 Rev. 02 / 11.2022 AB1203EN_SA
11 Opening and closing the lid
11.1 Opening the lid
The lid can only be opened if the centrifuge is switched on and the rotor is stationary.
If this shouldn't be possible, see the "Emergency unlock" chapter.
When the cycle counter is activated, after a centrifugation run, while opening the lid, the remaining number
of running cycles (centrifugation runs) is briefly displayed.
Example:
t/min:s
RPM
>RCF<
STOP
OPEN
Press the key.
The lid is unlocked by the motor.
: Lid unlocked.
Example:
t/min:s
RPM
>RCF<
11.2 Closing the lid
Do not reach with your fingers between the lid and housing.
Do not slam the lid closed.
Put the lid on and lightly press the front
edge of the lid down.
The lid is locked by the motor.
: Lid locked.
Example:
t/min:s
RPM
>RCF<
12 Installation and removal of the rotor
C
D
A
B
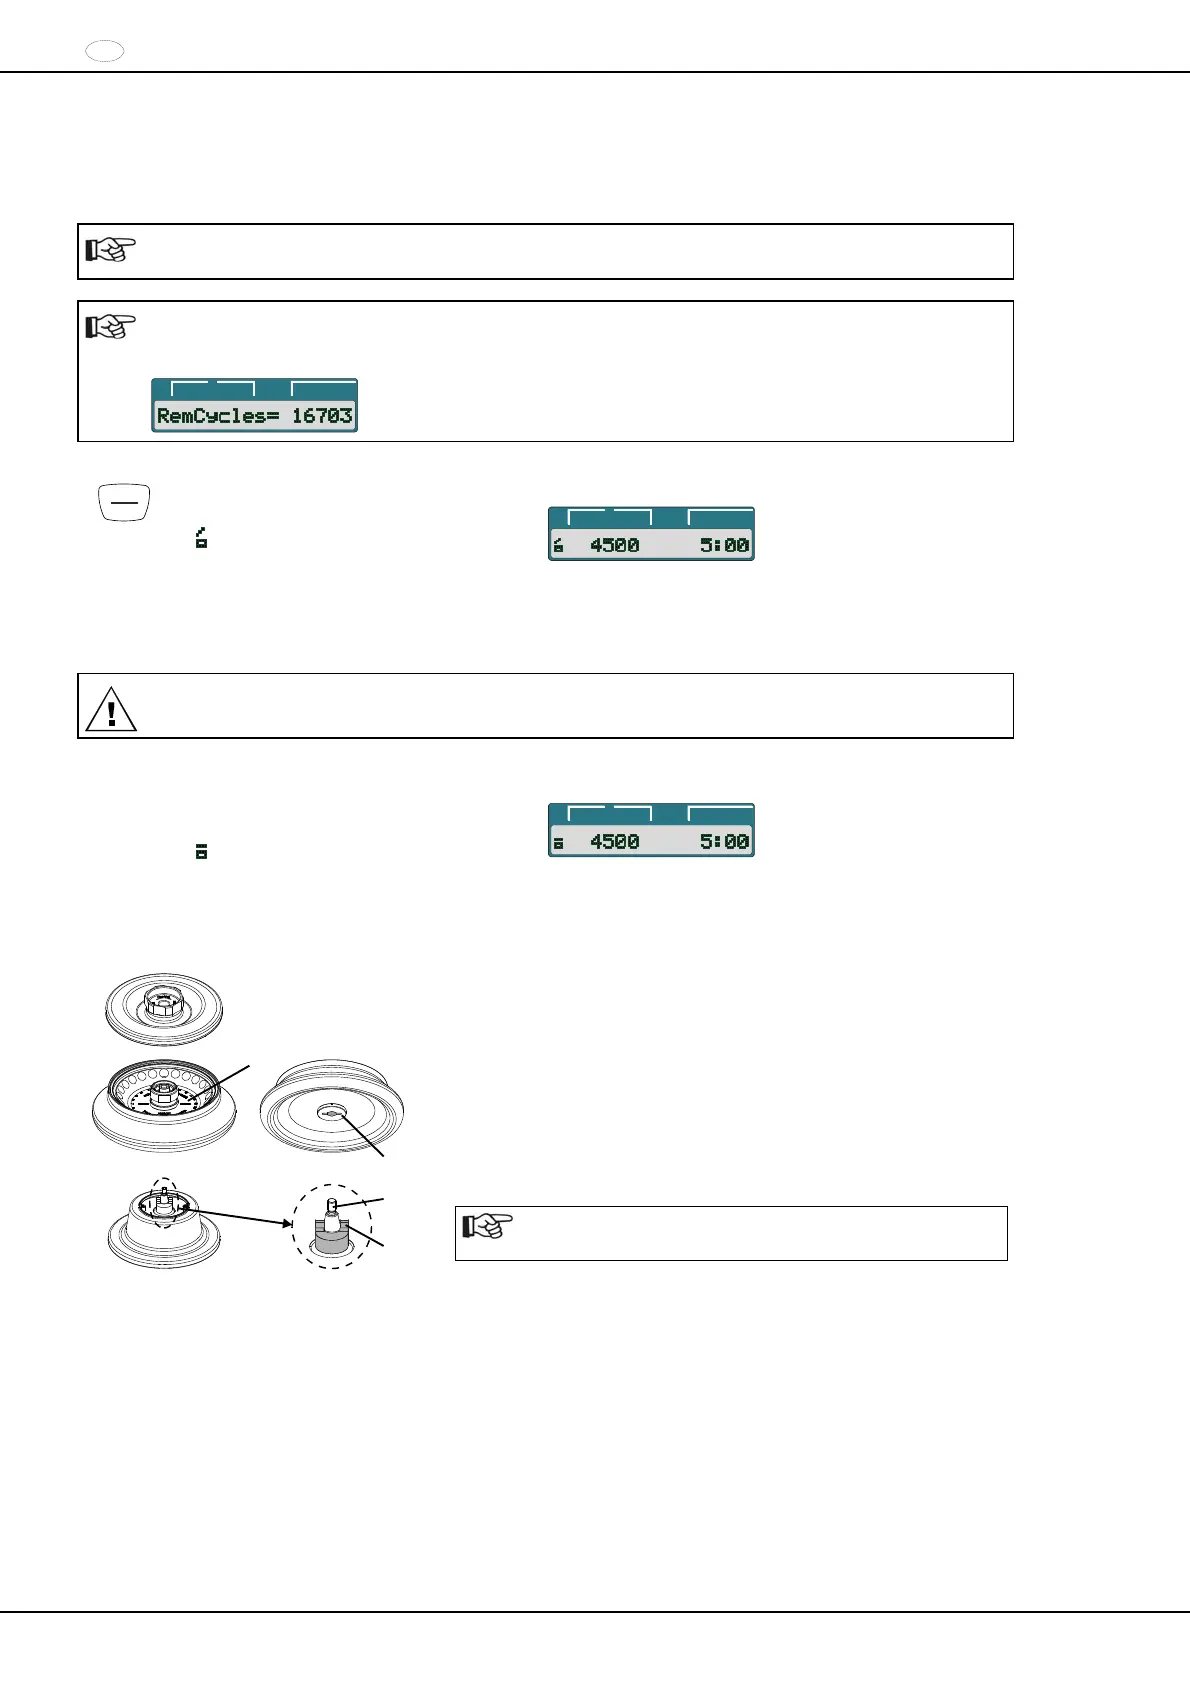
Installation:
Clean the motor shaft (A) and the bore of the rotor and then apply a
thin coat of grease to the motor shaft. Dirt particles between the
motor shaft and rotor prevent the rotor from having a perfect seat and
cause it to run unsteadily.
Place the rotor vertically onto the motor shaft. The motor shaft dog
(B) has to fit in the rotor slot (C). The alignment of the groove is
labelled on the rotor (D).
Tighten the clamping nut of the rotor with the Allen wrench (included
in delivery) by turning clockwise.
Check the rotor to make sure it is seated firmly.
To ensure a tight fit of the rotor, the nut of the rotor must
be hand-tightened.
Removal:
Loosen the rotor's clamping nut by turning counter-clockwise with the
Allen wrench (included in delivery) and turn up to the lifting pressure
point. After overcoming the lifting pressure point, the rotor is released
from the cone of the motor shaft. Turn the clamping nut until the rotor
can be lifted up from the motor shaft.
Lift up the rotor from the motor shaft.
 Loading...