Before You Start
The listening service has been enabled for the ISAPI host, and the network communicaon with
the device is normal.
Steps
1.
Go to
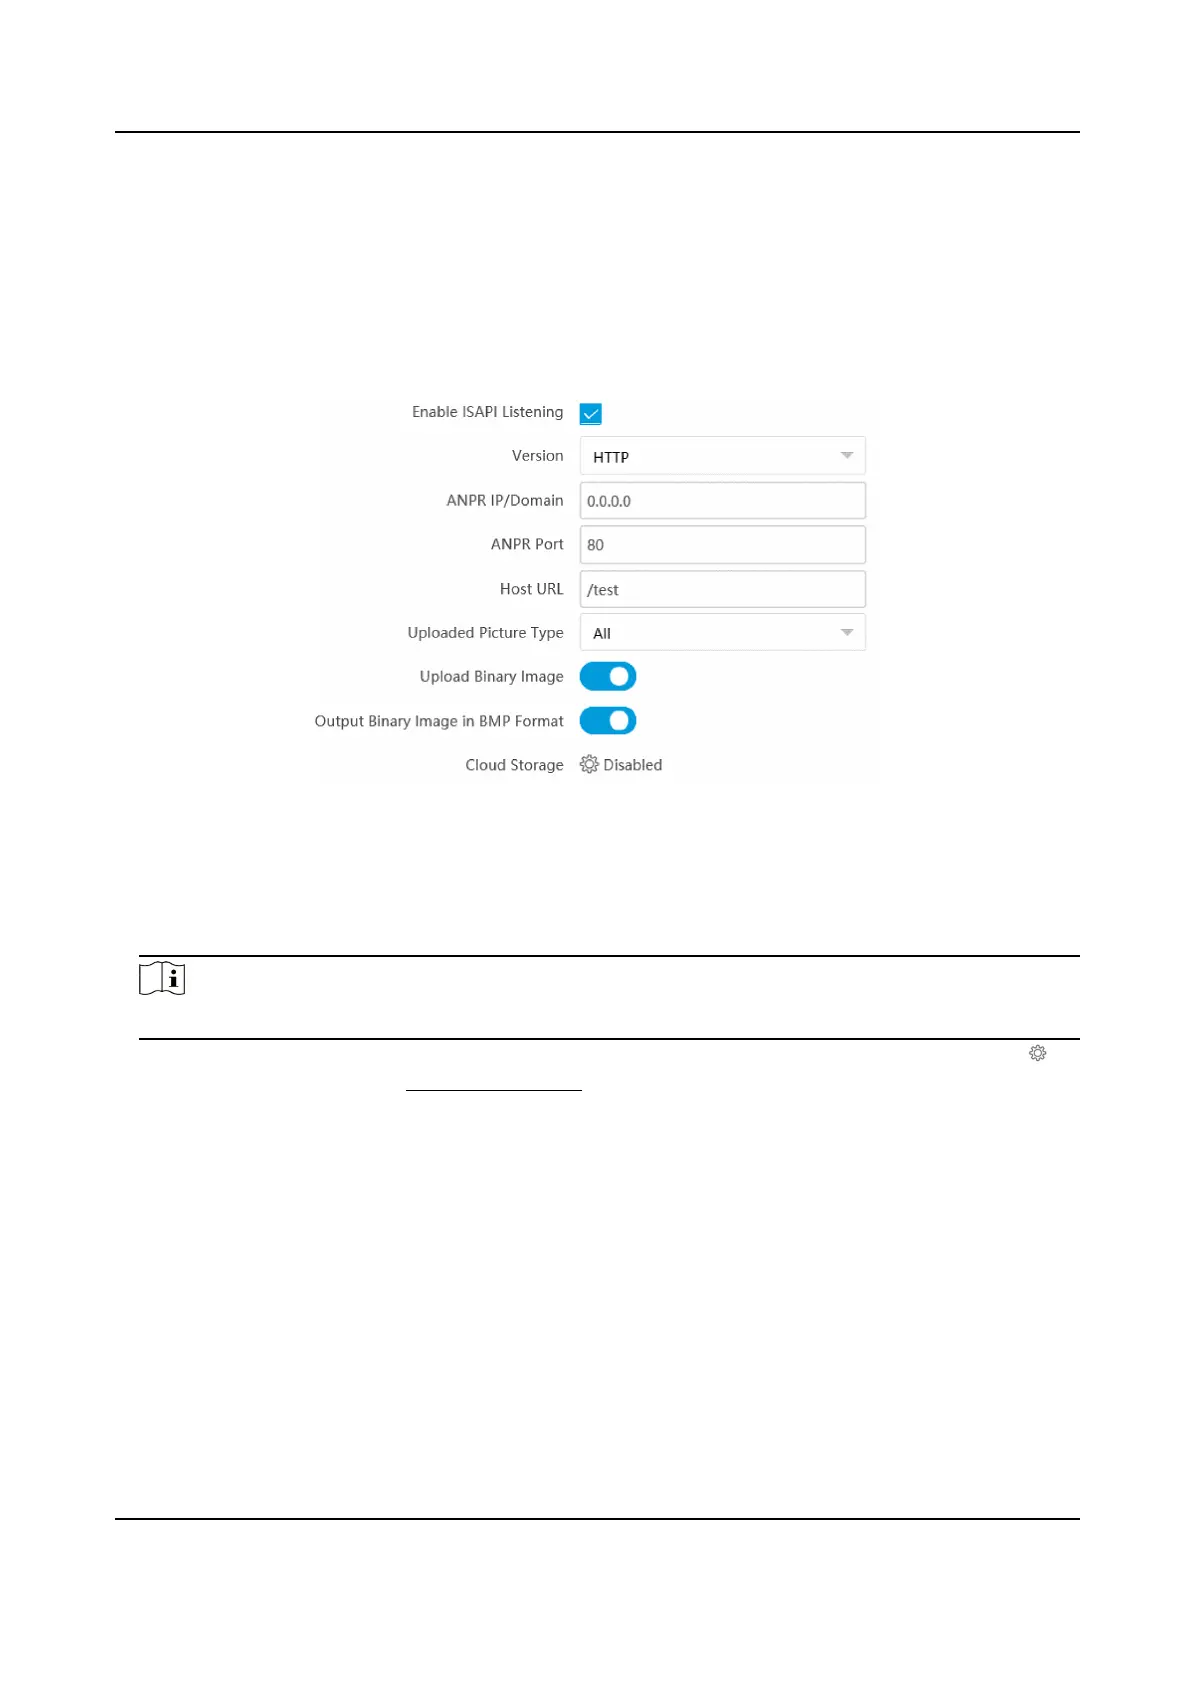
Conguraon → Network → Data Connecon → ISAPI Listening .
2.
Enable the ISAPI listening.
Figure 4-5 Set ISAPI Listening
3.
Set ANPR IP/Domain, ANPR Port, and Host URL.
4.
Set uploaded picture type.
5.
Oponal: Enable Upload Binary Image if you need to upload images which are full of black or
white pixel points.
Note
Enable Output Binary Image in BMP Format if you want to output images in this format.
6.
Oponal: If you want to save the alarm informaon and pictures to the cloud storage, click to
set Cloud Storage. Refer to Set Cloud Storage for details.
7.
Click Save.
4.1.6 Set Cloud Storage
Cloud storage is a kind of network storage. It can be used as the extended storage to save the
captured pictures.
Before You Start
●
Arrange the cloud storage server.
●
You have enabled level 1 arming in Live View → Real-Time Capture .
Network Trac Camera Operaon Manual
18
 Loading...