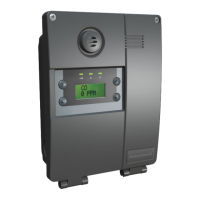
7-7
7.2.1 Set-up Menu ‘ SEt’
The set-up menu allows the settings of the detector
to be changed. The set-up menu consists of 6
submenus as shown in the table below.
Table 7-2. Set-up mode submenus.
Set-up
submenu
Icon Changeable settings
Alarms
Gas ID, alarm 1 and alarm 2 configuration, set points, time delay,
latching/non latching, energized/de-energized
4-20 mA
output
mA
4 mA, gas conc. corresponding to 4 mA;
20 mA, gas conc. corresponding to 20 mA
Faults
Configuration, latching/non latching, energized/de-energized,
m12 fault frequency, temperature fault enable/disable
Calibration Calibration interval (days)
Time/Date tImE
Date format mm:dd or dd:mm, current year, month, day,
hours, minutes
IP address Auto address selection on/off, IP address, subnet mask values.
Pass code Set pass code
LCD backlight LCD backlight mode (bm:m or bm:c)
Pump
frequency
PUmP use arrows (‘s’ or ‘t‘) to adjust frequency
Note
All settings in a submenu are accepted when
the ‘3’ accept button is pressed after the last
submenu setting. This saves the changes
and is indicated by displaying ‘UPdt’ on the
LCD. If however the ‘X’ cancel button is
pressed at any time before the changes are
accepted, this will cause any changes to be
cancelled in that particular submenu.
To select the set-up menu from normal operation,
press the ‘s’ up button for a few seconds. Enter
the pass code (if set). Use the ‘s’ up or ‘t’ down
buttons to select the set-up menu ‘ ’ icon and press
the ‘3’ accept button.
7.2.2 Set Alarms ‘ ALm’
1. Use the ‘s’ up or ‘t’ down buttons to select
the set alarms ‘ ALm’ submenu and press ‘3’
to accept.
2. The flashing gas id code is displayed along with
the gas cylinder and alarms icon ‘ ’.
3. Use the ‘s’ up or ‘t’ down buttons to change
the gas ID number (only applicable on multi gas
sensor cartridges- See Appendix B).
4. Press ‘3’ to accept.
5. The flashing level 1 (L1) alarm type is displayed
(U) rising or (d) falling.
6. Use the ‘s’ up or ‘t’ down buttons to change
the alarm type.
7. The flashing alarm 1 value is displayed along
with the icon ‘s’.
8. Use the ‘s’ up or ‘t’ down buttons to change
the value.
9. Press ‘3’ to accept.
10. The flashing level 2 (L2) alarm type is displayed
(U) rising or (d) falling.
11. Use the ‘s’ up or ‘t’ down buttons to change
the alarm type.
12. Press ‘3’ to display the flashing alarm 2 value
along with the icon ‘ ’.

 Loading...