IDR-2P, -2A & -6A Repeaters User Manual
Installation Guide
9 997-411-000-9, Issue 9
March 2008
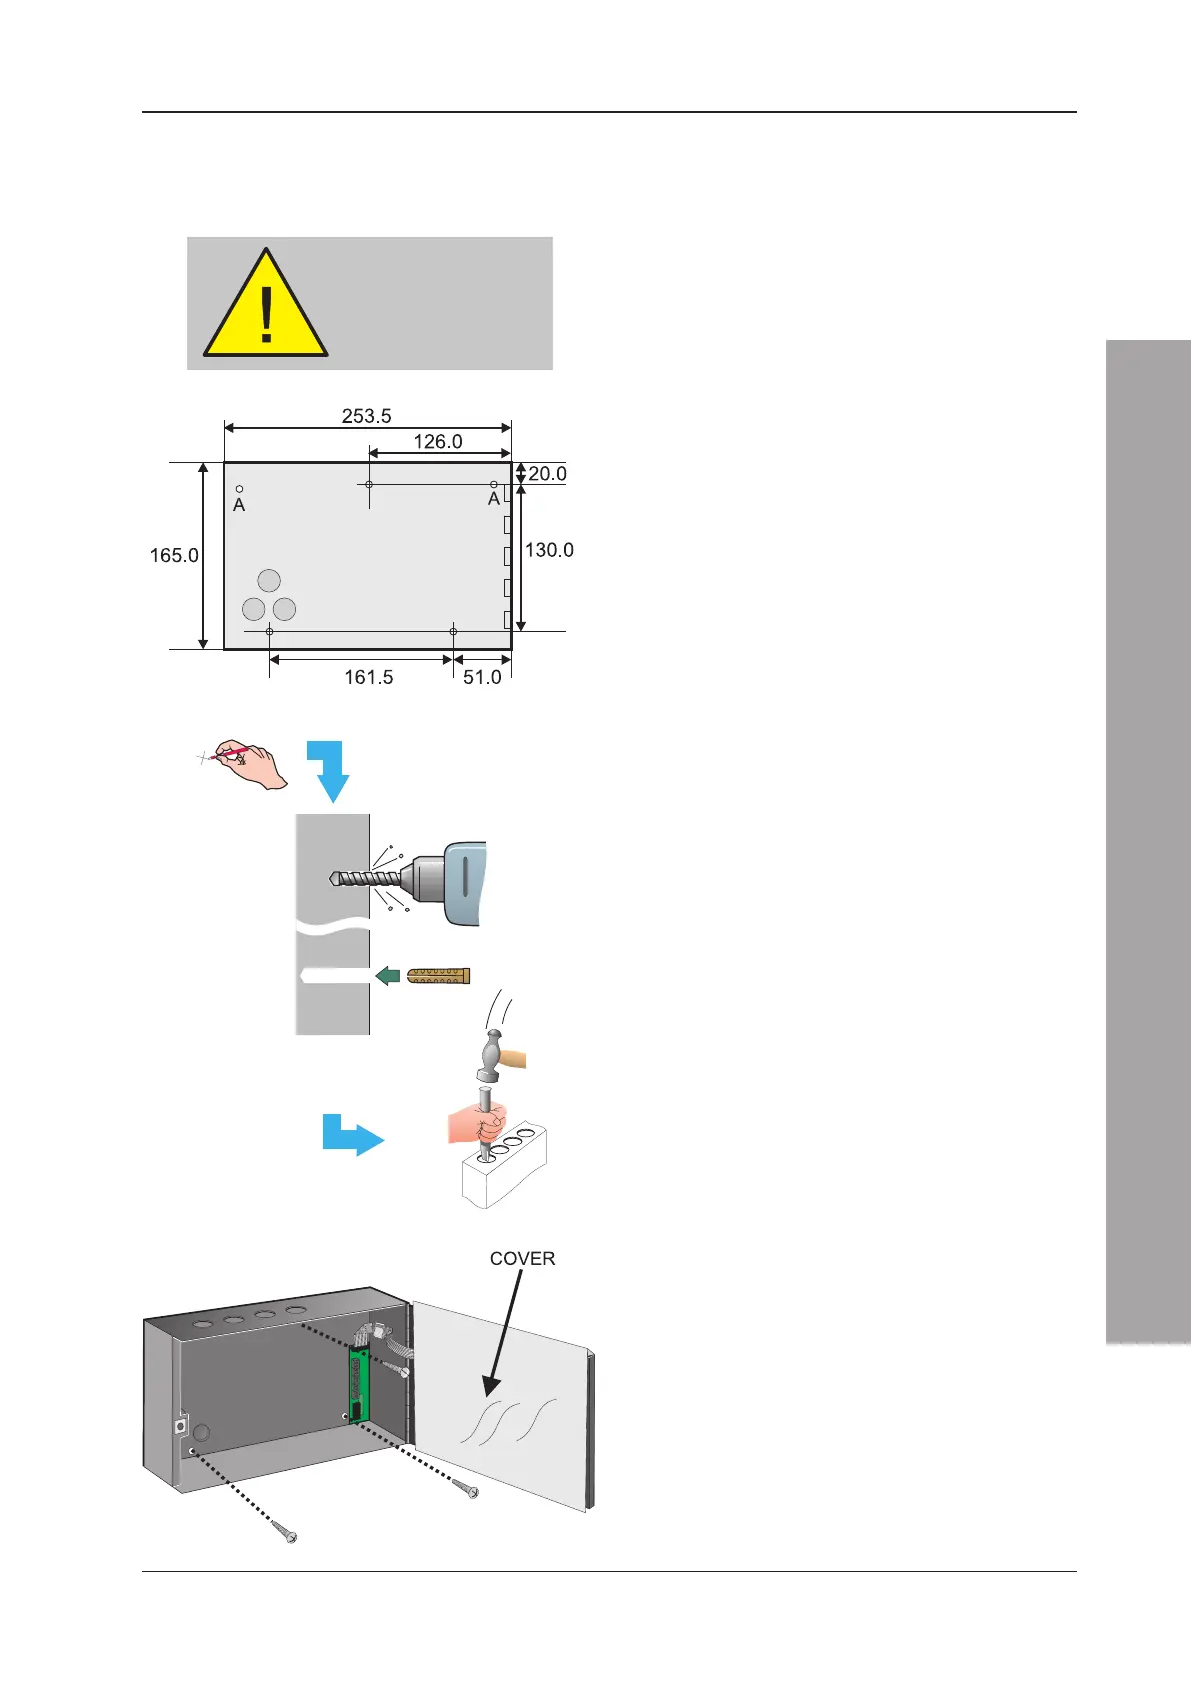
2.5 Installing the Enclosure
To ensure that the IDR repeater electronics
remain clean and undamaged, it is
recommended that the front door of the
enclosure be covered before the enclosure is
fixed to the wall. It is further recommended that
the cover remain in place while other trades
(e.g. plasterers or decorators) are working in
the vicinity, until the IDR repeater is ready for
commissioning.
2.5.1 Fixing Enclosure to Wall
The drawing at left shows the IDR repeater
enclosure fixing dimensions in millimetres.
Fixing hole diameters are 5mm.
Note: The two holes ‘A’ on the drawing are
provided for the bezel (Section 2.7).
Wall flatness
To prevent distortion, the IDR repeater
enclosure must be installed on a mounting
surface that is as flat as possible. If the wall is
not flat where the enclosure is to be fitted, use
appropriate packing pieces to level it up.
Procedure
On the suitable mounting surface:
1 Mark the position of the fixing holes.
2 Using an appropriate sized drilling bit, drill
and plug three holes in the mounting
surface.
3 Prepare apertures (20mm knockouts)
required for cable access.
4 Using three 5mm sized screws, fix the
enclosure to the mounting surface. Do not
use countersunk-headed screws.
DO NOT use the
enclosure as a guide
when drilling.
1
2
3
4
 Loading...