EasyManuals Logo
Home>HP>Measuring Instruments>HPE Apollo 2000 Gen10 Plus

HP HPE Apollo 2000 Gen10 Plus User Manual

HP HPE Apollo 2000 Gen10 Plus
102 pages
To Next Page IconTo Next Page
To Previous Page IconTo Previous Page
Page #33 background imageLoading...
Page #33 background image
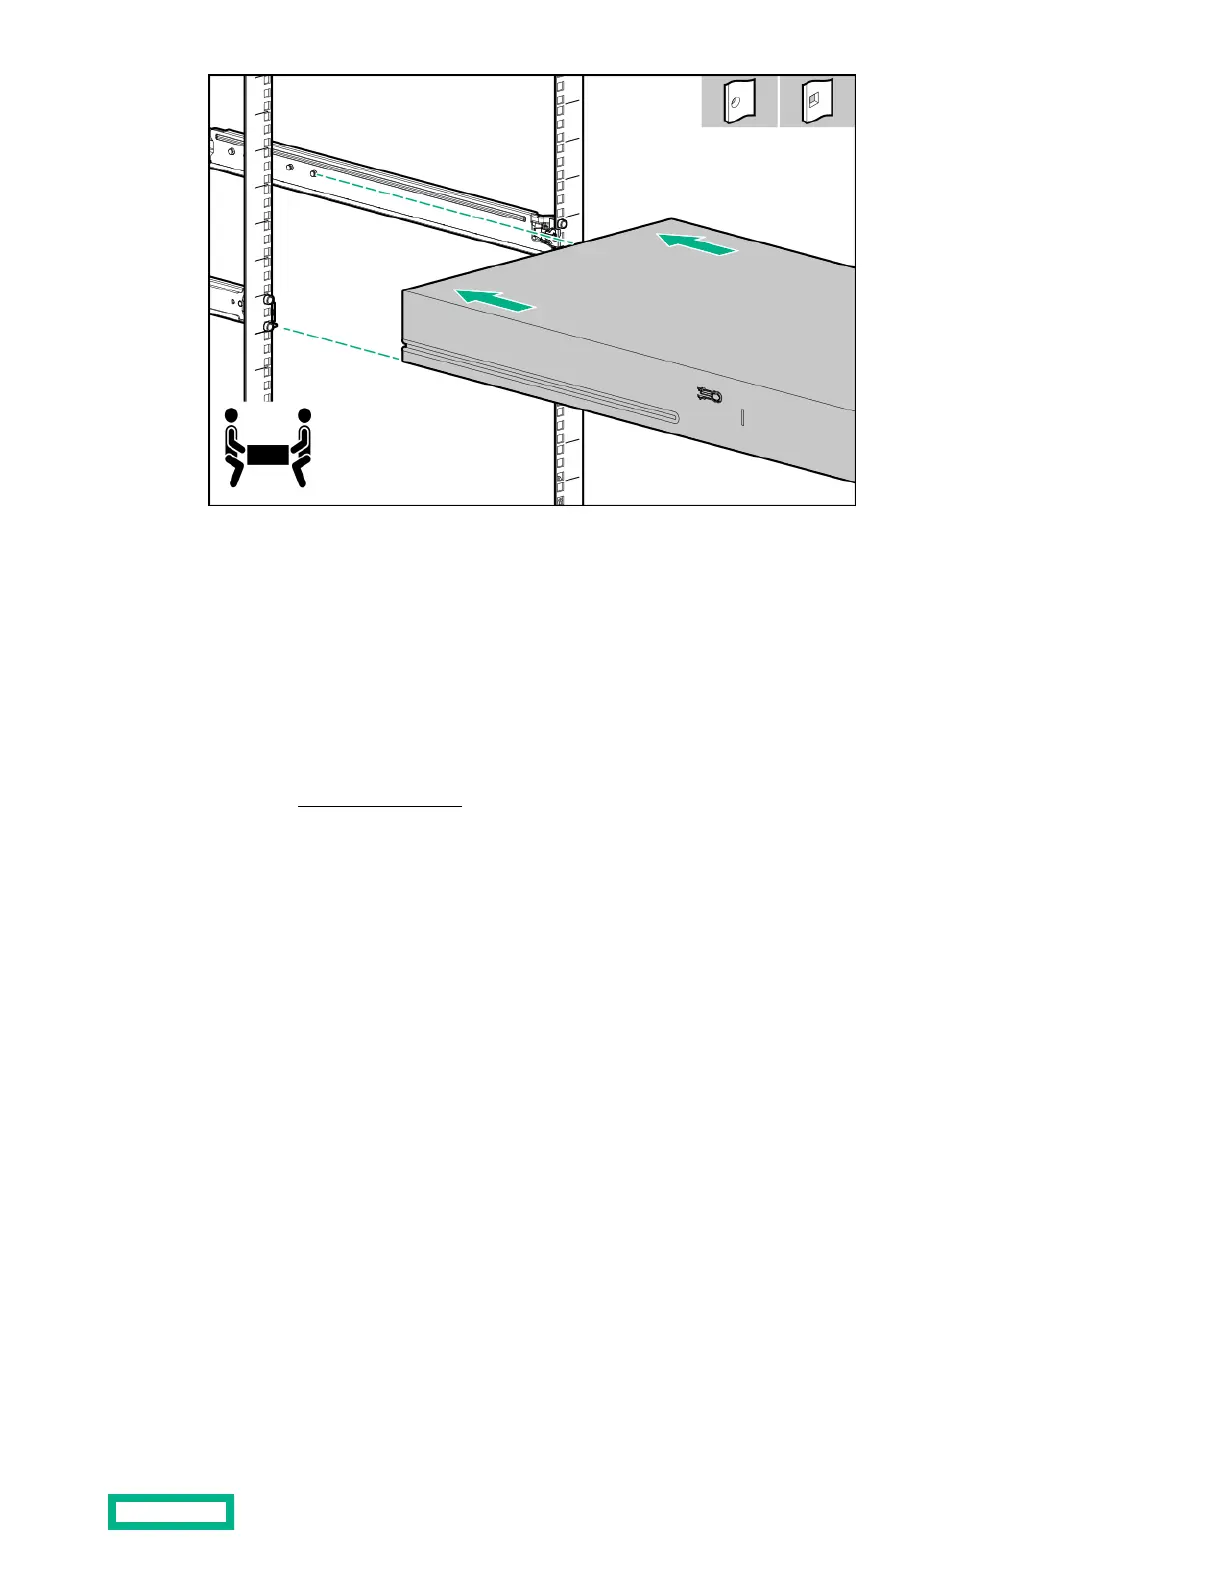
2. Install the following components:
a. Install all drives.
b.
Install all power supplies.
c.
If removed, install all server blanks.
d.
Install all servers.
3.
Connect all peripheral cables to the servers and chassis.
4.
If removed,
connect the tube set.
5.
Connect each power cord to the chassis.
6.
Connect each power cord to the power source.
7.
Employ industry best practices in routing and managing the rear panel cables and power cords.
8.
Secure the chassis to the rack:
a.
Open the bezel ear latch (callout 1).
b.
Tighten the bezel ear screw (callout 2).
Removal and replacement procedures
33

Table of Contents

Questions and Answers:

Question and Answer IconNeed help?

Do you have a question about the HP HPE Apollo 2000 Gen10 Plus and is the answer not in the manual?

HP HPE Apollo 2000 Gen10 Plus Specifications

General IconGeneral
BrandHP
ModelHPE Apollo 2000 Gen10 Plus
CategoryMeasuring Instruments
LanguageEnglish

Related product manuals