Installing a processor and heatsink module
Processor load order
Observe the following guidelines when installing additional processors:
• In a BL860c i2, CPU0 is installed before CPU1.
• In a BL870 i2 or BL890 i2, each blade must have CPU0 installed.
• When adding additional CPUs in a conjoined configuration:
— Load both CPU0 and CPU1 in the monarch blade first
— Load additional CPUs in sequence, from lowest slot-numbered blade to highest.
CAUTION: The pins on the processor socket are very fragile. Any damage to them may require
replacing the server blade base unit.
CAUTION: To avoid damage to the processor, verify that the plastic tabs on the processor are
pulled fully out before installation.
CAUTION: To avoid damage to the processor, handle the processor only by the edges. Do not
touch the bottom of the processor, especially the contact area.
CAUTION: To prevent possible server blade malfunction and damage to the equipment,
multiprocessor configurations must contain processors with the same part number.
CAUTION: To prevent thermal instability and damage to the server, do not separate the processor
from the heatsink after assembling.
The processor and heatsink ship as two separate units and are coupled together during installation
into the server blade.
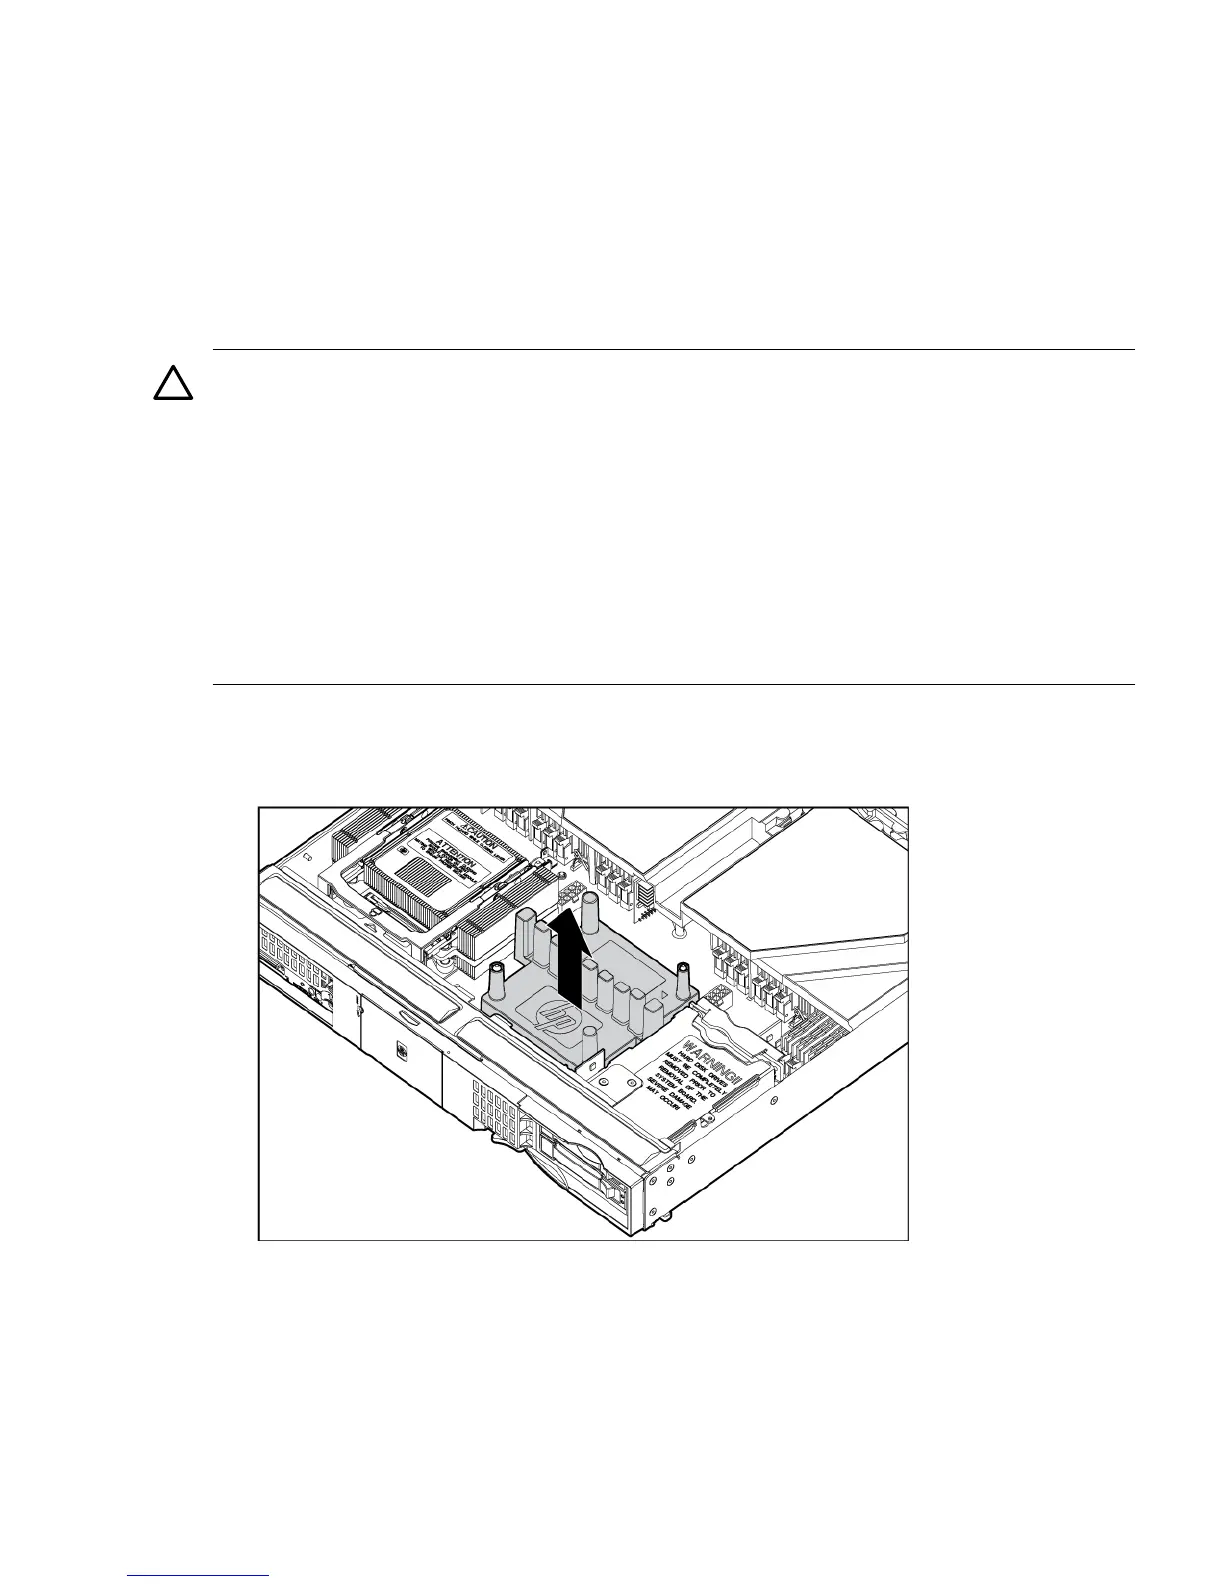
1. Remove the CPU airflow baffle.
Installing additional components 21
 Loading...