2. Place the access panel onto the server blade by lining up the posts on each side of the access
panel with the keyways on the server blade chassis.
3. Slide the access panel toward the front of the server blade, and push down on the access
panel latch until it is flush with the access panel.
4. Lock the access panel cam (if necessary) by turning the cam clockwise with the Torx T–15
or flathead screwdriver.
Installing and powering on the server blade
Preparing the enclosure
HP BladeSystem enclosures ship with device bay dividers to support half-height devices. To
install a full height device, remove the blanks and the corresponding device bay divider.
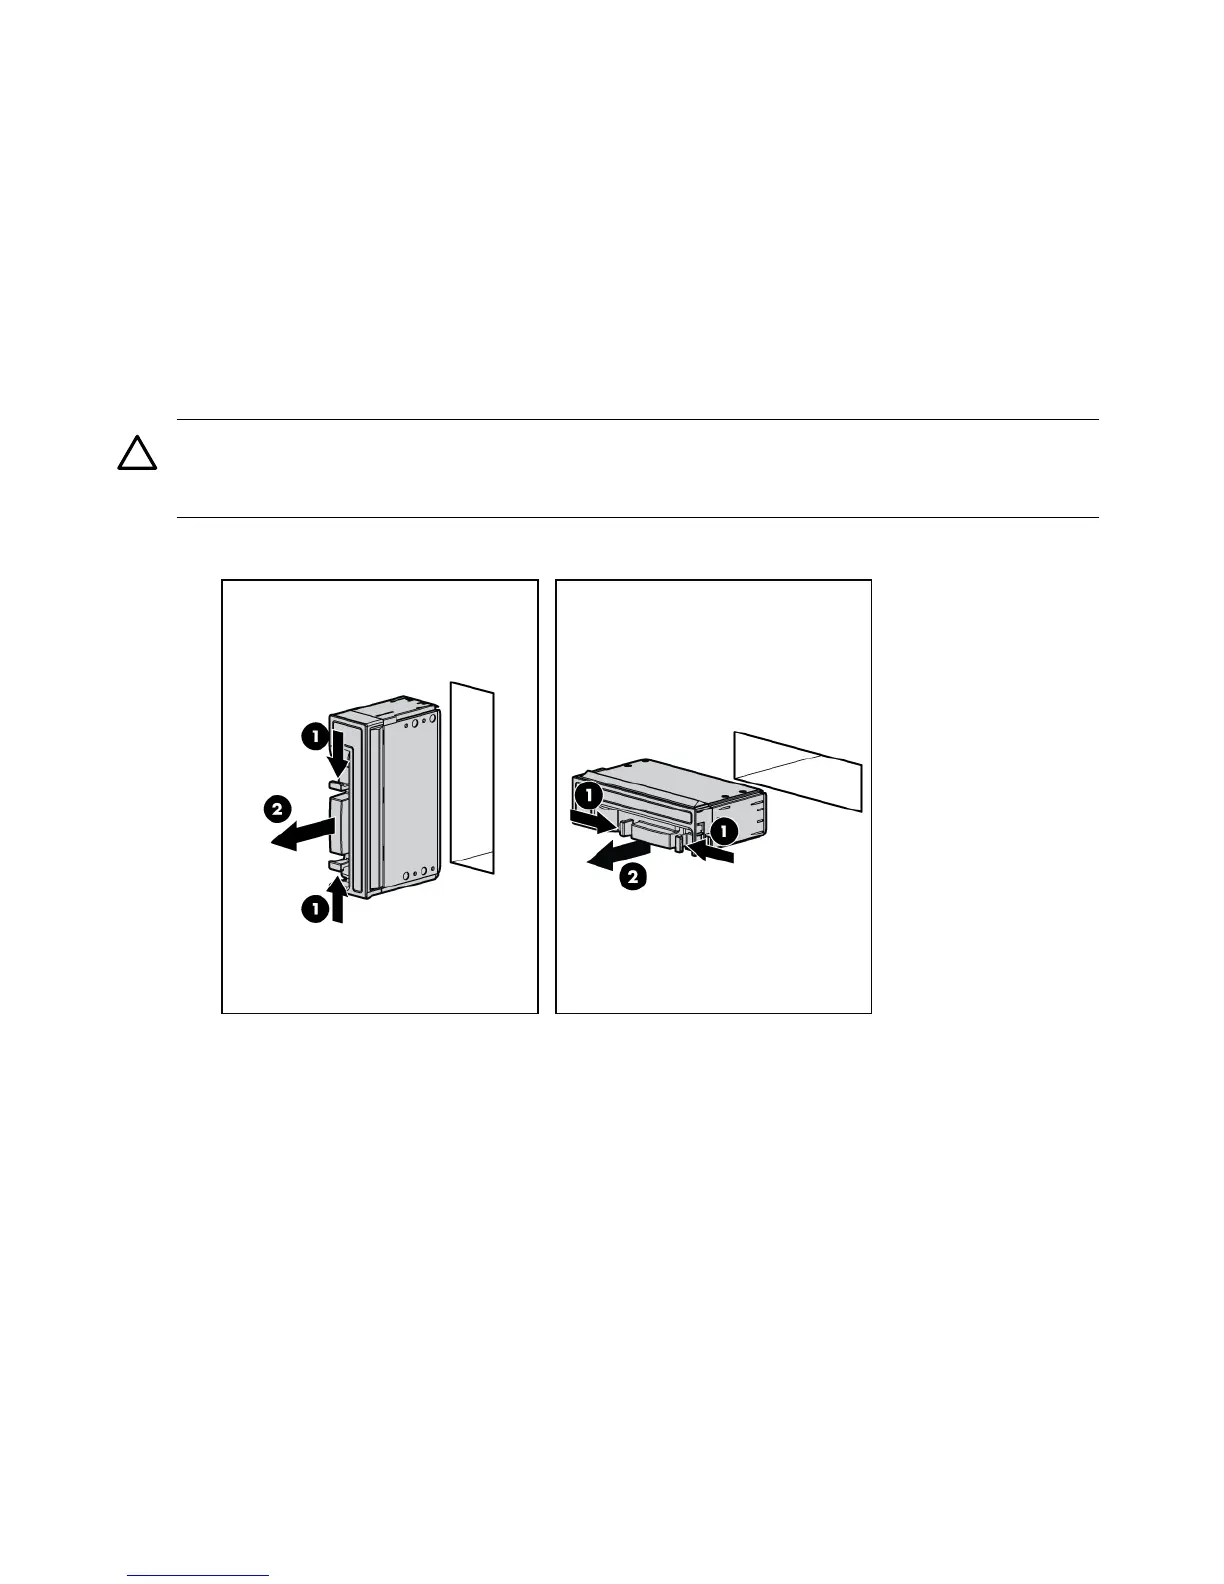
CAUTION: To prevent improper cooling and thermal damage, do not operate the server blade
or the enclosure unless all hard drive and device bays are populated with either a component
or a blank.
1. Remove the device bay blank.
2. Remove the three adjacent blanks.
32 Installing the server blade into the enclosure
 Loading...