Working with Sound, Pictures, and Video
23
NOTE: You must be connected to the Internet to use the HP Instant Share feature.
Backup and Restore Click this tab to create backup discs of all the images
on your PC or to restore images (either from a backup disc or from an
automatically created digital negative).
For more information on using the HP Image Zone Plus, click the Help link in the
control area (B) of the program window.
About the Memory Card Reader
Digital cameras and other digital imaging devices use memory cards, or media, to
store digital picture files. The optional memory card reader (select models only)
can read and can write to a variety of types of memory cards and the IBM
Microdrive disk drive.
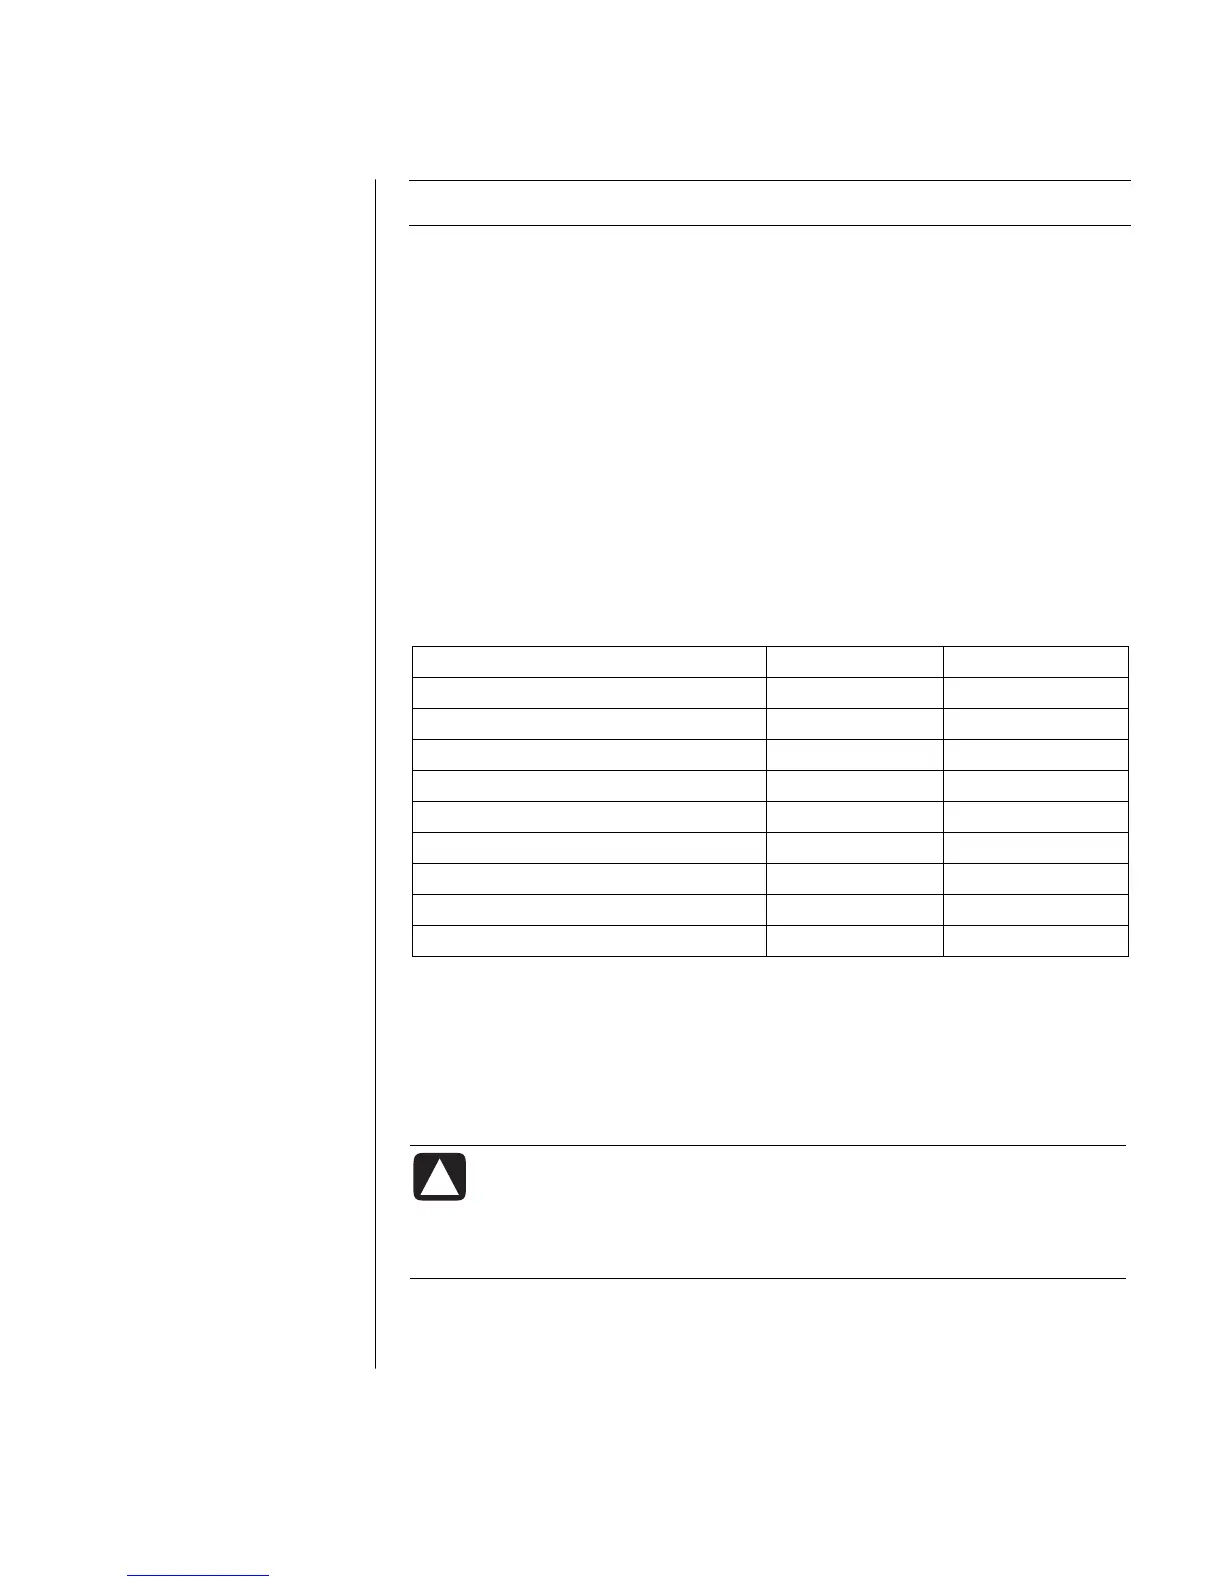
The card reader is accessible directly on the front of the PC or located inside a
cover. It has two or four horizontal card slots, which accept the memory cards and
the Microdrive disk drive.
Card 4-slot reader 2-slot reader
CompactFlash
™
Type I media Lower-left slot Upper slot
CompactFlash Type II media Lower-left slot Upper slot
IBM Microdrive disk drive Lower-left slot Upper slot
Secure Digital (SD) Memory Card Upper-right slot Lower slot
MultiMediaCard (MMC) Upper-right slot Lower slot
Memory Stick
®
(MS) Memory Card Lower-right slot Lower slot
Memory Stick (MS-PRO) Memory Card Lower-right slot Lower slot
SmartMedia
™
(SM) Memory Card Upper-left slot Lower slot
xD media Upper-left slot Lower slot
You can place media in one or more of the card slots and use each media
independently. Place only one piece of media in a slot at one time.
Each card slot has its own drive letter and icon. When you insert media, the
display label may change to the title of the media, if the title is present.
Special Note About the Safely Remove Hardware Utility
CAUTION: Do not click Stop in the Safely Remove Hardware
window with the USB Mass Storage Device selected. Doing so
removes the operating system recognition of the memory card
reader from your PC; you must restart the PC to see your memory
card reader again.
If you open the Safely Remove Hardware window by mistake, click Close.
 Loading...