System board
Description
System board for use in models without Windows 8 (includes thermal material)
System board for use in models with Windows 8 Standard (includes thermal material)
System board for use in models with Windows 8 Professional (includes thermal material)
System board for use only in models in the People’s Republic of China with NetClone (includes thermal material)
1. Prepare the computer for disassembly (Preparation for disassembly on page 19).
2. Remove the access panel (
Access panel on page 20).
3. When replacing the system board, make sure the following components are removed from the defective
system board and installed on the replacement system board:
●
Memory modules (Memory on page 24)
●
Expansion cards (
Expansion card on page 27)
●
Fan sink (
Fan sink on page 55)
●
Processor (
Processor on page 57)
4. Remove the fan duct from the chassis (
Fan duct on page 47).
5. Rotate the drive cage to its upright position.
6. Disconnect all data and power cables from the system board.
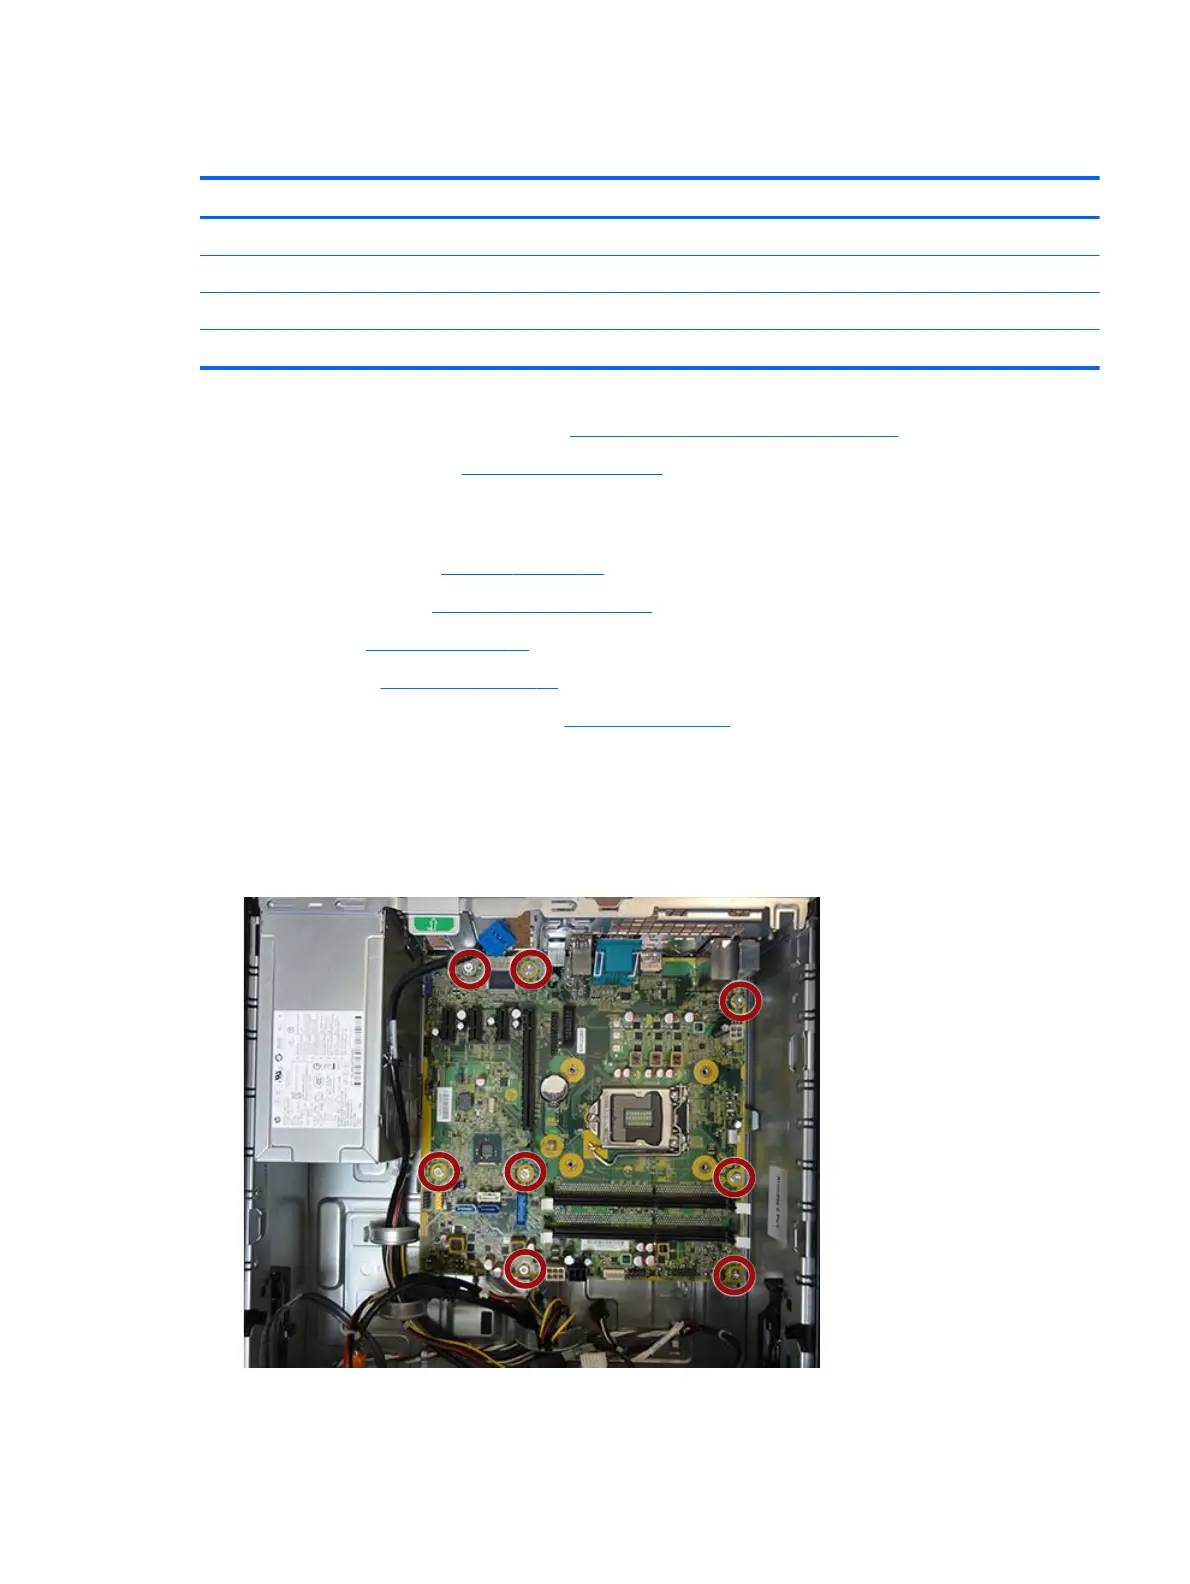
7. Remove the eight Torx screws that secure the system board to the chassis.
8. Slide the system board toward the front of the chassis to disengage the connectors.
9. Lift the system board up and out of the chassis.
System board 59
 Loading...