EasyManua.ls Logo

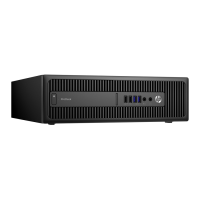
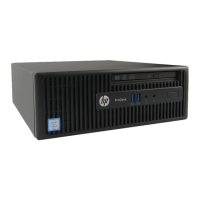
HP ProDesk 400 G2 Small Form Factor User Manual

HP ProDesk 400 G2 Small Form Factor
148 pages
To Next Page IconTo Next Page
To Previous Page IconTo Previous Page
Page #33 background image
Populating DIMM sockets
There are two DIMM sockets on the system board, with one socket per channel. The sockets are labeled
DIMM1 and DIMM3. Socket DIMM1 operates in memory channel B. Socket DIMM3 operates in memory channel
A.
The system will automatically operate in single channel mode, dual channel mode, or flex mode, depending
on how the DIMMs are installed.
NOTE: Single channel and unbalanced dual channel memory configurations will result in inferior graphics
performance.
The system will operate in single channel mode if the DIMM sockets are populated in one channel only.
The system will operate in a higher-performing dual channel mode if the memory capacity of the DIMM
in Channel A is equal to the memory capacity of the DIMM in Channel B.
The system will operate in flex mode if the memory capacity of the DIMM in Channel A is not equal to the
memory capacity of the DIMM in Channel B. In flex mode, the channel populated with the least amount
of memory describes the total amount of memory assigned to dual channel and the remainder is
assigned to single channel. If one channel will have more memory than the other, the larger amount
should be assigned to Channel A.
In any mode, the maximum operational speed is determined by the slowest DIMM in the system.
Installing DIMMs
CAUTION: You must disconnect the power cord and wait approximately 30 seconds for the power to drain
before adding or removing memory modules. Regardless of the power-on state, voltage is always supplied to
the memory modules as long as the computer is plugged into an active AC outlet. Adding or removing
memory modules while voltage is present may cause irreparable damage to the memory modules or system
board.
The memory module sockets have gold-plated metal contacts. When upgrading the memory, it is important
to use memory modules with gold-plated metal contacts to prevent corrosion and/or oxidation resulting
from having incompatible metals in contact with each other.
Static electricity can damage the electronic components of the computer or optional cards. Before beginning
these procedures, ensure that you are discharged of static electricity by briefly touching a grounded metal
object.
When handling a memory module, be careful not to touch any of the contacts. Doing so may damage the
module.
1. Prepare the computer for disassembly (Preparation for disassembly on page 19).
2. Remove the access panel (
Access panel on page 20).
3. Rotate up the internal drive bay housing to access the memory module sockets on the system board.
Memory 25

Table of Contents

Question and Answer IconNeed help?

Do you have a question about the HP ProDesk 400 G2 Small Form Factor and is the answer not in the manual?

HP ProDesk 400 G2 Small Form Factor Specifications

General IconGeneral
BrandHP
ModelProDesk 400 G2 Small Form Factor
CategoryDesktop
LanguageEnglish

Summary

Product Features

Routine Care and Disassembly Preparation

Electrostatic Discharge Information

Explains electrostatic discharge (ESD) risks and essential precautions for handling components.

Preventing Electrostatic Damage

Details packaging and grounding precautions to prevent damage to sensitive electronic parts.

Removal and Replacement Procedures

Preparation for Disassembly

Outlines the essential steps to take before beginning any disassembly or removal task.

Power Supply

Processor

System Board

Computer Setup (F10) Utility

Troubleshooting Without Diagnostics

Before Calling Technical Support

Steps to take to isolate problems and gather information before contacting support.

Solving General Problems

Common issues like system lockups, incorrect date/time, and cursor problems.

Solving Power Problems

Addresses issues related to power supply, intermittent shutdowns, and startup failures.

Solving Hard Drive Problems

Troubleshooting steps for hard disk errors, slow performance, and drive detection issues.

Solving Media Card Reader Problems

Solutions for issues with media card readers, including write protection and recognition.

Solving Display Problems

Troubleshooting steps for blank screens, incorrect resolutions, and video anomalies.

Solving Audio Problems

Addresses issues with sound output, including no sound, muffled sound, or volume problems.

Solving Printer Problems

Troubleshooting steps for printers that will not print or print garbled information.

Solving Keyboard and Mouse Problems

Solutions for issues with keyboard commands, mouse movement, and general input device problems.

Solving Hardware Installation Problems

Addresses issues when new hardware is not recognized or causes configuration conflicts.

Solving Network Problems

Troubleshooting steps for network connectivity, driver detection, and Wake-on-LAN issues.

Solving USB Flash Drive Problems

Solutions for issues with USB flash drives not being recognized or not booting.

Solving Internet Access Problems

Troubleshooting steps for inability to connect to the internet or browser issues.

Solving Software Problems

Addresses issues related to application installation, configuration, and operating system startup.

POST Error Messages

POST Numeric Codes and Text Messages

Lists and explains POST error codes, messages, and their recommended actions.

Password Security and CMOS Reset

Resetting the Password Jumper

Instructions for clearing BIOS passwords by moving a system board jumper.

Clearing and Resetting the CMOS

Steps to reset the computer's CMOS settings to factory defaults.

HP PC Hardware Diagnostics

Accessing and Running Diagnostics

Guide on how to access and execute the HP PC Hardware Diagnostics tools.

System Backup and Recovery

Backing Up, Restoring, and Recovering in Windows 8.1/8

Procedures for creating recovery media and restoring systems in Windows 8/8.1.

Using Reset When System is Not Responding

Steps to perform a system reset when Windows is unresponsive.
Battery Replacement

Related product manuals