LP-605 Rev. 000 Rel. 009 Date 8.16.18
42
Part 9 - Controls
A. Start-Up
Once the unit has been properly installed, check the gas and water
connections for leaks. Check for proper ventilation and combustible
air supply to the water heater. Purge the gas and water lines to
remove debris. Then follow the steps below to power on the water
heater.
1. Close the manual gas shut-o valve located on the gas line.
2. Fully open the manual water shut-o valve on the water supply
line.
3. To ensure complete lling of the tank, allow air to exit by
opening the nearest hot water faucet. Allow water to run until a
constant ow is obtained. This will let air out of the water heater
and piping.
4. Open each hot water tap to ensure that water will ow. Then
close the hot water tap.
5. Fully open the manual shut-o gas valve.
6. Plug in the 120 VAC / 60 Hz power supply to the water heater
and turn on the unit.
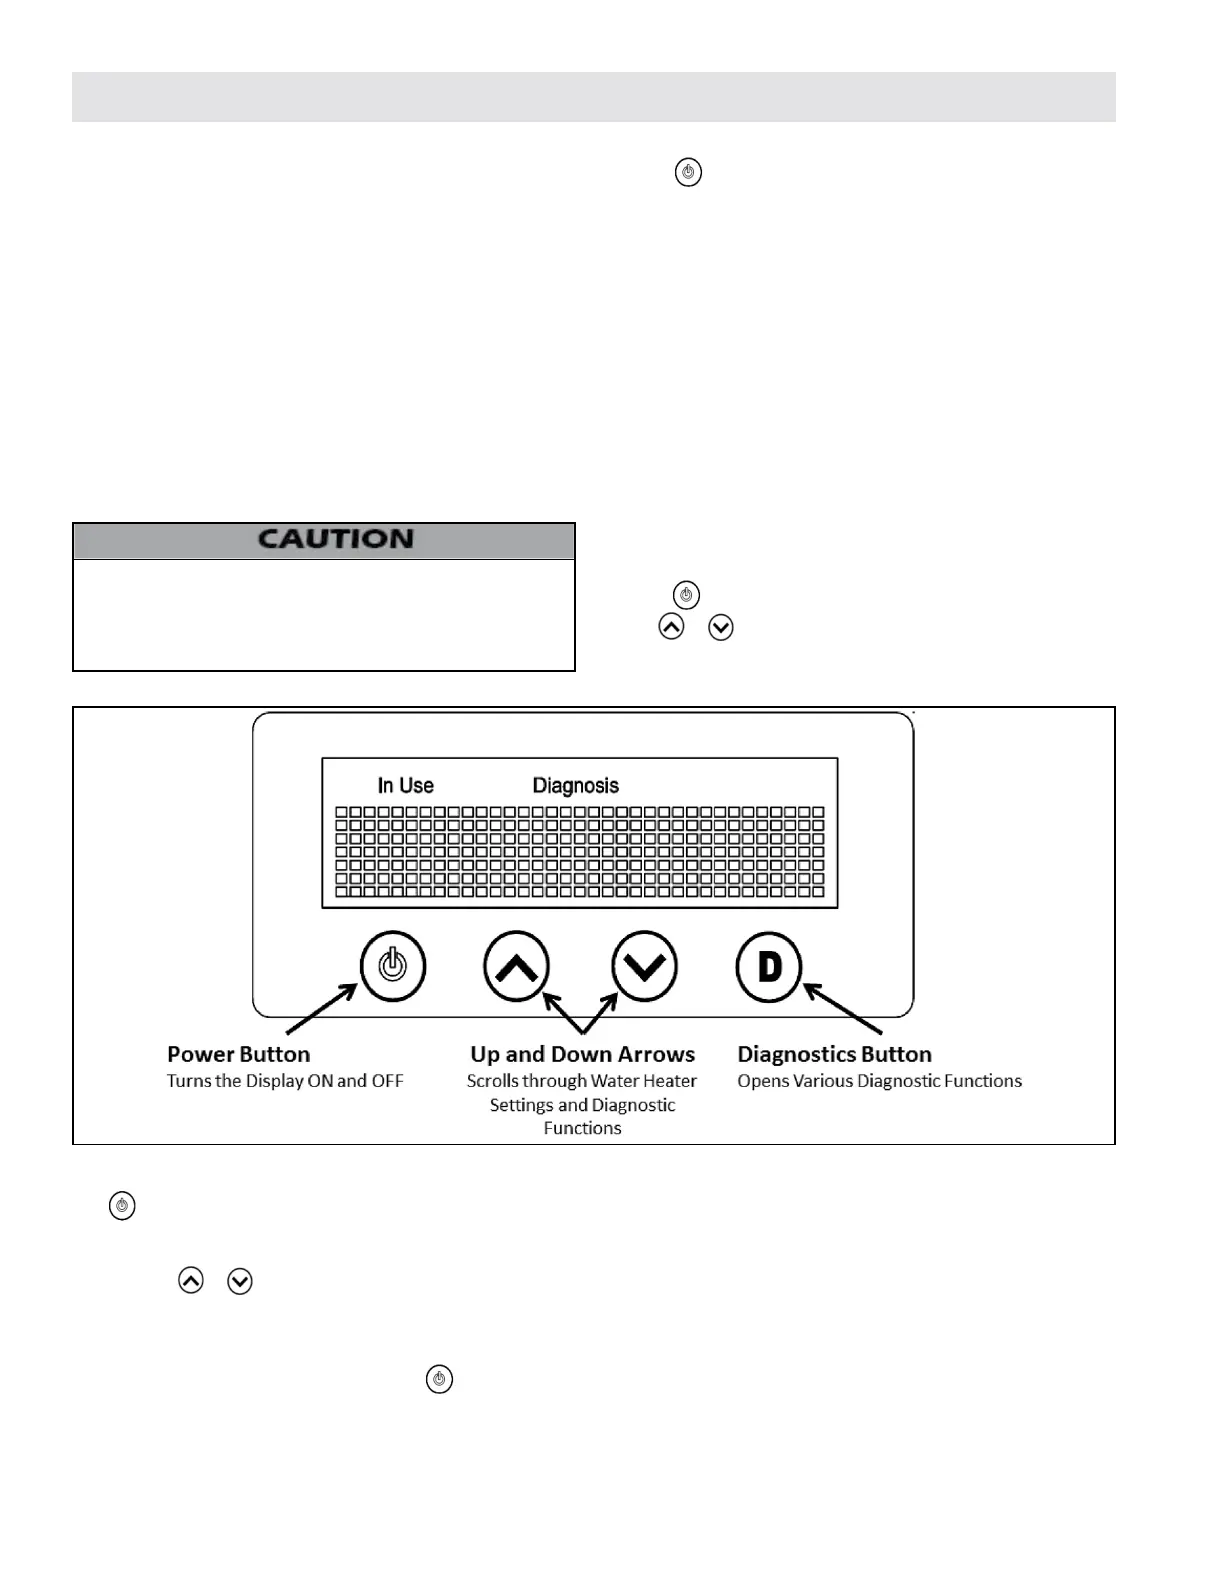
B. How to Use the Control Interface
DO NOT use this water heater unless it is completely lled with
water. Water must ow from the hot water faucet before turning
“ON” gas to the water heater. The water heater will be damaged
if it is operated while empty. Such damages ARE NOT covered by
product warranty.
Figure 44 - LCD Display Detail
1. To turn the Water Heater LCD Display from ON to OFF, press the
Button. The current stored water temperature setting based
on DIP Switch 2 setting will display (NORMAL and HOTTER are
the default settings. For HIGH OUTPUT, see Section C below.)
Press the or buttons to select your temperature setting.
2. When tank water temperature is lower than setting temperature,
the water heater will start the burner automatically and LCD
monitor will display IN USE.
3. To turn the water heater display OFF press .
NOTE: The temperature on the LCD display does not control the
output temperature of the water heater. To adjust hot water output
temperature, see Section B.
C. How to Set the Water Heater for High Output Operation
1. Press to turn OFF the water heater. If the water heater has
been operating, wait for the blower to nish cycling. Then unplug
the water heater.
2. Use a Phillips Head screwdriver to remove the two screws
attaching the Display / Control panel to the water heater.
NOTE: DO NOT lose the two screws. These are needed for reinstallation.
3. Reach under the water heater cover and gently but rmly push
the Display / Control out. The Display / Control should release and
tilt.
4. Lift the Display / Control out and tilt at.
NOTE: DO NOT pull the Display / Control too hard. DO NOT disconnect
the wire harnesses.
5. Change the operation of DIP Switch 2 from OFF to ON. See Figure
35 for DIP Switch details.
6. Lift and tilt the Display / Control into position. Gently but rmly
press it into place until it clicks.
7. Use a Phillips Head screwdriver to reinstall the Display / Control
panel.
8. Plug the water heater in.
9. Press to turn ON the water heater. HOTTER will display. Press
the or buttons to select HIGH OUTPUT.
D. Temperature Setting Procedure
The water heater is shipped ready to operate at NORMAL 125
o
F (51.7
o
C),
and can be eld adjusted to operate at HOTTER (145
o
F [62.8
o
C]) and
HIGH OUTPUT (165
o
F [73.9
o
C]) temperatures. See Section C for setting
HIGH OUTPUT.
After turning on the water heater and selecting the temperature
setting, let it operate and come to temperature.
After the water heater comes to temperature, open a hot water faucet.
The water heater mixing valve is factory set to operate at 120
o
F
(48.9
o
C). The mixing valve setpoint temperature can be adjusted from
70 – 145
o
F (21.1 - 62.8
o
C).
To adjust the mixing valve:
1. Ensure the water heater is lled with water and powered on.
2. Loosen the knob screw. Lift knob.
3. Turn knob clockwise or counter clockwise to adjust temperature.
 Loading...