LP-179 Rev. 6.7.16
26
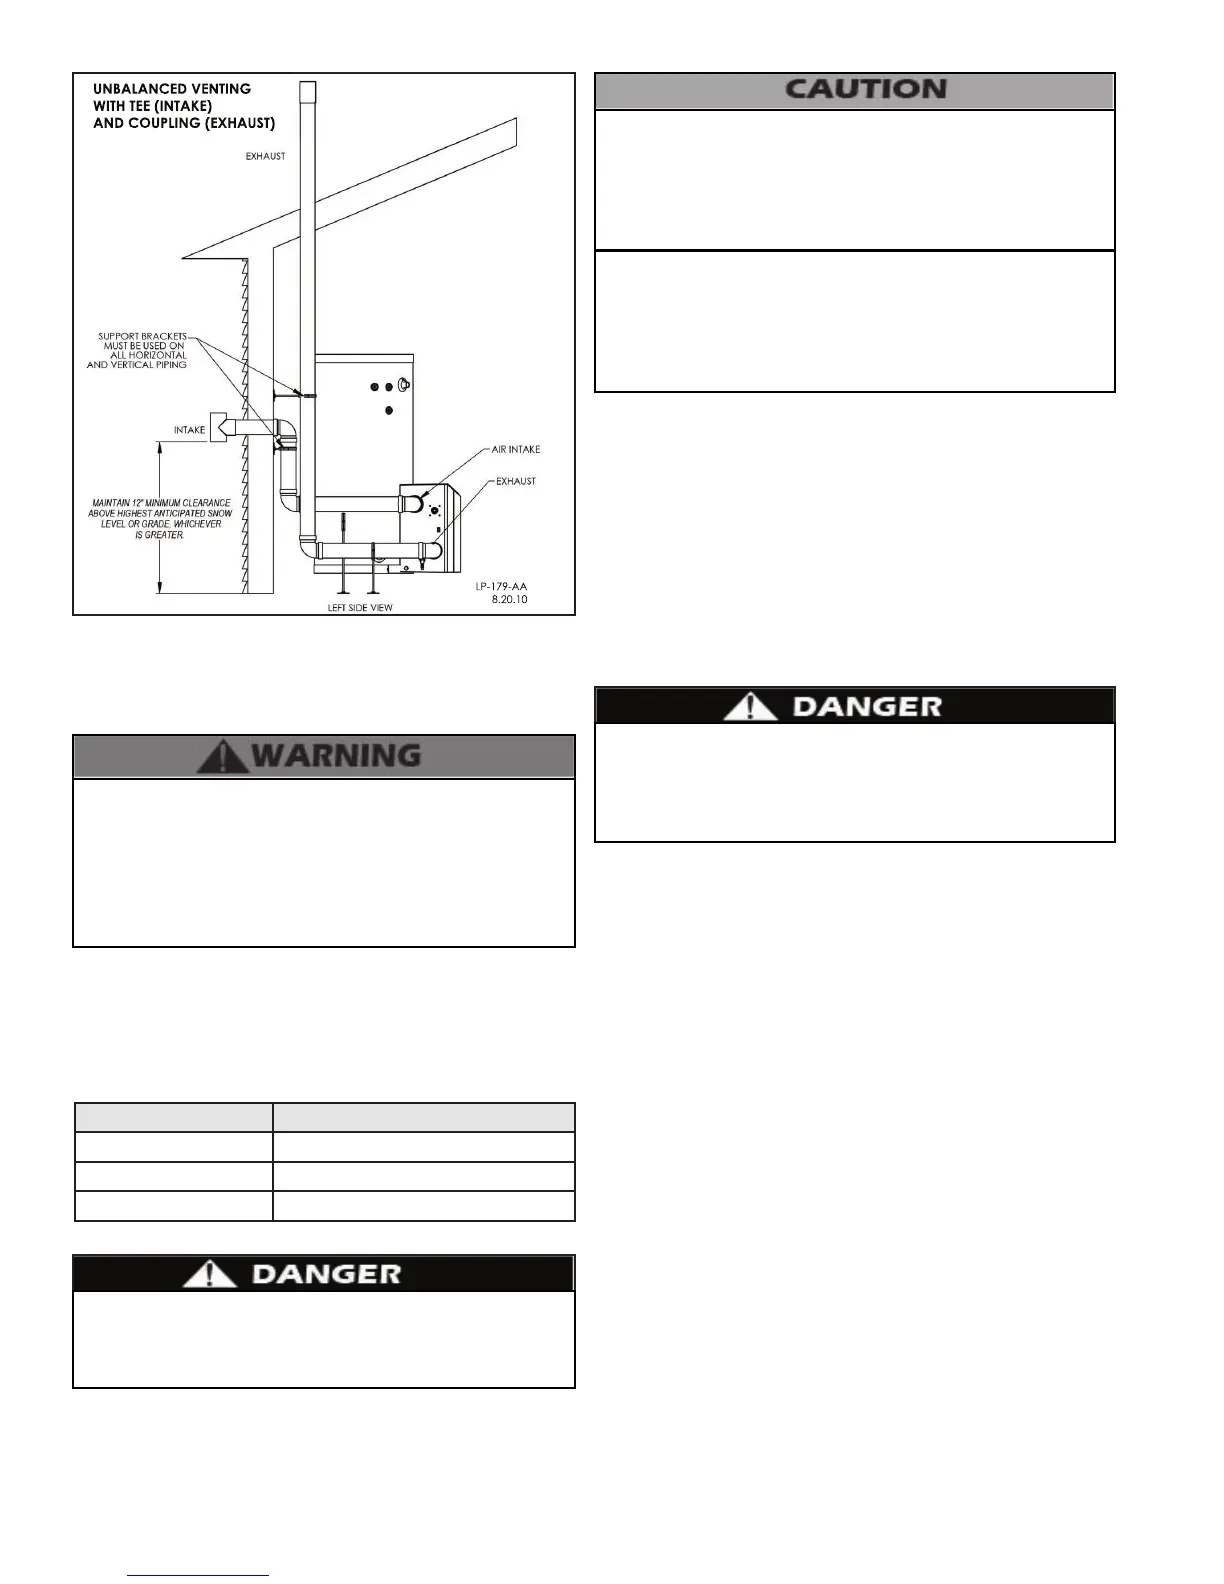
UNBALANCED VENTING
WITH TEE (INTAKE)
AND COUPLING (EXHAUST)
LP-179-AA
8.20.10
All vent pipes must be glued, properly supported, and the
exhaust pitched a minimum of 1/4” per foot back to the heater
to allow drainage of condensate. When placing support
brackets on vent piping, the rst bracket must be within 1
foot of the water heater and the balance of 4 foot intervals
on the vent pipe. Venting must be readily accessible for visual
inspection from the rst three feet from the heater.
NOTE: These drawings are meant to demonstrate system
venting only. The installer is responsible for all equipment and
detailing required by local codes.
2. Venting Through an Existing System
This heater may be vented through an existing unused vent
system. The inner diameter of the existing vent system is
utilized for the combustion air source. Two methods have
been approved for such venting: Concentric Venting Through
an Existing System and Venting as a Chase.
Vent / Air Inlet Size Minimum Existing Vent / Chase Size
2” 4”
3” 5”
4” 7”
Table 10 - Minimum Existing Vent / Chase Sizing
Do not install the heater into a common existing vent with
any other appliance. This will cause ue gas spillage or heater
malfunction, resulting in substantial property damage,
serious personal injury, or death.
Figure 18 - Unbalanced Venting - Roof Exhaust and Sidewall
Intake
Contractors must check state and local codes before installing
through an existing vent opening. State and local codes always
take precedence over manufacturer’s instructions. Failure to
check state and local codes before installing through an existing
opening could result in property damage and add signicantly
to installation costs.
If an existing venting system is converted for use with this heater,
the installer must ensure that the existing venting system
is clean and free from particulate contamination that could
damage the heater. Failure to do so could result in property
damage and heater failure. Such failure IS NOT covered under
warranty.
Concentric Venting Through an Existing System
NOTE: The following instructions refer only to venting through
an existing vent system, and not to venting with HTP’s optional
concentric vent kits. Refer to Concentric Vent Kit installation
manual (LP-166) for further information on venting with the
optional concentric vent kits.
Concentric venting through an existing system must run
vertically through the roof. See Table 9 for proper minimum
vent sizing. Use only the approved venting materials specied
in Table 5 for piping the system. All instructions listed in this
Venting section apply. See Figures 19-1 and 19-2 for venting
demonstrations.
The upper and lower vent terminations as well as all joints in
the venting system must be properly sealed to ensure that all
combustion air is drawn properly and exhaust does not leak
from the system. Failure to properly seal the venting system
will result in property damage, serious personal injury, or death.
Chase Venting Through an Existing System
When venting as a chase, follow all instructions included in this
Venting section, including those in the previous Concentric
Venting Through an Existing System section. See Figure 19-3 for
chase venting demonstration.
 Loading...