8. Make sure that the nut is in position in the joystick.
9. Install the bracket.
10. Install the bellows and make sure that the bellows
seal around the retainer.
11. Install the washer and make sure it is in position with
the keys to seal correctly.
12. Install the upper chassis and the body in opposite
sequence.
6.15 To replace the rear joysticks
1. Remove the body. Refer to
To remove and install
the body on page 20
.
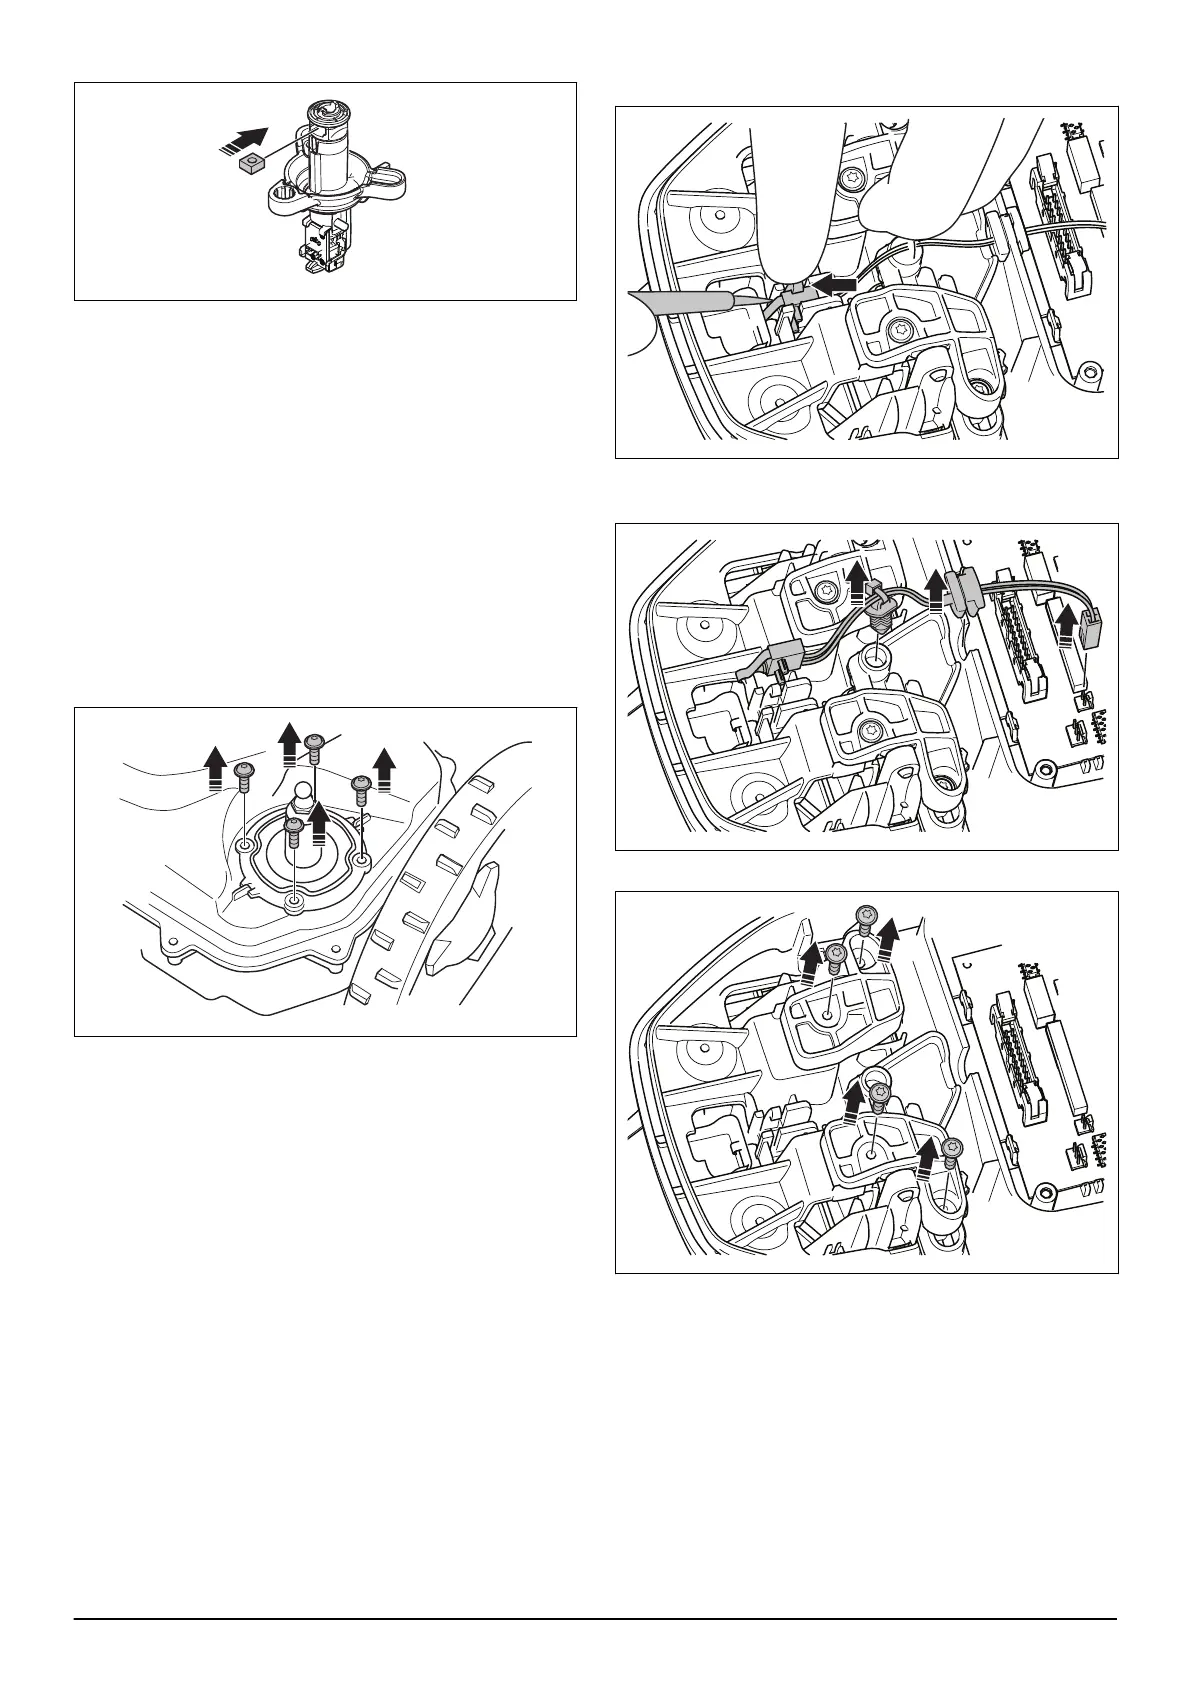
2. Remove the 4 screws that hold the rear joysticks to
the upper chassis.
3. Lift up and remove the rear joysticks.
4. Install in opposite sequence.
6.16 To replace the lock kit, STOP sensor and
STOP button 420/440/430X/450X/430XH/
450XH
This section gives information on how to remove all
parts. For service or to replace a spare part, all steps
may not be necessary.
1. Remove the body. Refer to
To remove and install
the body on page 20
.
2. Remove the upper chassis. Refer to
To remove and
install the upper chassis on page 20
.
3. Push the clips and lift up the stop sensor with a flat
screwdriver.
4. Remove the cable grommet and disconnect the
cable from the HMI circuit board.
5. Remove the 4 screws for the holders.
26 - Repair instructions 1191 - 001 -

 Loading...