166
o
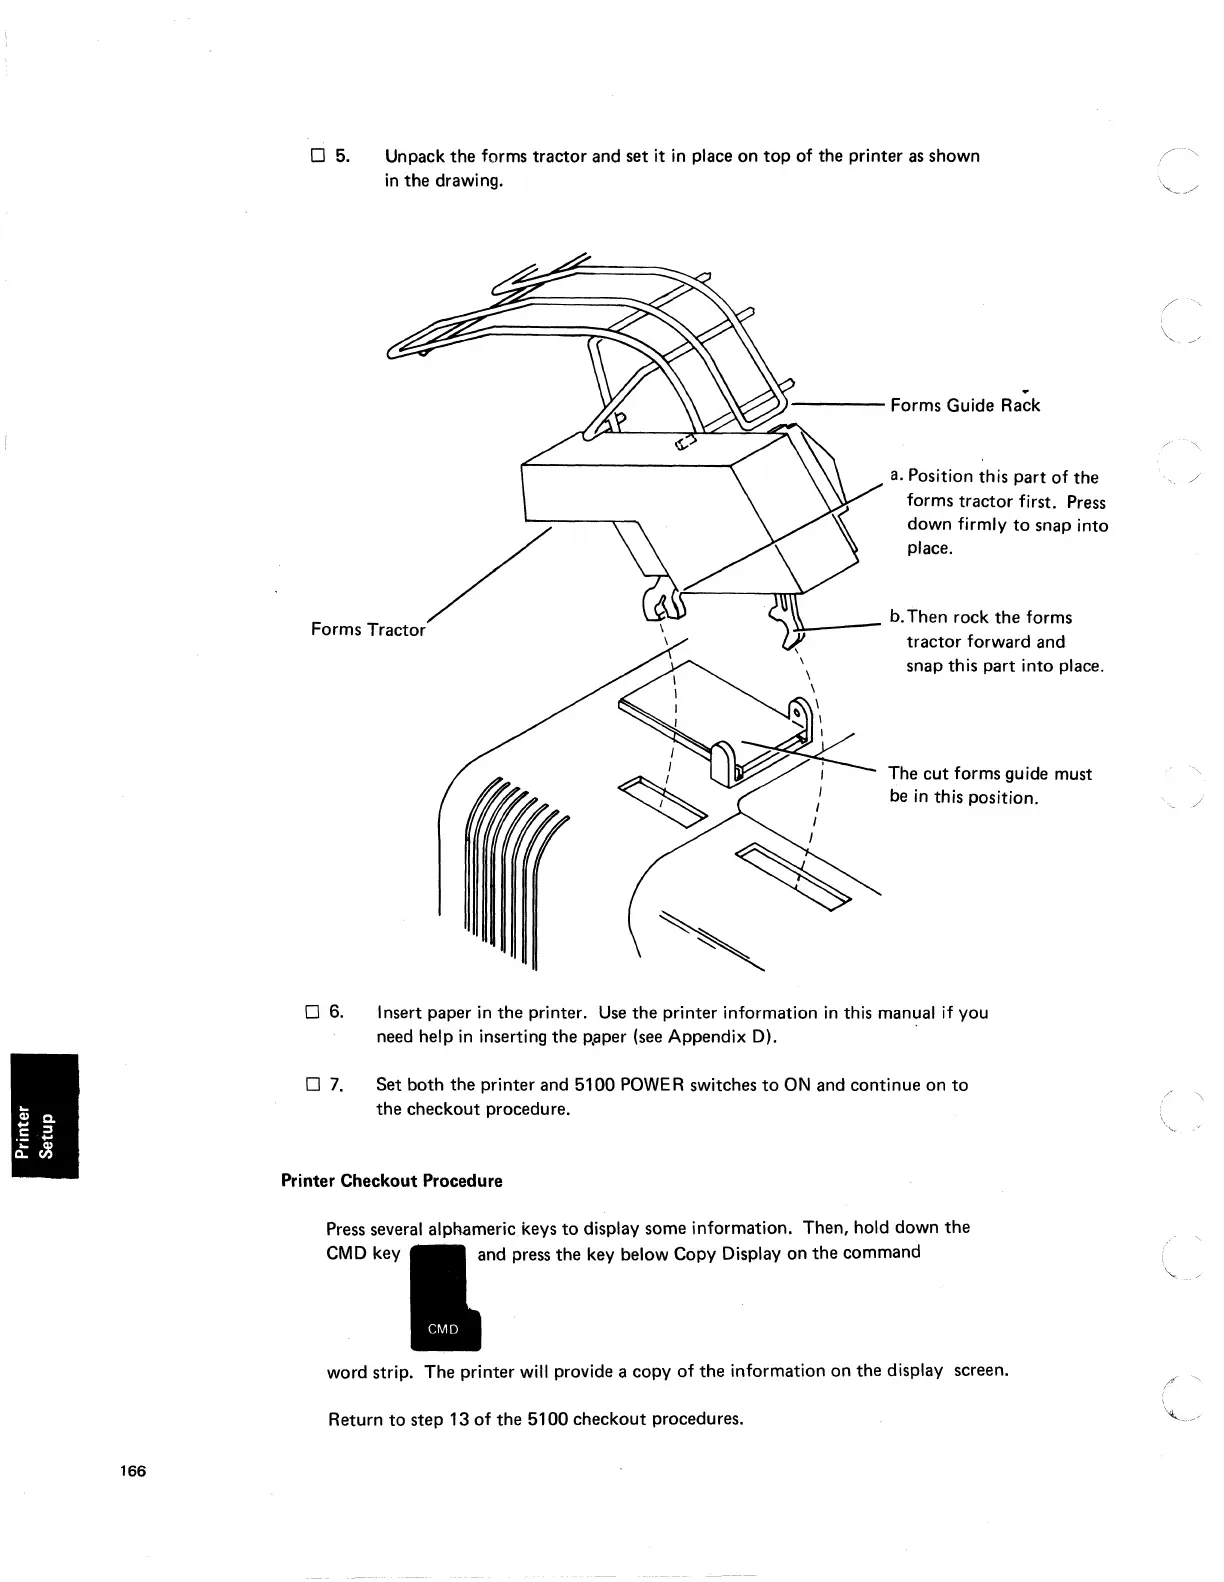
5.
Unpack
the
forms tractor and set it
in
place
on
top
of the printer
as
shown
in
the
drawing.
.
}-----
Forms Guide Rack
a.
Position this
part
of
the /
Forms Tractor
/
forms
tractor
first. Press
down firmly
to
snap into
place .
.ll.._--
b. Then rock
the
forms
tractor
forward
and
snap this part into place.
The
cut
forms guide must
be
in
this position.
o 6. Insert paper
in
the
printer.
Use
the printer information
in
this manual if you
07.
need help
in
inserting
the
p'aper (see Appendix D). .
Set both the printer and
5100
POWE
R switches
to
ON
and continue on
to
the
checkout procedure.
Printer Checkout Procedure
Press several alphameric keys
to
display some information. Then, hold down
the
CMD
key and press the key below Copy Display
on
the
command
word strip. The printer will provide a copy
of
the
information
on
the
display screen.
Return
to
step
13
of
the
5100
checkout procedures.
-~
/
i
I,
""
-'
/
 Loading...