4 On the Suspend/Resume Mirrored Pro-
tection display, select the disk unit that you
just replaced. It has a status of suspended.
This
is
done by entering a 2
in
the option
column next to the disk unit you are
selecting, then pressing the Enter key.
5 Are you
in
System Service Tools (SST)?
No Yes
~
The disk unit that you selected will
be
made active while the system is
operational.
This
ends
the
procedure.
6 Perform the following:
a.
Return to the Dedicated Service Tools
(DST) display.
b.
Perform
an
IPL.
Note: The disk unit you selected is
made active during the IPL.
This
ends
the
procedure.
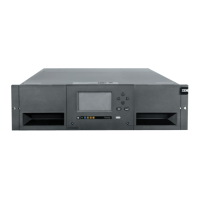
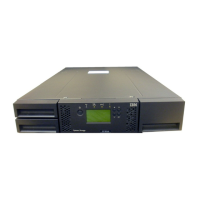
Disk Unit Data Save and Initialize
- Pump Data to Tape
Note: To complete this procedure, you may need
the latest set of SAVSYS
or
SAVSTG tapes made
before the problem occurred and three blank
tapes.
1 Are you exchanging a disk enclosure
because a disk unit failure caused system
operations to stop completely?
Yes
No
~
You may use the Remove Units
from Configuration function of DST
to move all data from the disk unit
you want to exchange to the other
disk units in the same ASP.
Go to step 18 of this procedure.
2 Perform
an
IPL to Dedicated Service Tools
(DST) (see "Dedicated Service Tools
(DST)"
in
the ASI400 Service Functions
information for the system).
Does the Use Dedicated Service Tools
(DST) display appear?
Yes
No
~
Repeat this step of this procedure.
If the same system reference code
(SRC) occurs again, the customer's
data
is
not recoverable. Go to step
5 of this procedure.
If a different SRC occurs, use it to
correct the problem (see "Starting
Problem Analysis"
in
the Problem
Analysis
information for the
system).
This
ends
the
procedure.
3 From the Use Dedicated Service Tools
(DST) display, perform the following to save
the customer data from the failing disk unit:
a.
Select the Work with disk units option.
b.
Select the Work with disk unit recovery
option from the Work with Disk Units
display.
c.
Select the Save disk unit data option
from the Work with Disk Unit Recovery
display.
d.
Select the disk unit that you want the
data saved from on the Select Disk Unit
Data to Save display.
If the disk unit is missing, you cannot
save the customer data to tape at this
time. Go to step 5 of this procedure.
e.
Install a tape
in
the tape unit.
f.
The Specify Volume Identifier prompt
appears. Enter the volume identifier for
the tape. Write down the tape volume
identifier here . You will
use the tape volume identifier later
in
this procedure.
g.
The Select Tape or Diskette Unit
prompt appears.
Select the tape unit that you loaded
with a tape.
Note:
If the tape volume identifier that
you entered does not match the tape
volume identifier written
on
the tape,
the Device Intervention Required
prompt appears. The message ''Wrong
volume loaded" appears at the bottom
of the display. The tape volume identi-
Chapter
2.
Recovery Procedures 2-5

 Loading...