6. Place the disk drive backplane and cables on the table.
Replacing the disk drive backplane in the 7063-CR1
Learn how to replace the disk drive backplane in the IBM 7063-CR1 Hardware Management Console
system.
Procedure
1. Ensure that you have the electrostatic discharge (ESD) wrist strap on and that the ESD clip is plugged
into a ground jack or connected to an unpainted metal surface. If not, do so now.
2. Remove the replacement disk drive backplane and cables from the protective plastic envelope.
3. Move the cables from the old disk drive backplane to the new card.
4. Replace the disk drive backplane as shown in Figure 8 on page 12.
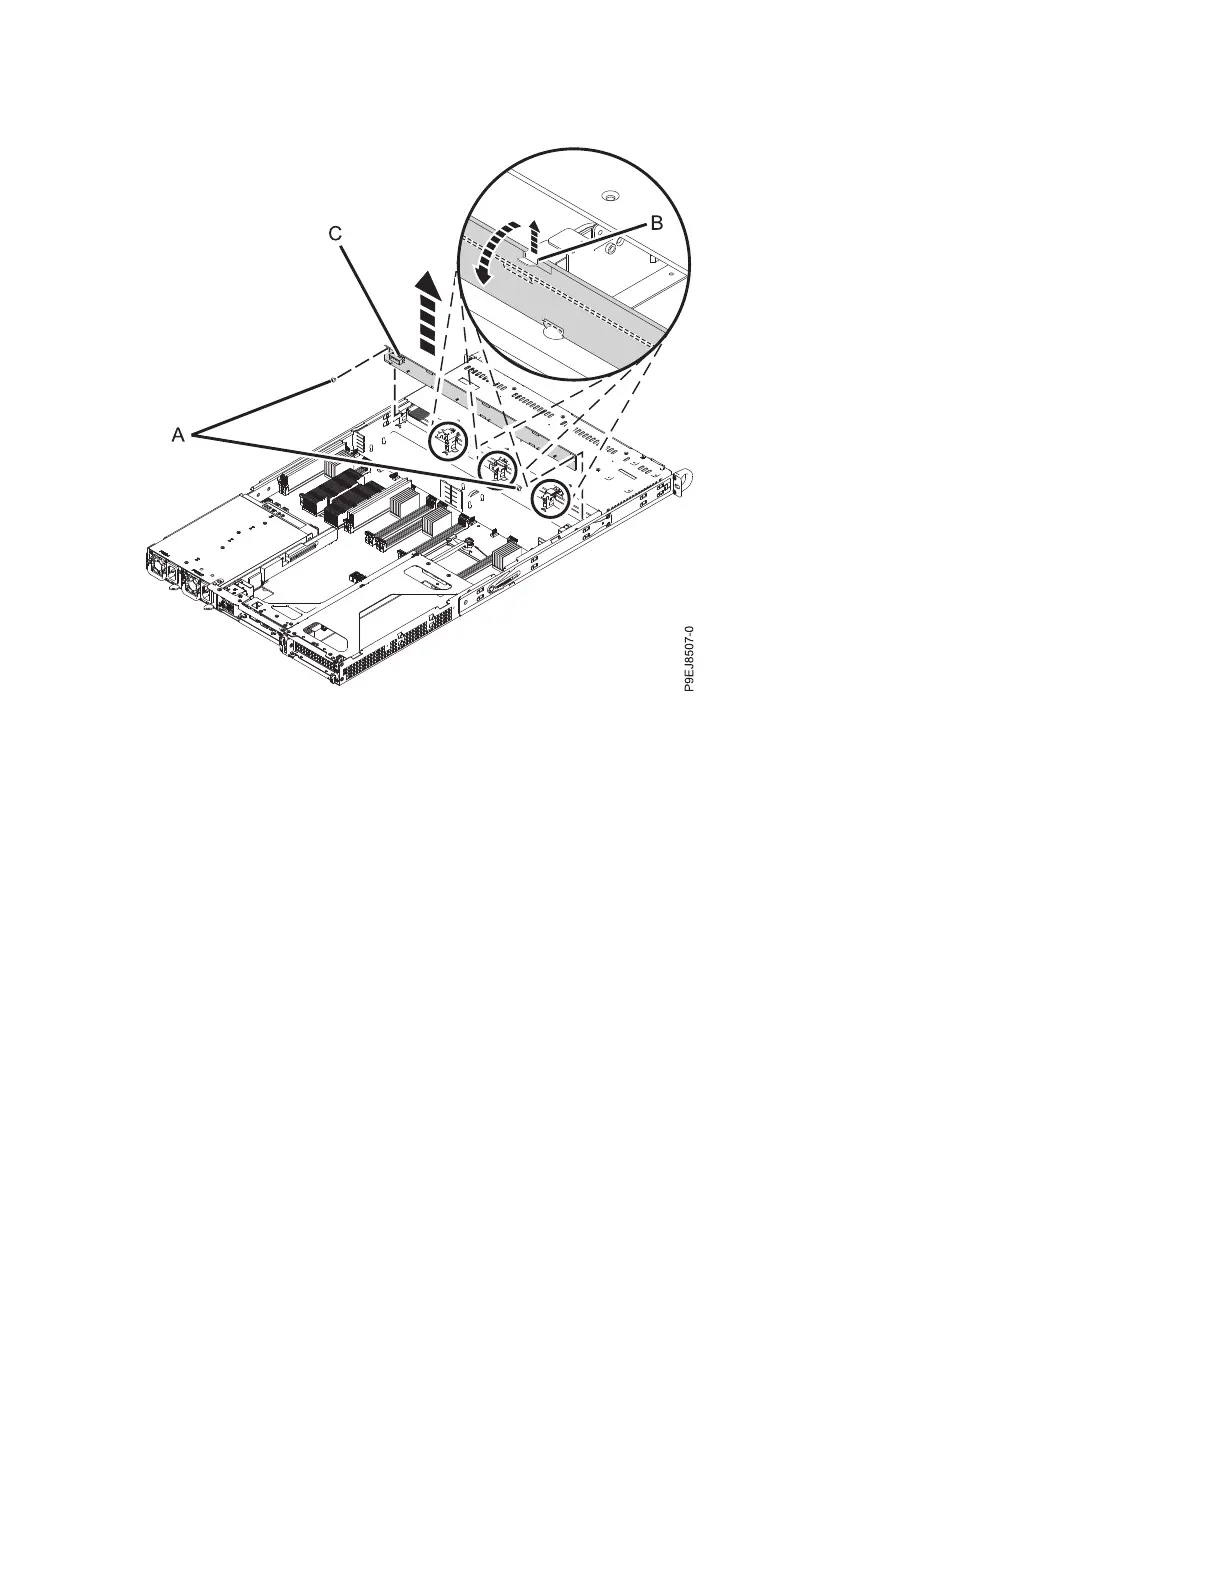
a. Insert the disk drive backplane (A) into the system using the alignment slots (B) in the chassis.
b. Snap the disk drive backplane into place so that it is held by the retaining clips (C).
c. Replace the two screws (D), one screw on each side, in the top of the disk drive backplane.
Figure 7. Removing the disk drive backplane and screws
Removing and replacing parts in the 7063-CR1 11
 Loading...