Hot-Swap Power Supply Removal
Before performing this procedure, read the following “Safety Notices” on page vii.
If you are servicing a system that has two power supplies installed, you can replace
each power supply (one at a time) without shutting down the system.
To remove a hot-swap power supply, do the following:
Note: You do not need to turn off the power to the system to install hot-swap power
supplies.
1. On a Model 6C4, open the front and rear rack doors and put the system into the
service position as described in “Placing the Model 6C4 into the Service Position”
on page 53.
On a Model 6E4, open the bezel door.
2. Visually check the power supply LEDs. If the amber colored LED is lit, suspect that
power supply to be faulty.
3. Remove the service access cover as described in “Service Access Cover Removal
(Model 6C4)” on page 55 or “Service Access Cover Removal (Model 6E4)” on
page 57.
4. Remove the power supply cable from the rear of the faulty power supply.
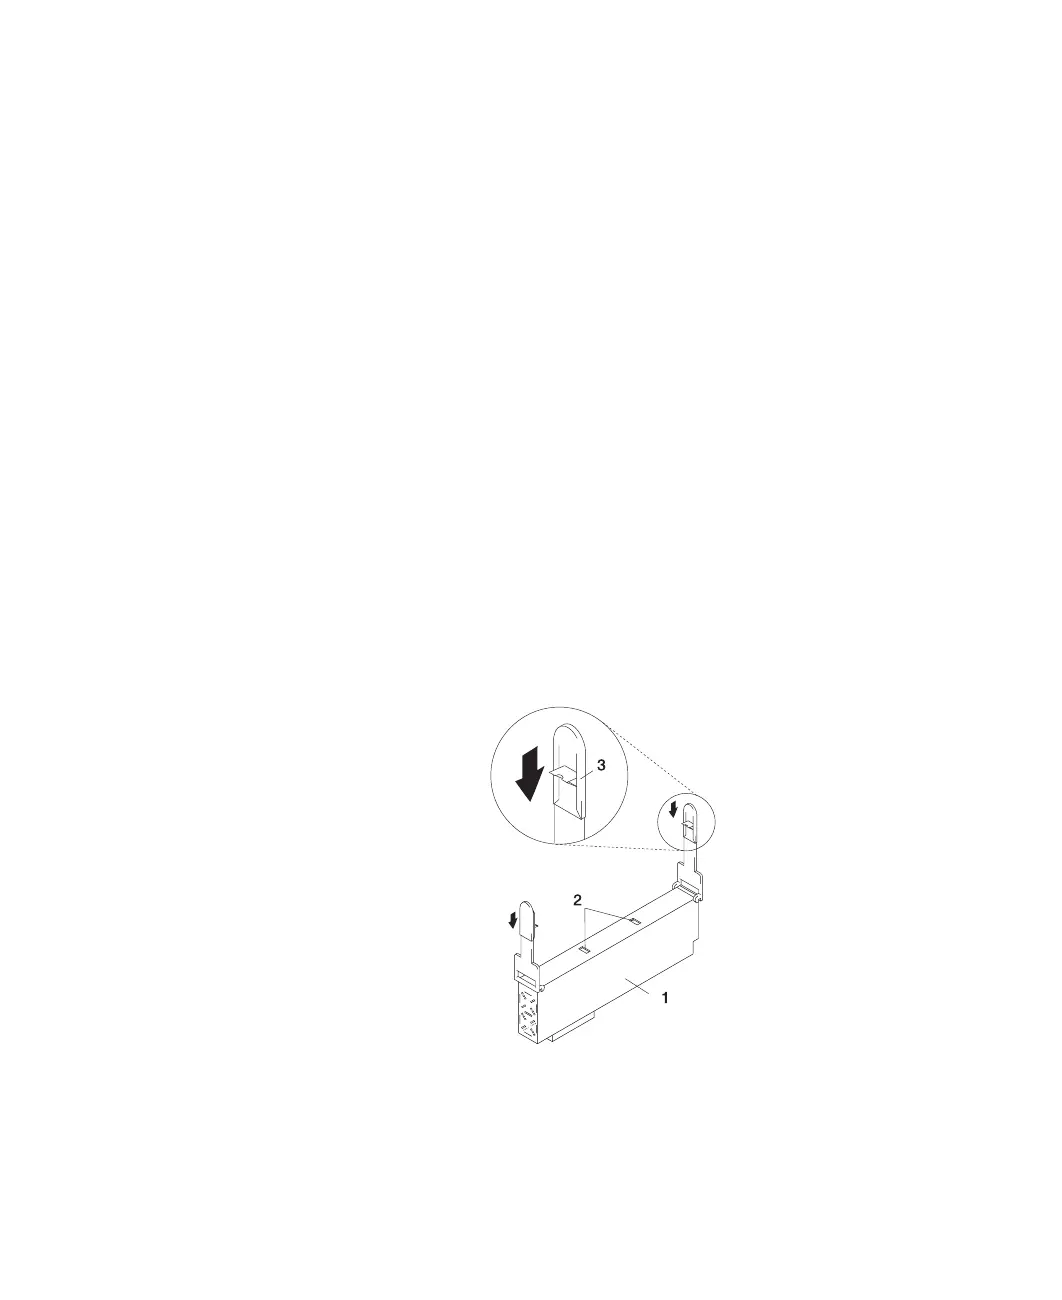
5. Grasp the ends of both power supply handles, and slide the retractable
spring-activated portion of each handle toward its hinged base. This action
releases the locking tab located on the bottom side of each release handle. See
the following illustration.
1 Power Supply
2 Locking Tab Receiver Hole
3 Retractable Spring-Activated Portion of the Handle
128 Eserver
pSeries 630 Model 6C4 and Model 6E4 Installation Guide
 Loading...