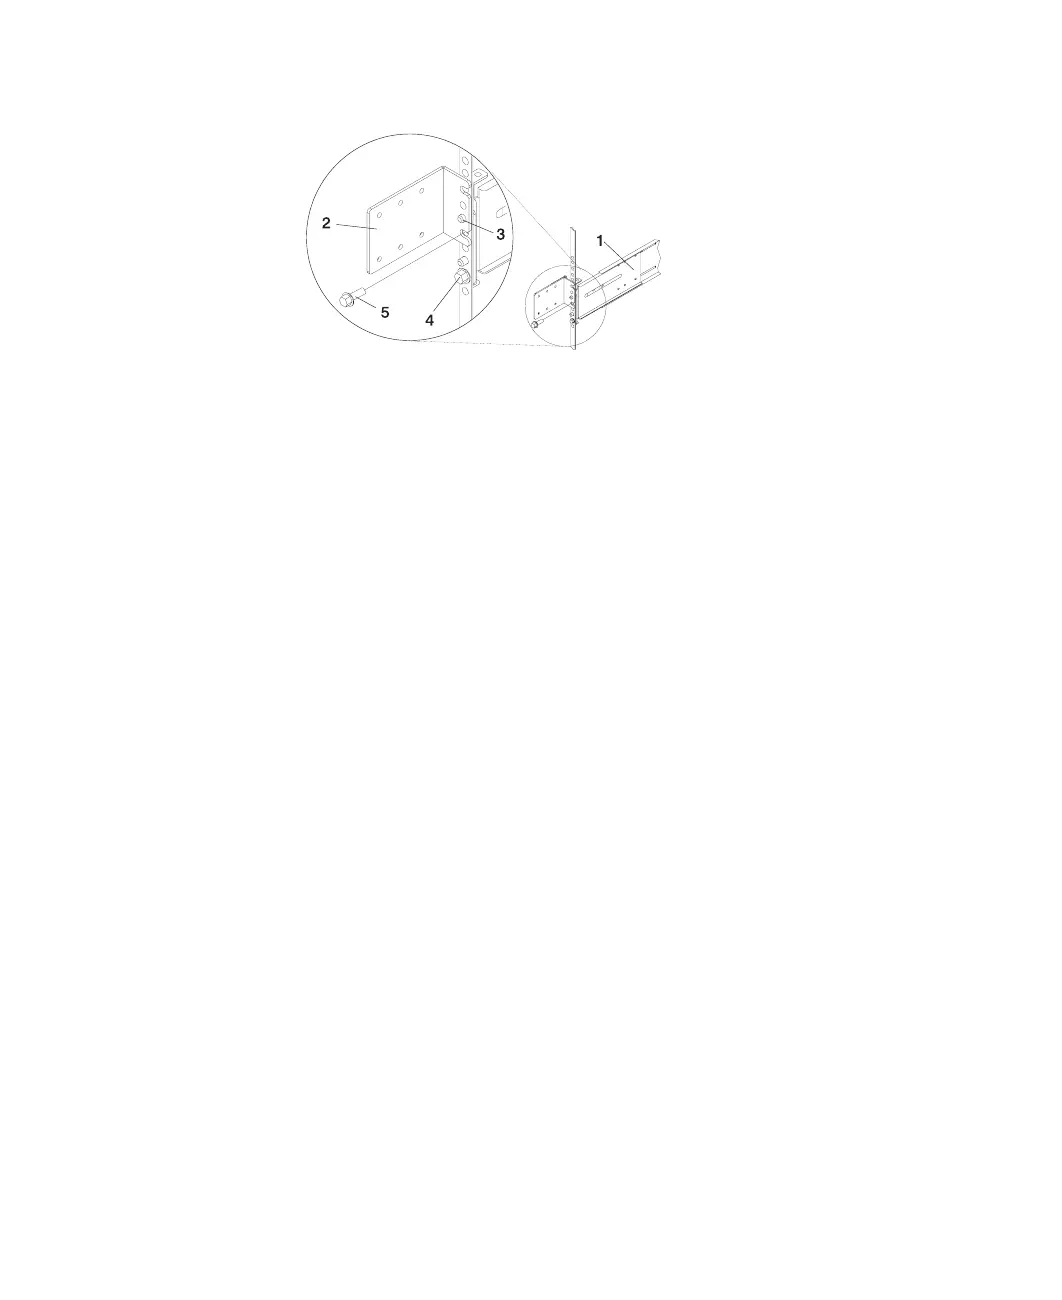
1 Rail Assembly (Labeled ″Left″ in the Front Lower Corner)
2 Rack to Cable Management Arm Bracket
3 Top Rear Alignment Pin
4 Bottom Screw
5 Top Screw
18. Locate the bracket that attaches the cable management arm to the rack flange.
19. Position the bracket’s bottom hole over the rail’s top alignment pin.
Note: The bracket’s bottom slot should now align with the top screw hole of the
rail flange.
20. Attach a second retaining screw through the screw hole located below the top
alignment pin. Finger-tighten the screw.
21. Using a screwdriver, tighten the six screws that secure the rail length adjusting
plate.
22. The rails are now completely installed. All screws used to attach the rails to the
rack must be finger-tight only.
Notes:
a. Both slide rails
must
be completely retracted into the rack.
b. The rails
must
be level from front to back and from left to right.
23. Before continuing to the next step, be sure to read and understand the following
caution notices:
CAUTION:
The stabilizer must be firmly attached to the bottom front of the rack to
prevent the rack from turning over when the drawers are pulled out of the
rack. Do not pull out or install any drawer or feature if the stabilizer is not
attached to the rack.
CAUTION:
This unit weighs between 32 kg (70.5 pounds) and 55 kg (121.2 pounds).
Three persons are required to safely move it. Using fewer than three persons
to move it can result in injury.
You are now ready to mount the system drawer into the rack.
Chapter 2. Setting Up the System 21
 Loading...