8. If you are instructed to return the rear hard disk drive cage, follow all
packaging instructions, and use any packaging materials for shipping that are
supplied to you.
Replacing the 2.5-inch hot-swap rear hard disk drive kit
Use this information to replace the 2.5-inch hot-swap rear hard disk drive kit.
About this task
To replace the 2.5-inch hot-swap rear hard disk drive kit, complete the following
steps.
Procedure
1. Read the safety information that begins on “Safety” on page vii and
“Installation guidelines” on page 122.
2. Turn off the server and peripheral devices and disconnect the power cords.
3. Remove the cover (see “Removing the cover” on page 126).
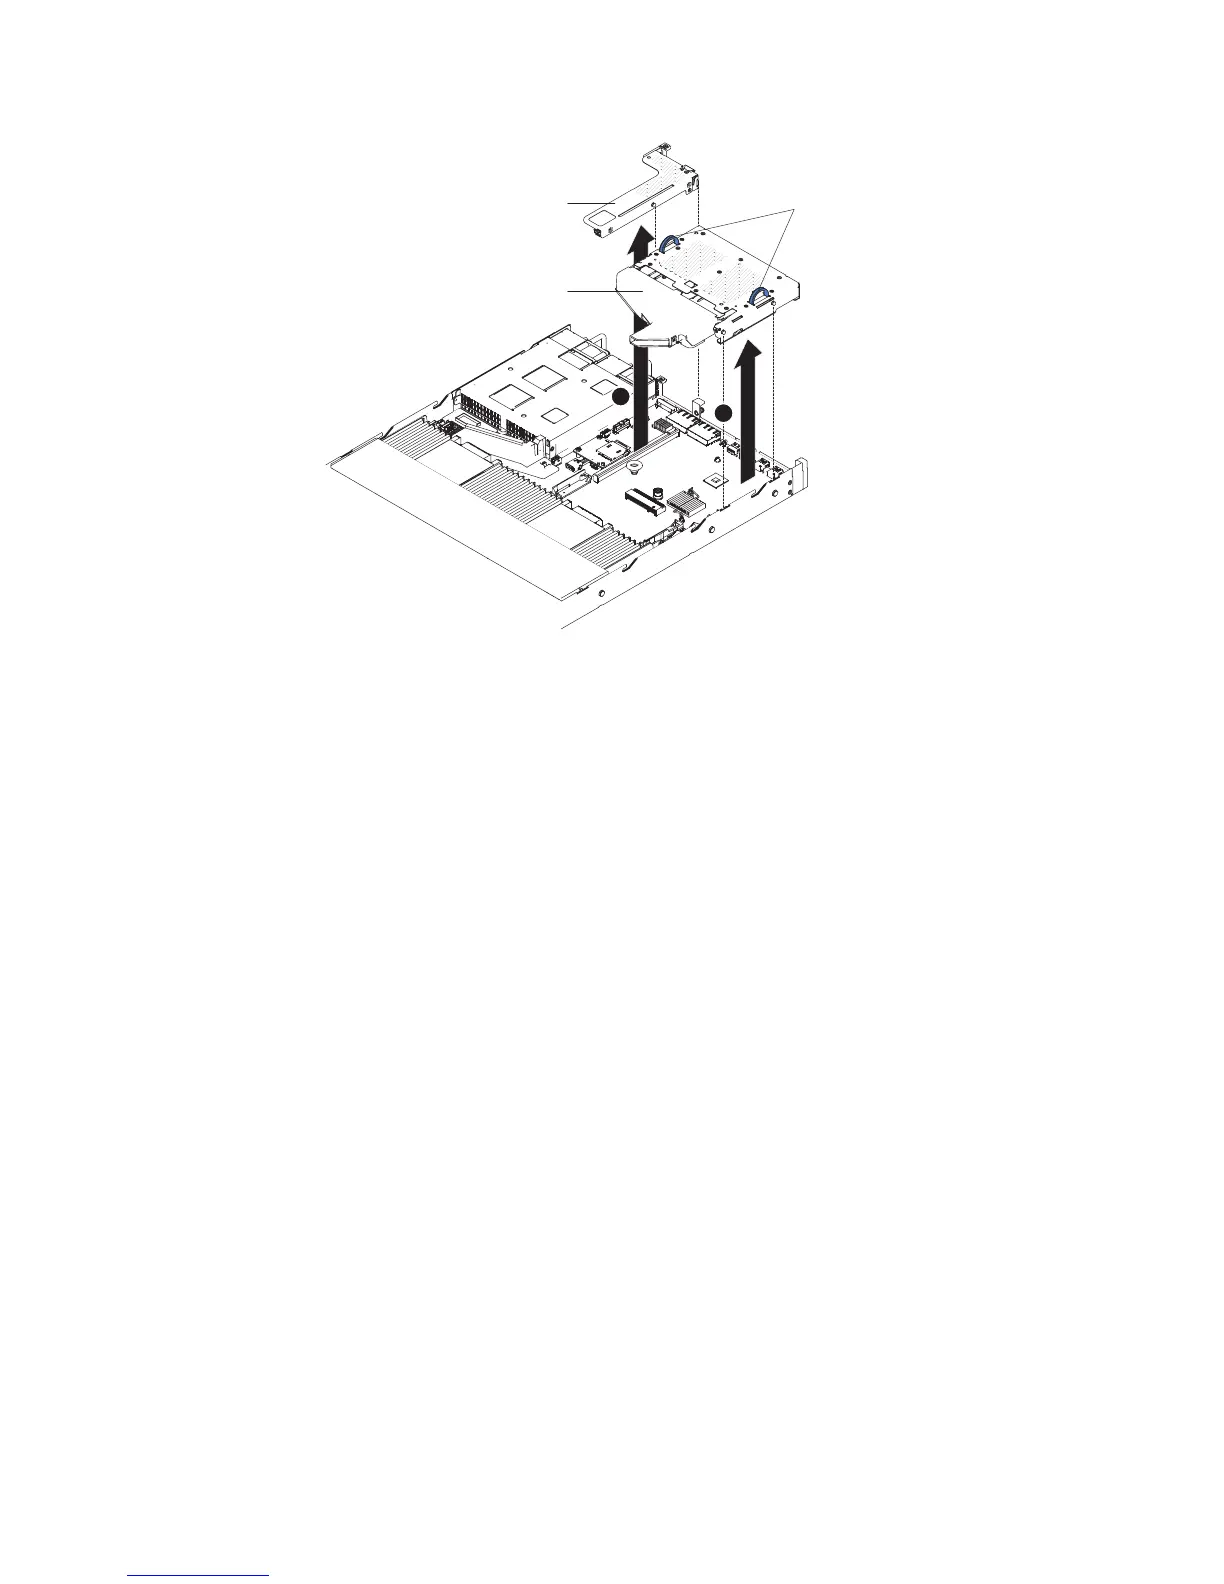
4. If PCI riser-card assembly 3 needs to be installed (see “Replacing a PCI
riser-card assembly” on page 172), remember to first install the 2.5-inch
hot-swap rear hard disk drive kit. Install the kit by grasping the two handles
located on the sides of the kit, and slowly lower it into the chassis. Make sure
the two alignment pins securely engages the two holes on the side of the
chassis.
Attention: Always follow the installation sequence in this step. Failure to do
so, may result in damage to the 2.5-inch hot-swap rear hard disk drive kit.
2.5-inch hot-swap
rear hard disk
drive kit
1
2
PCI riser-card
assembly 3
Handle
Figure 62. 2.5-inch hot-swap rear hard disk drive kit removal
150 IBM System x3550 M5 Type 5463: Installation and Service Guide
 Loading...