Removing a RAID cache card
This information provides instructions for removing a RAID cache card.
About this task
Note: For additional information and notes about the adapters, see “Installing an
adapter” on page 70.
To remove a RAID cache card, complete the following steps:
Procedure
1. Read the safety information and installation guidelines, see “Safety” on page vii
and “Installation guidelines” on page 35.
2. Turn off the server (see “Turning off the server” on page 22) and all attached
peripheral devices. Disconnect all power cords; then, disconnect all external
cables as necessary to replace the device.
3. Remove the top cover (see “Removing the server top cover” on page 226).
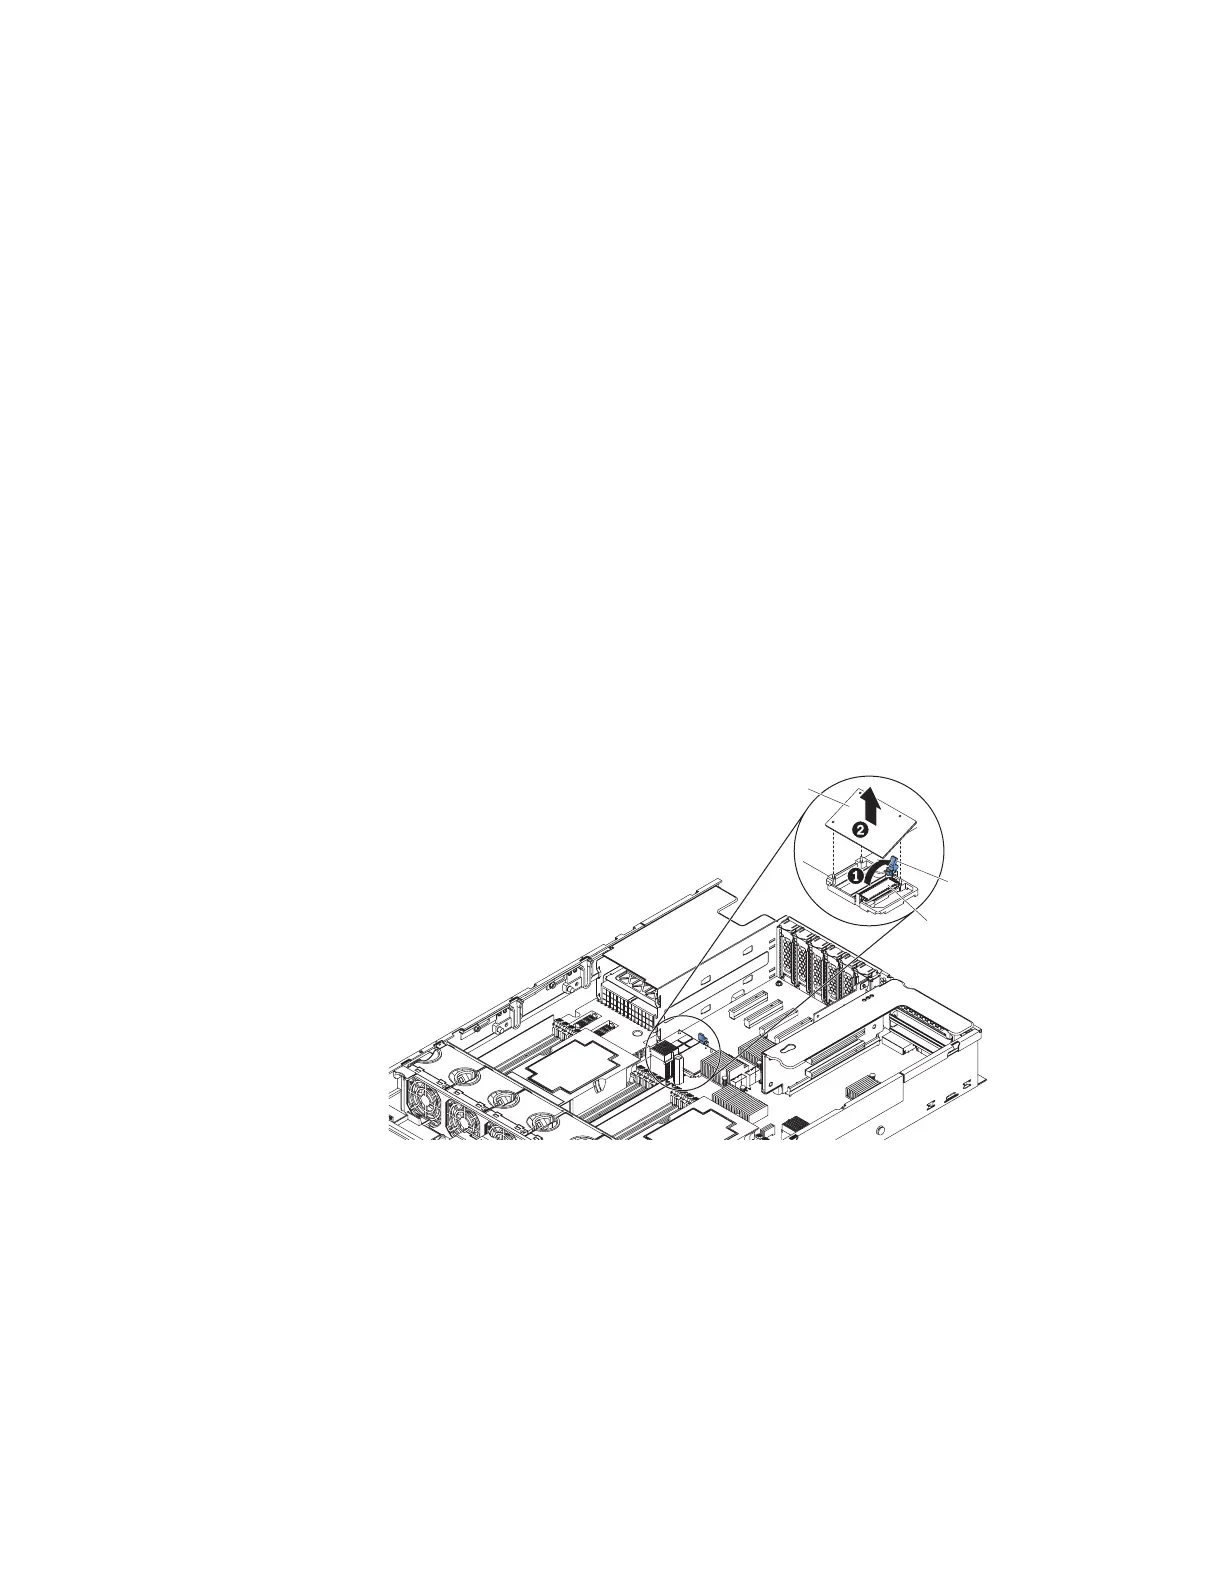
4. If the cache card is installed on the system board, complete the following
steps.
a. Disconnect the cable from the battery or flash power module in the
battery/flash power module tray located on top of the USB/video assembly
near the front of the server.
b. Press the blue lever toward the rear of the server to the open position. The
cache card will disengage from the RAID cache card connector on the
system board.
RAID cache card
RAID cache
card connector
Release
tab
c. Disconnect the battery cable or flash power module cable from the cache
card.
d. Press the black retention clip toward the front of the server and lift the
cache card out of the server and set it aside.
e. Go to step 6 on page 277.
5. If the cache card is installed on a RAID adapter, complete the following steps:
a. Disconnect the cable from the battery or flash power module in the
battery/flash power module tray located on top of the USB/video assembly.
b. Grasp the riser-card assembly at the blue touch points and pull it up until
the riser-card assembly disengages from the connector on the system board.
c. Disconnect the cache card cable from the cache card on the RAID adapter.
276 System x3750 M4 Types 8722 and 8733: Installation and Service Guide
 Loading...