44
Installation and Servicing
Section 3 - Servicing
SERVICING
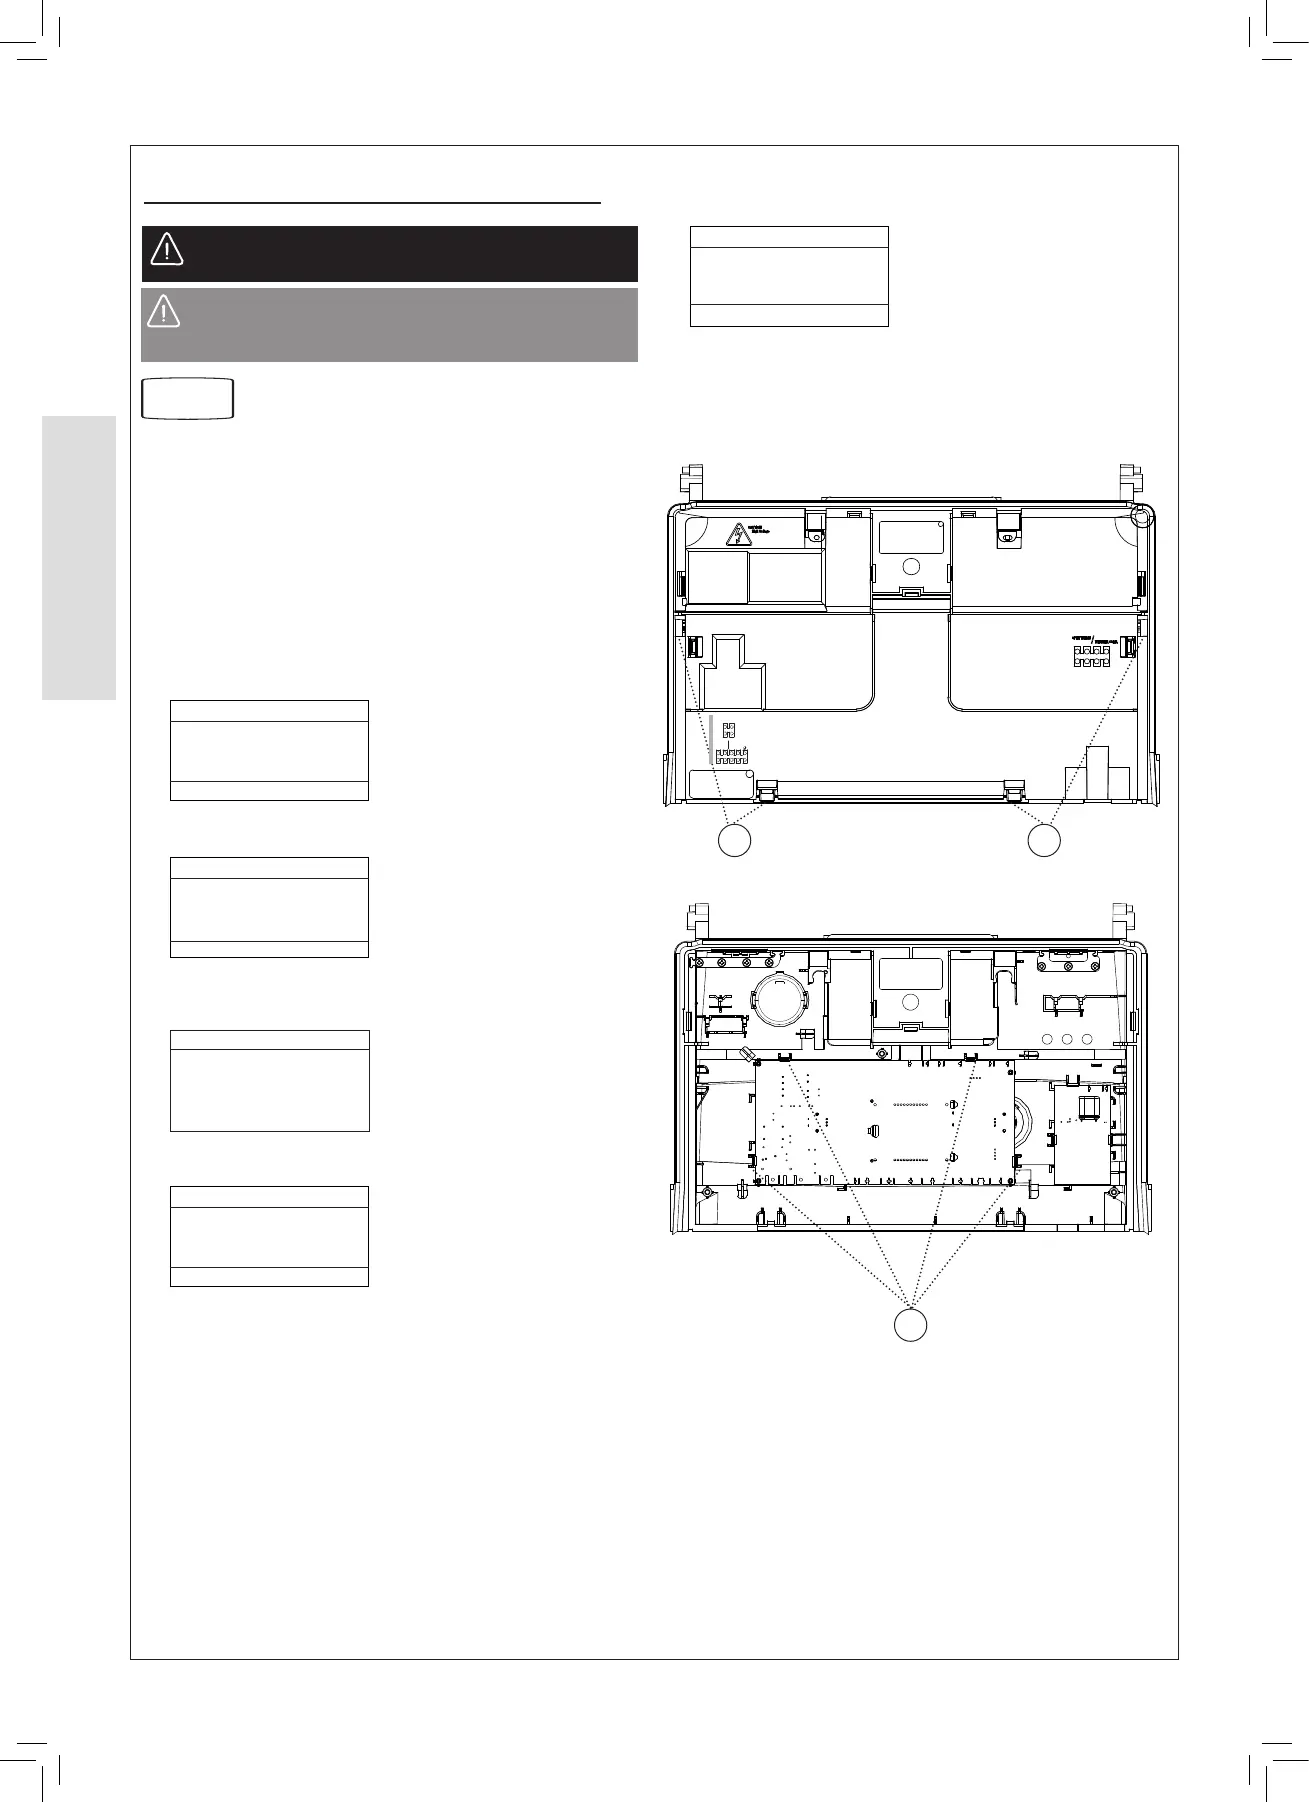
3.19 PRIMARY PCB REPLACEMENT
Refer to Section
3.2
1. Carefully release the four retaining clips and remove
control box cover.
2. Unplug all lead connections to the PCB.
3. Spring out the four side retaining clips and pull the PCB
upwards to clear the corner retaining posts.
4.
Fit the new PCB.
5. Re-connect all plug connections.
6. Reassemble.
7. Turn power on, display shows:
Installer
Initialise spare PCB?
Yes
Press Yes and the following screen is shown:
Select Boiler Brand
Option 1 of 4
Max
Back Next Select
Press Next until ‘Max’ is shown, then press Select
Select Boiler Name
Option 1 of 4
System
2
UK
Press Next until ‘System’ UK is shown, then press Select
Select Boiler Model
Option 1 of 6
System UK
15kW
Natural Gas
Back Next Select
Press Next until correct Boiler model shown
1/6 System 15 NG
2/6 System 18 NG
3/6 System 18 Propane
4/6 System 24 NG
5/6 System 30 NG
6/6 System 30 Propane
Press Select to conrm & the following screen is shown:
Program this model?
System UK
15kW
Natural Gas
Back Yes
Press Yes to nish.
WARNING: It is critical that the correct boiler size
and fuel type is entered in to the boiler.
CAUTION: Fit the earth strap provided with the PCB
to your wrist and secure to a suitable earth on the
boiler chassis.
1
3
1
COMBI
HEAT / SYSTEM
SL1
LIN
LIN
SL2
OPTIONAL
FROST STAT
ROOM
STAT/
TIMER
L N
MAINS IN
UIN 230010 A01
L N
MAINS IN
 Loading...