40
14.
Install pressure adjustment locking cap screw into hole on valve bonnet.
15.
Adjust relief valve in accordance with procedures in section 3, part H of this manual.
16.
Return apparatus to normal ready condition.
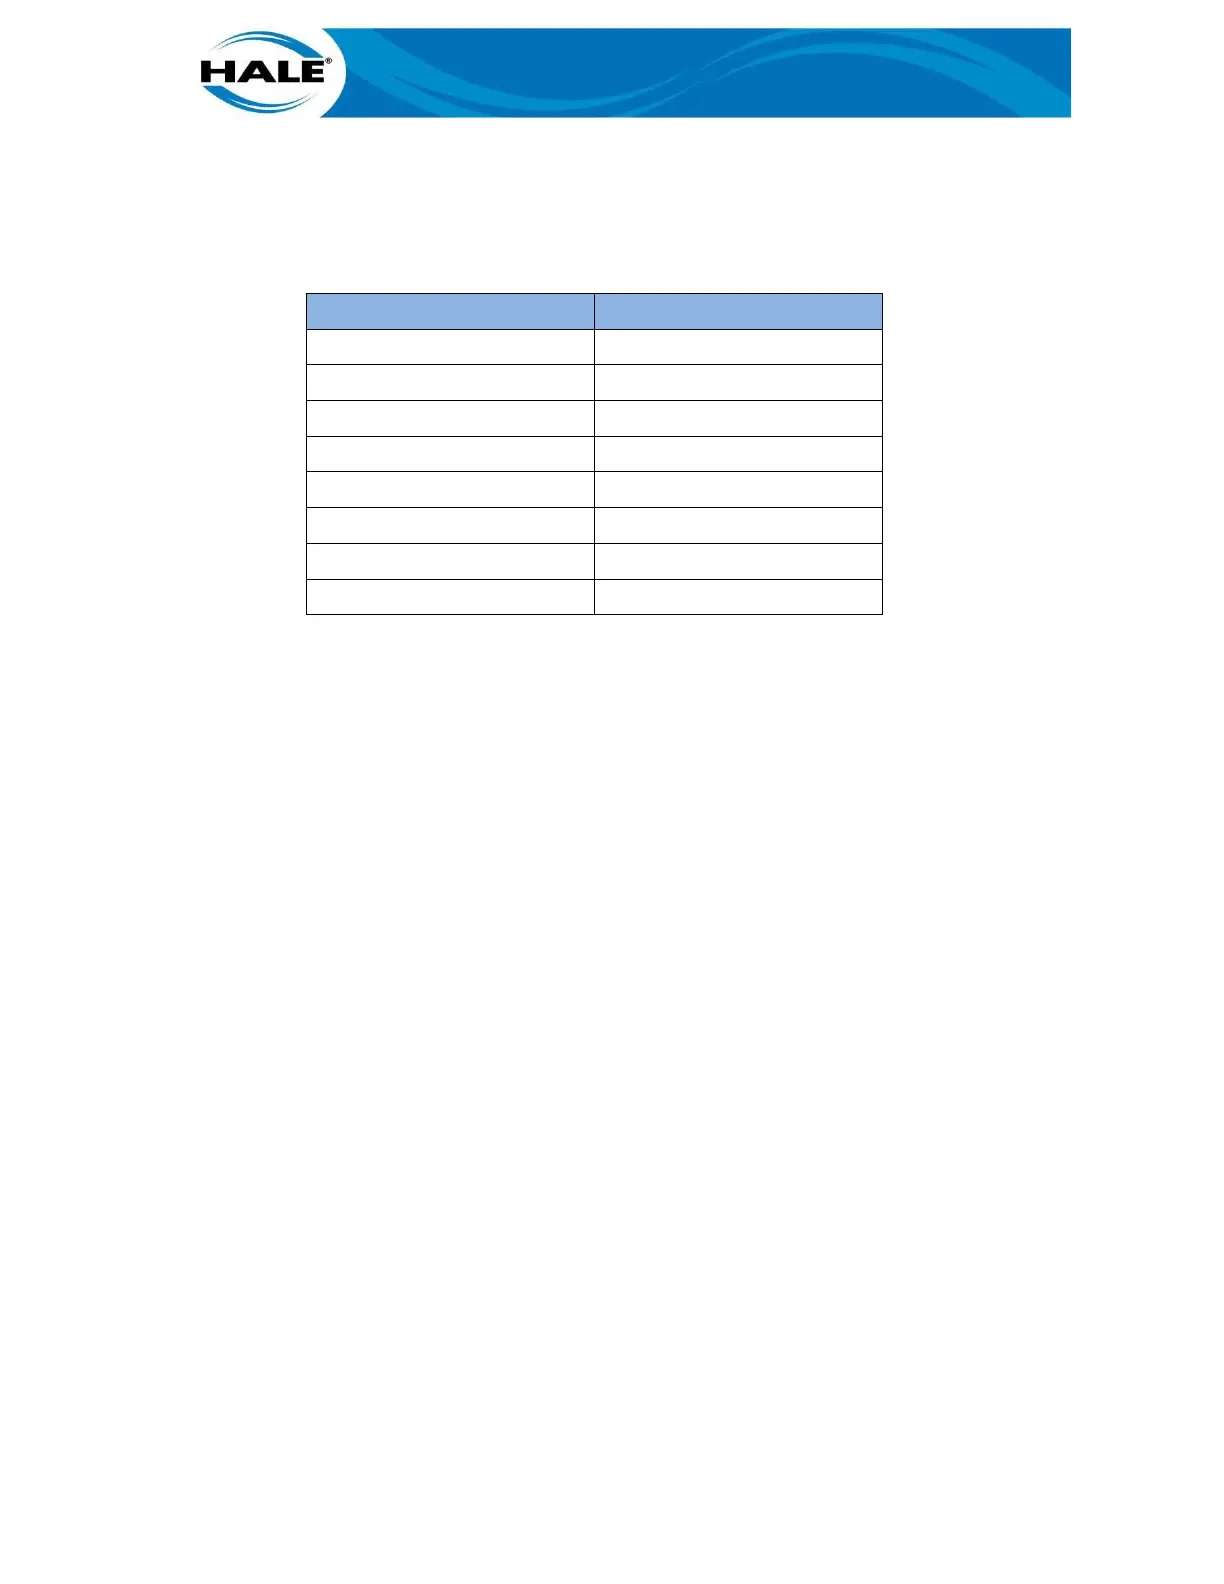
Table 6. Fastener Torque Values
4.5.4 Bench Procedure for MIV Control Module Replacement
If the MIV control Module replacement is necessary order a control module replacement (Hale
P/N 610-00050). If no access to remove MIV control manual in the apparatus proceed as fol-
lows:
1.
Remove valve handwheel and open the operator panel.
2.
Tag and disconnect the electrical wires from the valve.
3.
Disconnect the relief valve discharge piping, air bleeder tubing, outboard primer tubing and
drain tubing from the valve body.
4.
Remove the cap screws and nuts, then remove the suction tube and valve from the fire
pump.
5.
Take the valve body to a clean work area and clamp into a vise or other stable work hold-
ing device being careful not to damage the valve sealing surfaces.
6.
Remove two 8-32 pan head screws holding MIV control module to gearbox adapter.
7.
Replace with new MIV Control Module (Hale P/N 610-00050)
8.
Install two 8-32 pan head screws to fasten MIV control module to MIV gearbox adapter
9.
Install valve and suction tube on the fire pump. Apply a coat of Loctite #242 or equal to
threads of cap screws and nuts before installing. Torque cap screws and nuts to 40 lb-ft
(54 N-m).
10.
Connect electrical wires.
11.
Operate the valve to the closed position
 Loading...