47Blower/Chlorinator/Sensors
Chlorinator
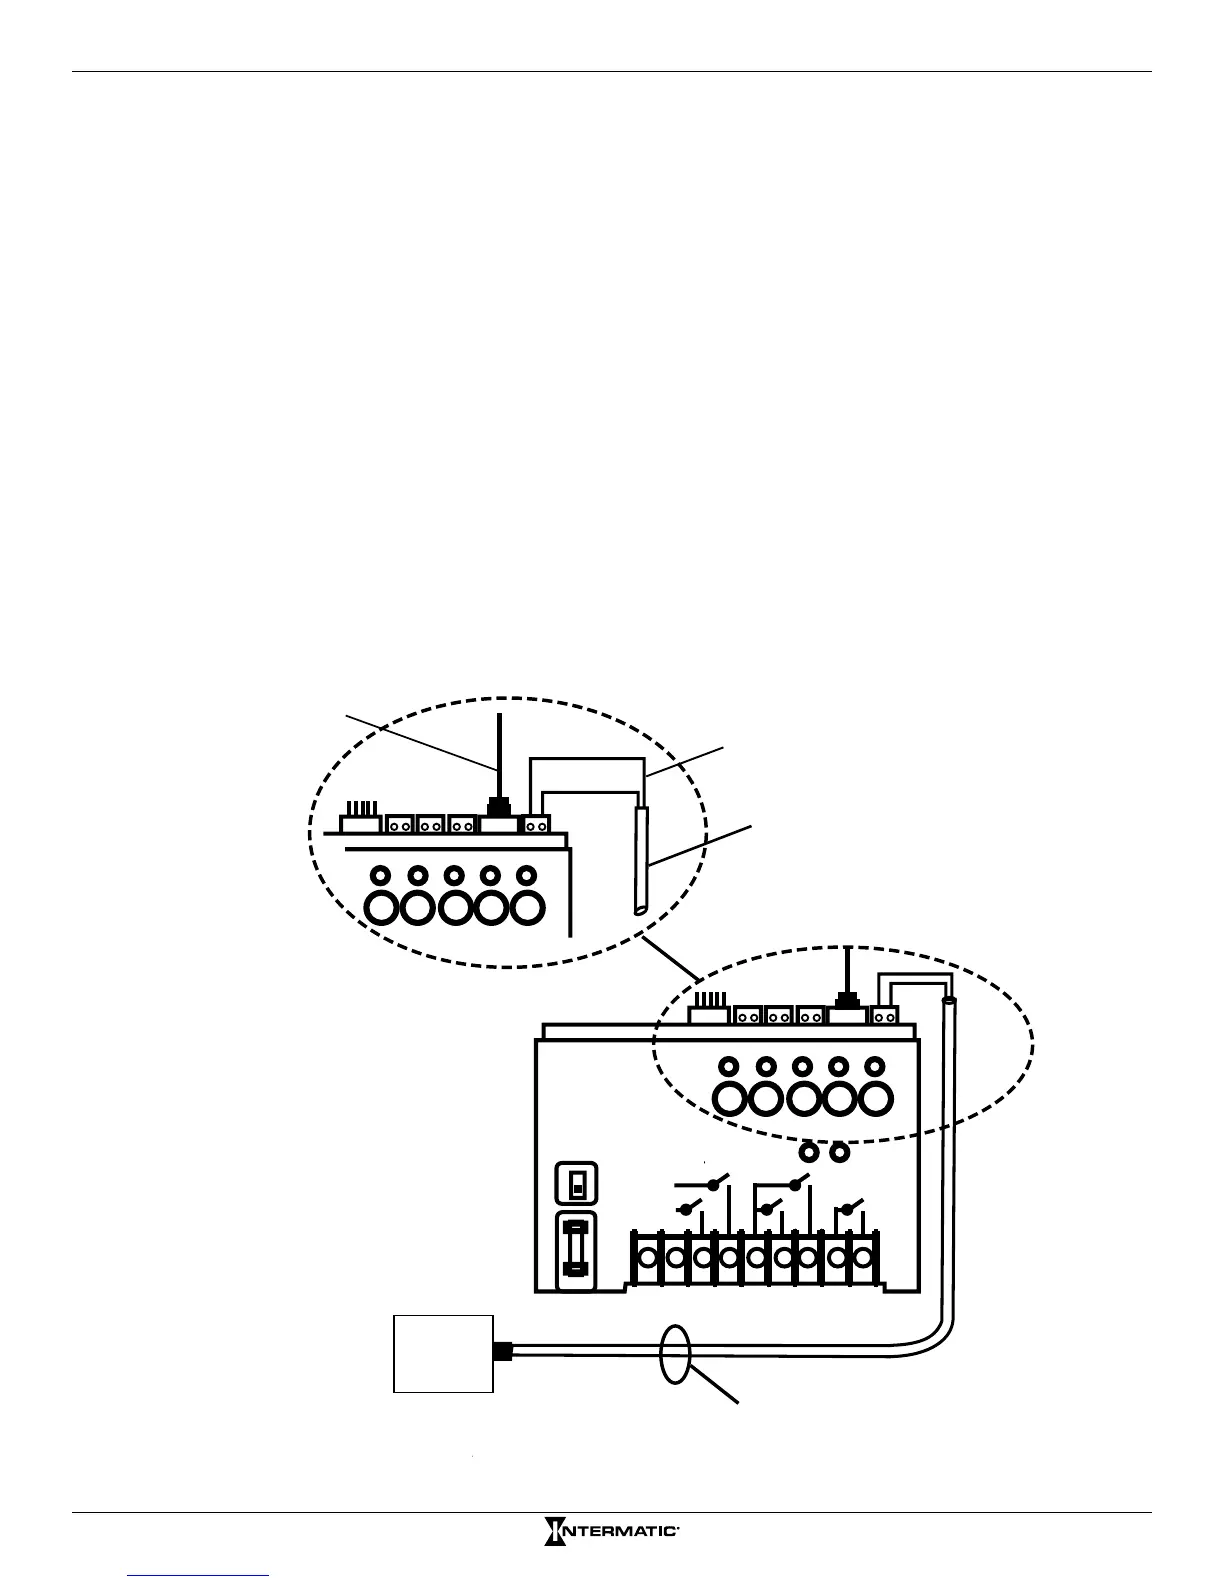
Connecting AutoPilot Salt Chlorine Generator Control Cable to
Receiver
Contact your local AutoPilot dealer to verify your chlorine generator has been updated for this
feature. Follow this procedure to connect the generator control cable to the receiver. This enables
the generator to communicate with the receiver.
NOTE: The chlorine generator connects to the same terminals as the Pentair Variable Speed Pump
(or P5043ME Expansion Module communication cable). All three elements can be installed in the
terminals.
1. Make sure power is off at the receiver and salt chlorine generator.
2. Connect the twist lock connector end of the communication cable to the proper terminals on
the salt chlorine generator.
3. Connect the green wire from the unattached end of the communication cable to the
connector terminal next to the Cat 5 cable. See Figure 7-4.
NOTE: Be sure to observe polarity when connecting the salt chlorine generator wires.
4. Connect the yellow wire from the cable to the connector terminal next to the green wire. See
Figure 7-4.
1 2 3
4 5
1
2
3
4 5
1 2 3 4 5 6
7
8 9
Cable Connection Polarity
Pump or Expansion Module
Communication Cable
Green
Yellow
Green
Yellow
Cat 5 Cable
Jacketed Cable with
Twist-Lock Connector
supplied by pump
manufacturer.
Salt Chlorine Generator
120V
240V
Figure 7-4. Connecting AutoPilot Salt Chlorine Generator wiring.
 Loading...