Page 76
J-400
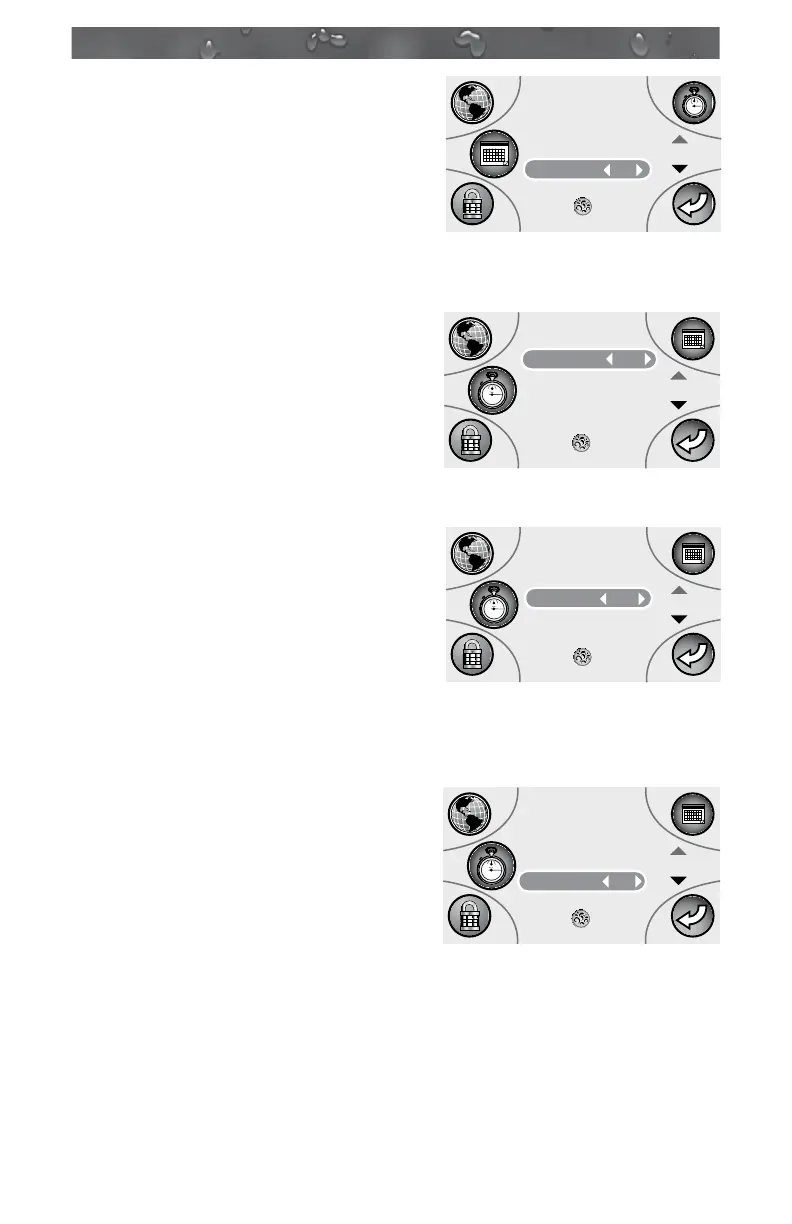
3. With the “Set Day” selected
(Figure F), press the Left or Right
button on the Quad Keypad to scroll
through selection. Once the correct
day is displayed, press the Splash
button to save your changes. Press
button D to return to the “Settings 3”
main menu. Press button C to
access the Time Setting Submenu.
14.3 Setting the Time
1. The display will open with
“Set Clock” selected (Figure G).
Press either the Left or Right button
on the Quad Keypad to choose
either a 12-hour or 24-hour (military
time) display. Then press the Down
button to access the hour selection.
2. With “Set Hour” selected (Figure
H), press the Left (decrease) or
Right (increase) button on the
Quad Keypad to scroll through the
selection. Once the correct hour is
displayed, press the Down button to
access the minutes selection.
Note: If you are using a standard 12-
hour period, you will see the hour displayed as “1PM.” For the
24-hour period it will read “1300.”
3. With “Set Min.” selected (Figure I),
press the Left (decrease) or Right
(increase) button on the Quad
Keypad to scroll through the
selection. Once the correct minutes
are displayed, press the Splash
button to save your changes. Press
button D to return to the “Settings 3”
Main Menu.
DATE
Select
Year
Month
Day
Press to Save
5
4
3
Set Day
02
Figure F
Figure G
TIME
Select
Clock
Hour
Minutes
Press to Save
5
4
3
Set Clock 12hr
Figure H
TIME
Select
Clock
Hour
Minutes
Press to Save
5
4
3
Set Hour
1PM
TIME
Select
Clock
Hour
Minutes
Press to Save
5
4
3
02
Set Min.
Figure I
 Loading...