21 - 7
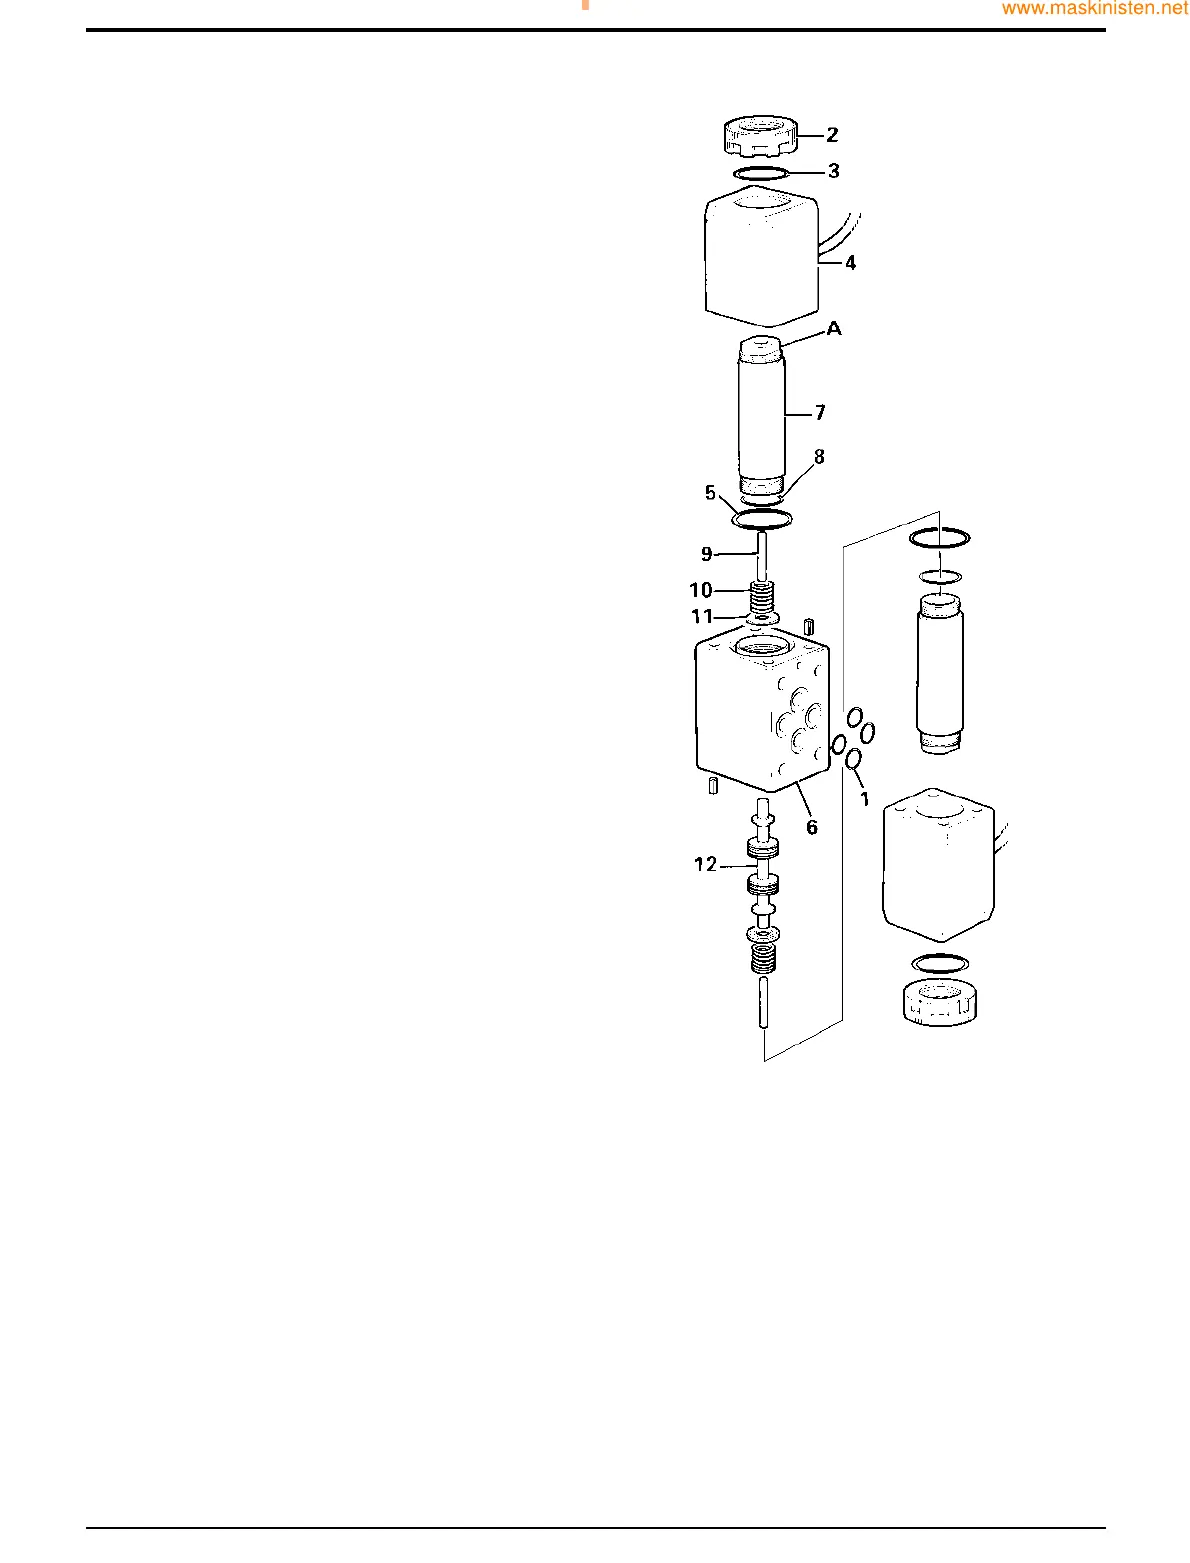
Solenoid Valve
Dismantling and Assembly
The numerical sequence shown on the illustration is
intended as a guide to dismantling.
For assembly the sequence should be reversed.
For clarity, only one solenoid has been numbered in the
dismantling sequence.
Dismantling
1 Remove the surface mounted ‘O’ rings 1.
2 Unscrew the knurled nut 2 and remove O-ring 3,
withdraw the solenoid 4 and O-ring 5.
3 Hold the solenoid valve body 6 in a vice, using the
spanner flats A, remove spindle 7 and O-ring 8.
4 Pull out actuating pin 9, spring 10, spring retainer 11
and spool 12.
5 Dismantle the opposite solenoid in the same sequence
as described above.
6 Inspect the spool and spool bore for signs of wear,
nicks scratches etc.
Assembly
1 Renew all O-rings.
2 Lightly lubricate all parts with clean transmission fluid
before assembling.
3 Check that the flying leads are secure and that the
connectors are intact.
4 Apply a small quantity of JCB Threadlocker & Sealer to
the threads in the knurled nut 2 before fitting.
Section F Transmission
9803/7130
Section F
21 - 7
Issue 1
Service Procedures
161590
 Loading...