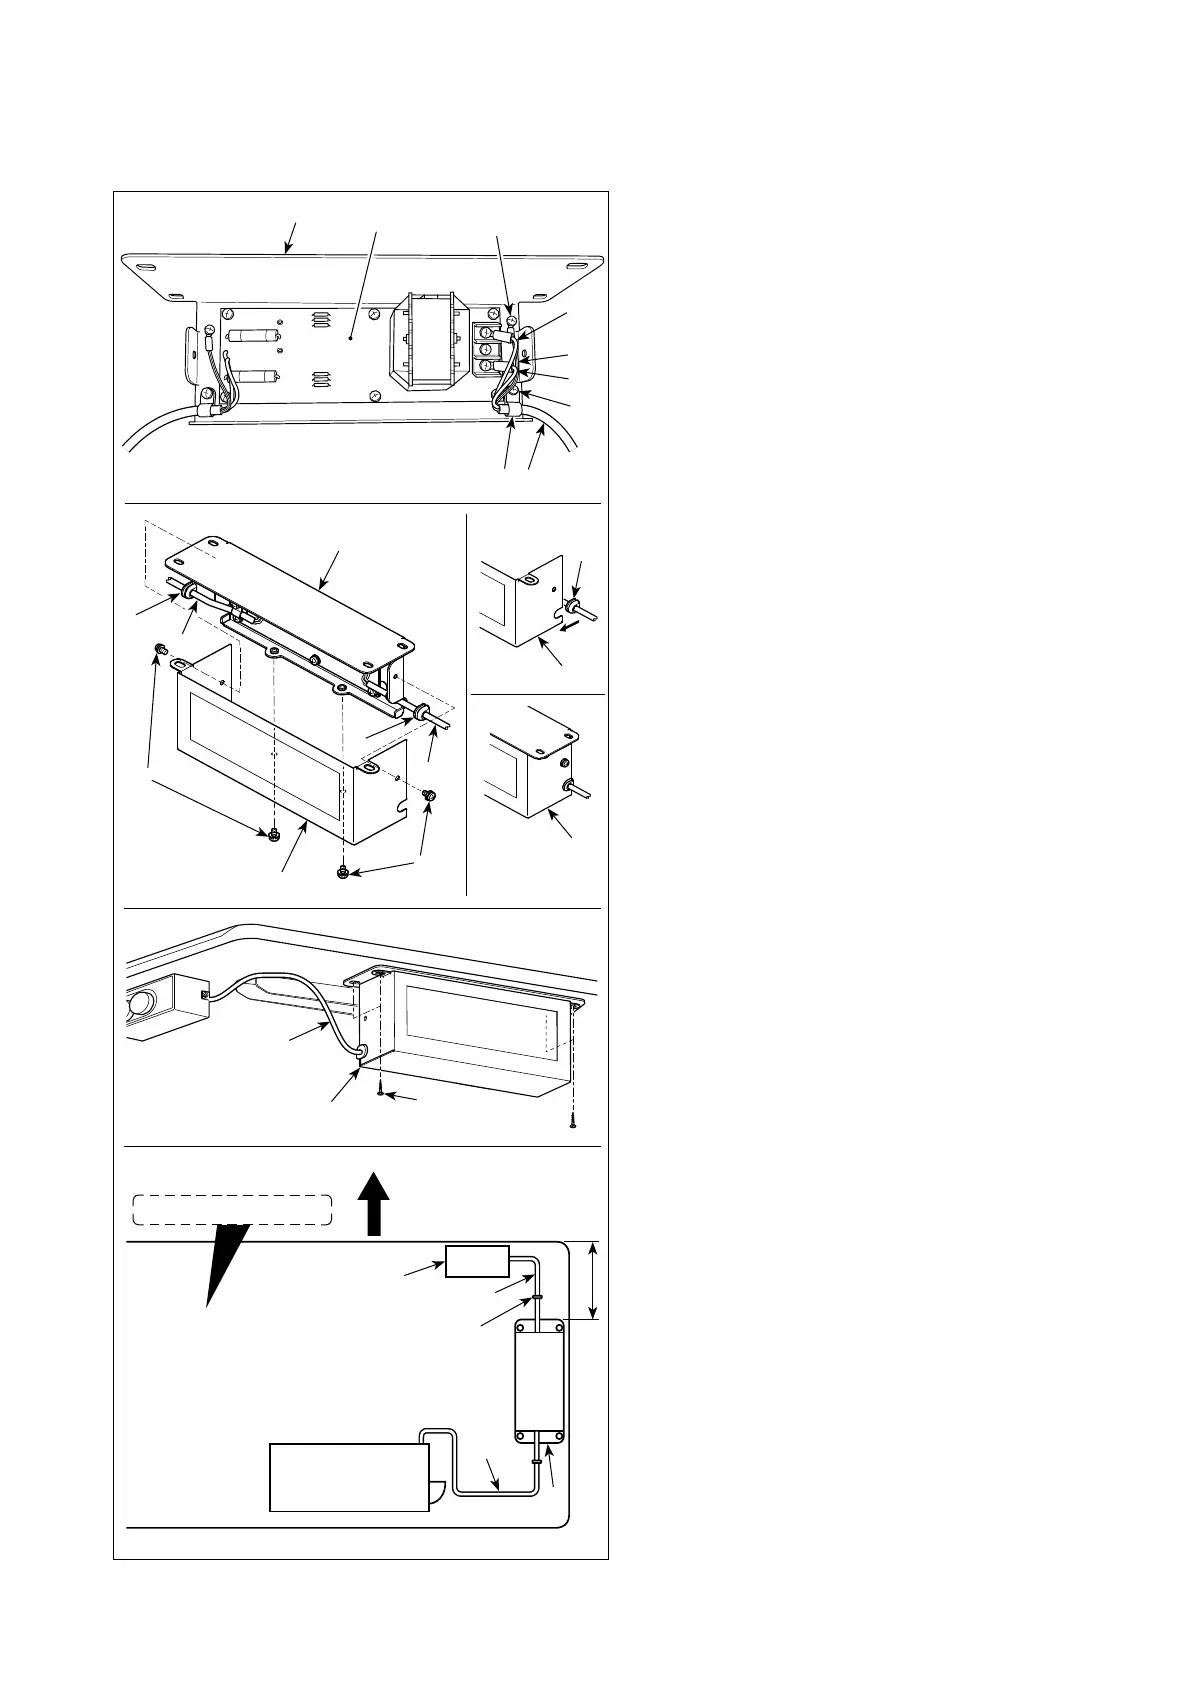
2-6-3. Installing the reactor box
* For the EU-type models, install the reactor box that is supplied with the sewing machine.
❽
1) Connect the terminals of power cord ❶ of the
SC-950(951) to reactor-box PCB asm. ❷ and
to reactor box mounting plate ❸.
Connect brown wire A to the rst connector
and blue wire B to the third connector respec-
tively from the top of terminal block on the
reactor box PCB asm. using screws. Connect
green/yellow wire C to reactor box mounting
plate ❸ with earth setscrew ❹.
2) Attach cable clip ❺ to the power cord of SC-
950(951). Attach the power cord together with
the cable clip to reactor box mounting plate ❸
with cable clip setscrew ❻.
3) Attach cord bushes ❽ to input/output cables
❶ and ❼ of the reactor box. Attach both bush-
es in the same manner.
4) Attach reactor box cover to reactor box
mounting plate ❸ with four reactor-box cover
setscrews ❾.
At this time, x cord bushes ❽ attached to
input/output cables ❶ and ❼ in the concave
section on reactor box cover to eliminate a
gap between reactor box and cover .
5) Install reactor box on the table stand with
four accessory wood screws at the position
that is approximately 200 mm away from the
front end of table stand.
Adjust the installing position according to the
size of table stand so that the reactor box does
not protrude from the edge of table stand.
6) Fix input/output cables ❶ and ❼ of reactor
box on the table stand using accessory cord
staple .
At this time, take care not to cross the input-
and output-cables.
❼
❽
❽
❶
❾
❸
❾
❸
❶
A
B
❻
C
❷
❹
❺
❼
Operator's side
Power box
200 mm
❼
SC-950(951)
❶
Undersurface of table
– 7 –

 Loading...