➊
➋
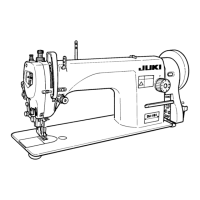
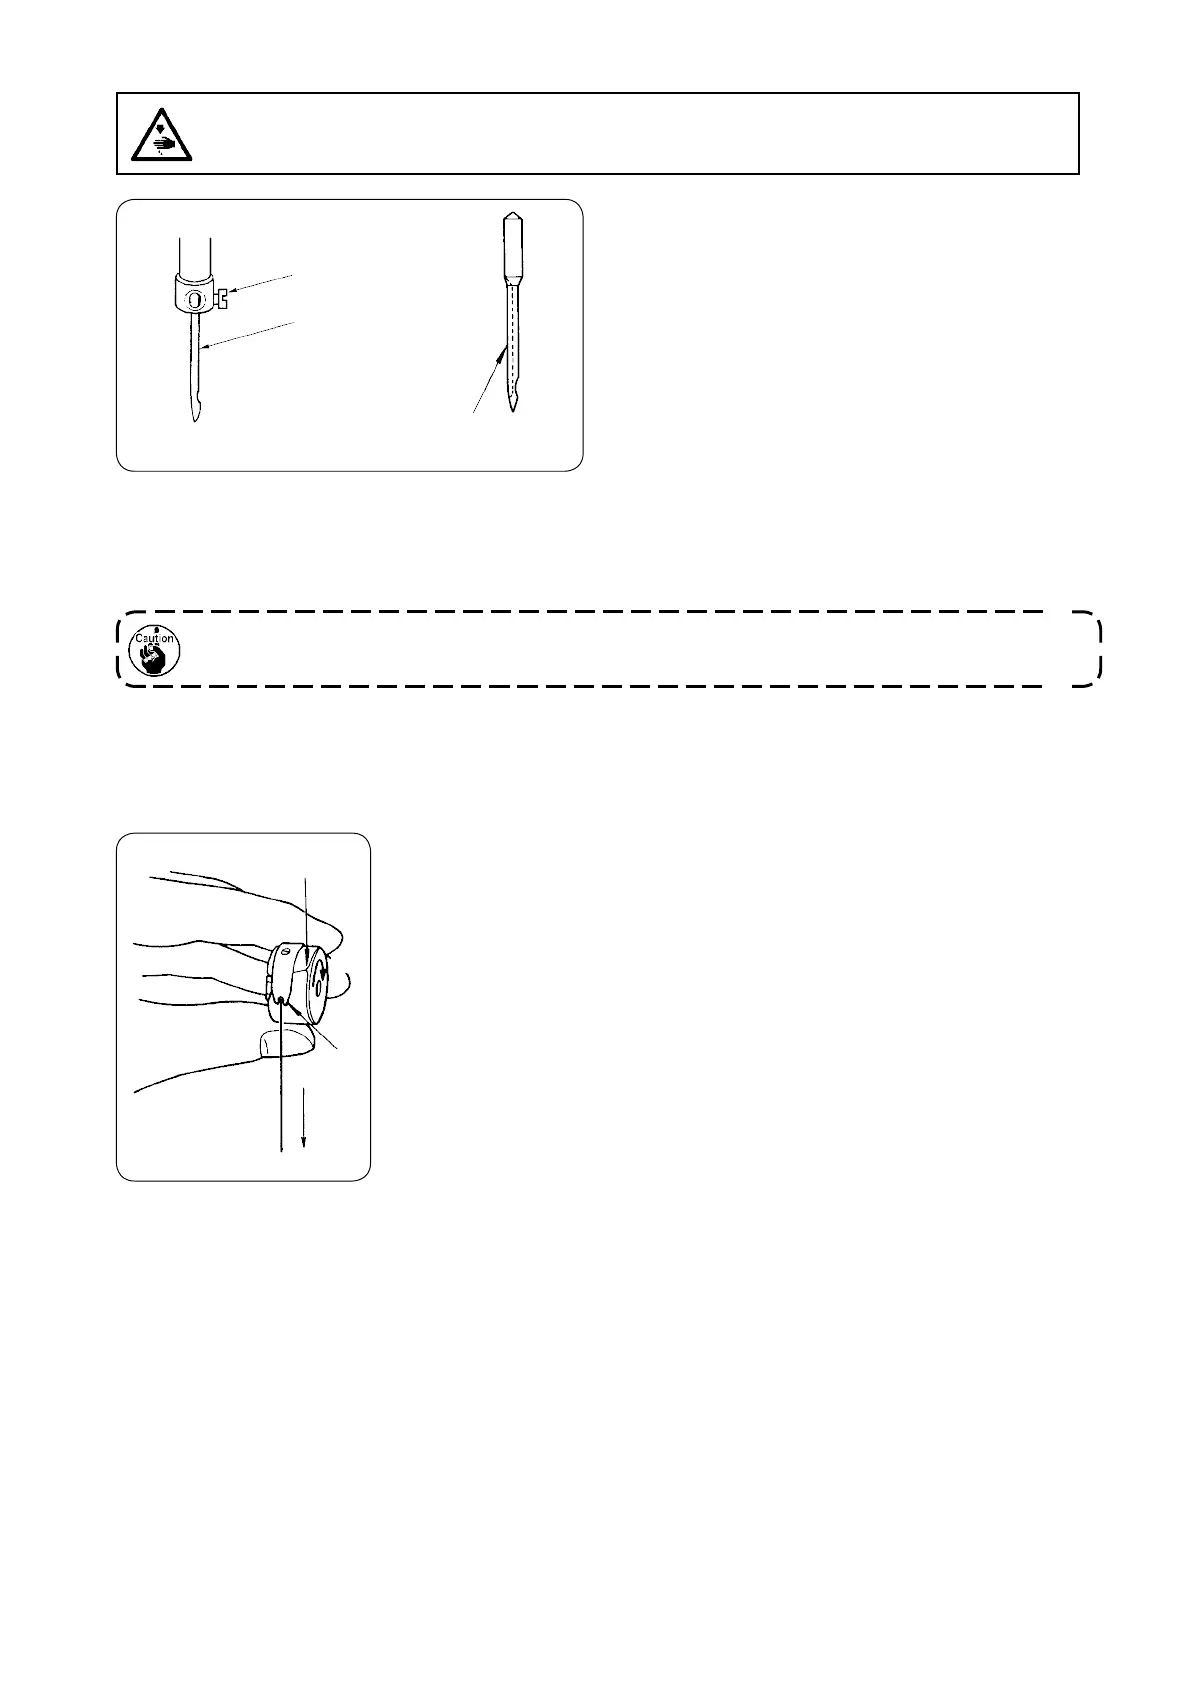
1) Turn the handwheel to bring the needle bar to the highest position of its stroke.
2) Loosen needle clamp screw
➋
, and hold needle
➊
so that the long groove in the needle is facing exactly to the left.
3) Push needle
➊
deep into the needle clamp hole until it will go no further.
4) Tighten needle clamp screw
➋
firmly.
When replacing the needle, check the clearance provided between the needle and the blade point of hook. (Refer to “17.
NEEDLE-TO-HOOK RELATION”.)
6. ATTACHING THE NEEDLE
WARNING :
To protect against possible personal injury due to abrupt start of the machine, be sure to start the follow-
ing work after turning the power off and ascertaining that the motor is at rest.
Long groove
– 18 –
➋
➊
A
B
7.
THREADING THE BOBBIN THREAD
1) Set the bobbin into the bobbin case, pass the thread through thread slit
➊
, and
pass it under tension spring
➋
.
2)
Adjust so that the bobbin rotates in direction
B
when the thread is pulled in direction
A
.
– 19 –
 Loading...