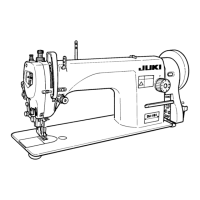
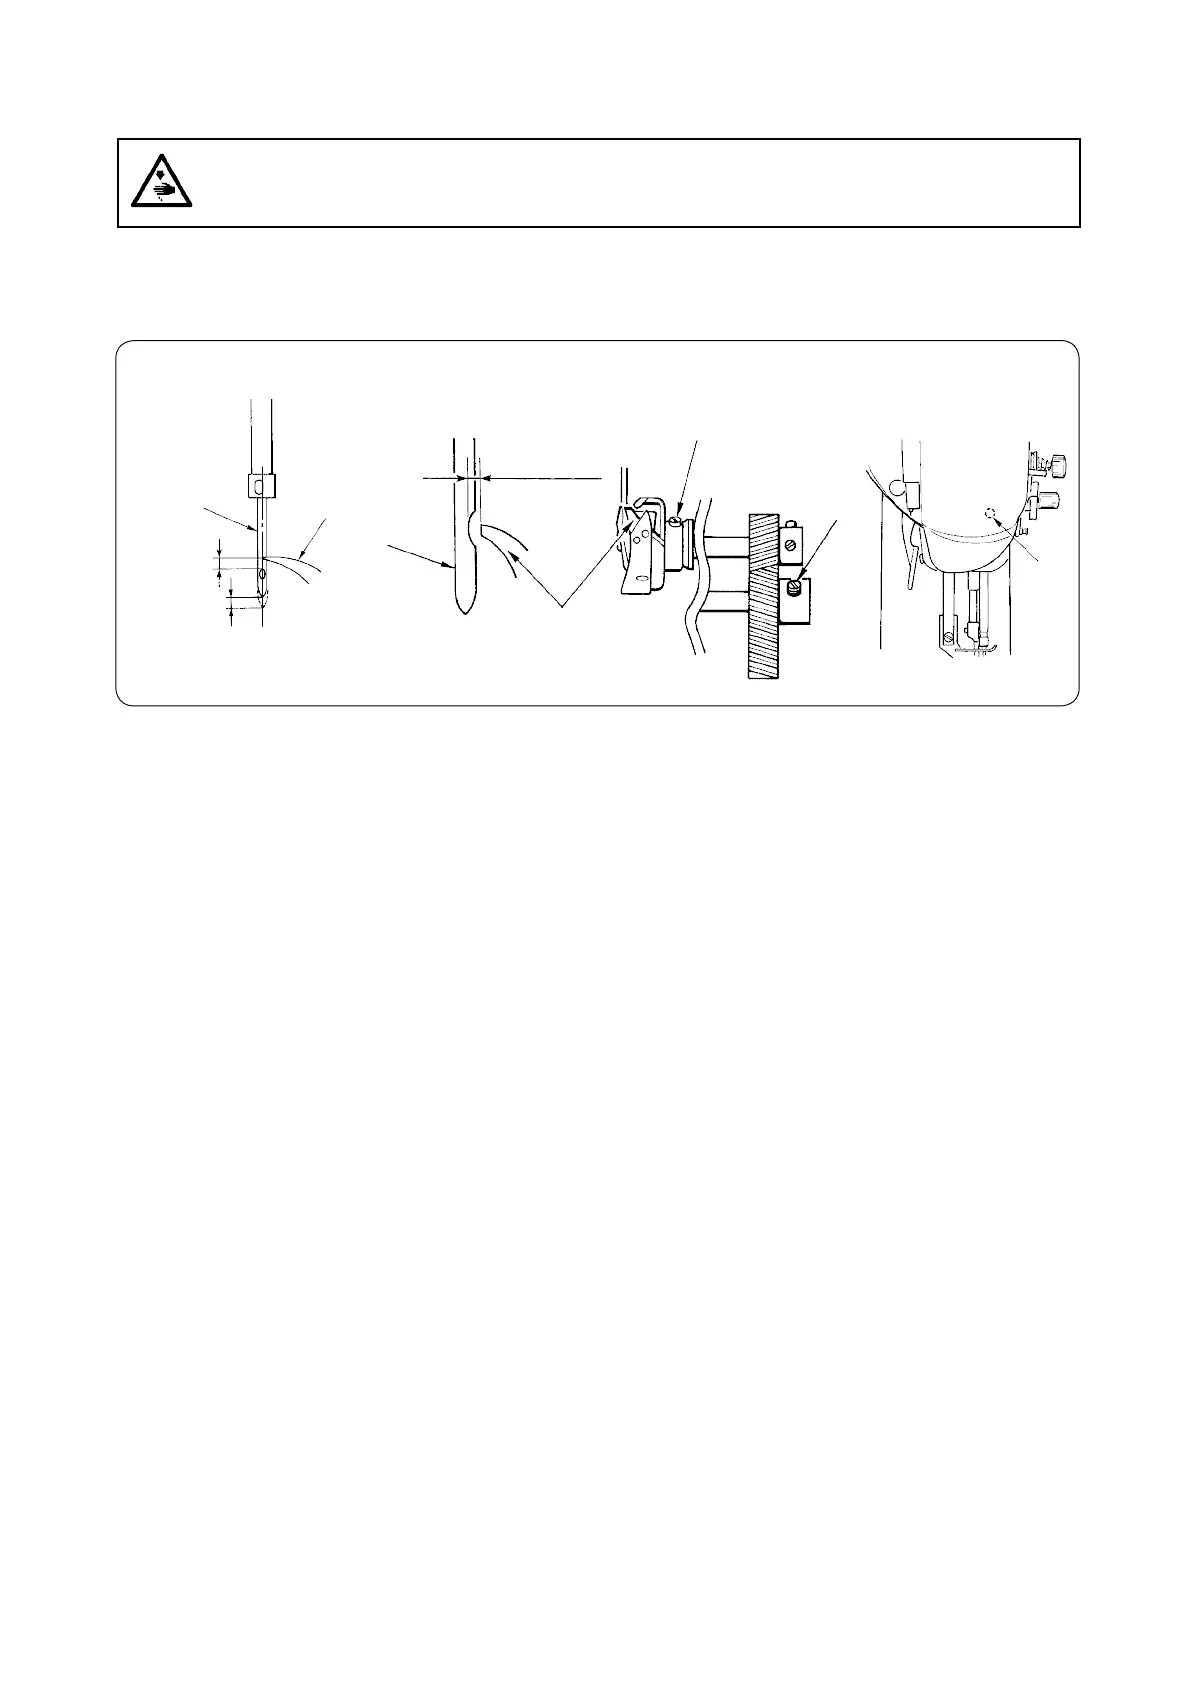
1) Set the stitch dial to 0 [zero].
2) Turn the handwheel and loosen screw
➊
in the needle bar bracket to adjust so that the distance from the upper
end of needle eyelet of needle
➋
to blade point
➌
of the hook is dimension A when the needle bar is raised by 2.1
mm from the lowest position of its stroke. Then tighten the screw again. (For opening/closing the face plate, refer to
"5. LUBRICATION".)
3) Turn the handwheel to make the needle bar ascend by 2.1 mm from the lowest position of its stroke. For the DNU-
1541,DNU-1541H, loosen two setscrews
➍
in the hook and turn the hook so that blade point
➌
of the hook is almost
aligned with the center of needle
➋
. Then tighten two setscrews
➍
in the hook. For the DNU-1541S, loosen two
setscrews
➎
in the hook driving shaft gear and turn the handwheel to adjust. Then tighten two setscrews
➍
.
4) Loosen two setscrews
➍
in the hook and move the hook to the right or left until a clearance of 0.02 to 0.05 mm is
provided between the blade point of the hook and the needle at the position where blade point
➌
of the hook is
almost aligned with the center of needle
➋
. For the DNU-1514S, however, adjust the screw No. 1 having a V-shaped
top end of two setscrews
➍
to V-groove on the hook shaft portion and tighten it.
➍
➎
➌
➊
➋
2.1 mm
A
➌
➋
0.02 to 0.05 mm
DNU-1541
DNU-1541S : A = 2.0mm
DNU-1541H : A = 1.3mm
– 32 –
17. NEEDLE-TO-HOOK RELATION
WARNING :
To protect against possible personal injury due to abrupt start of the machine, be sure to start the follow-
ing work after turning the power off and ascertaining that the motor is at rest.
– 31 –
 Loading...