A
B
C
D
➊
➋
➍
➌
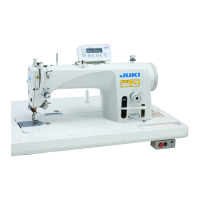
10. WINDING A BOBBIN
1) Pass the thread in the order of
➊
, through
➍
.
Then, wind it several turns round the bobbin.
2) Tilt bobbin winder lever
A
.
3)
Loosen setscrew
B
and adjust the position of the adjusting
plate to wind a bobbin about 80% of its capacity.
4) If the bobbin is wound unevenly, correct it by moving
bobbin winder thread guide
C
back or forth.
Then, tighten setscrews
D
.
5) When the bobbin is filled up, the bobbin winder lever
automatically releases the bobbin and the bobbin
winder stops running.
– 22 –
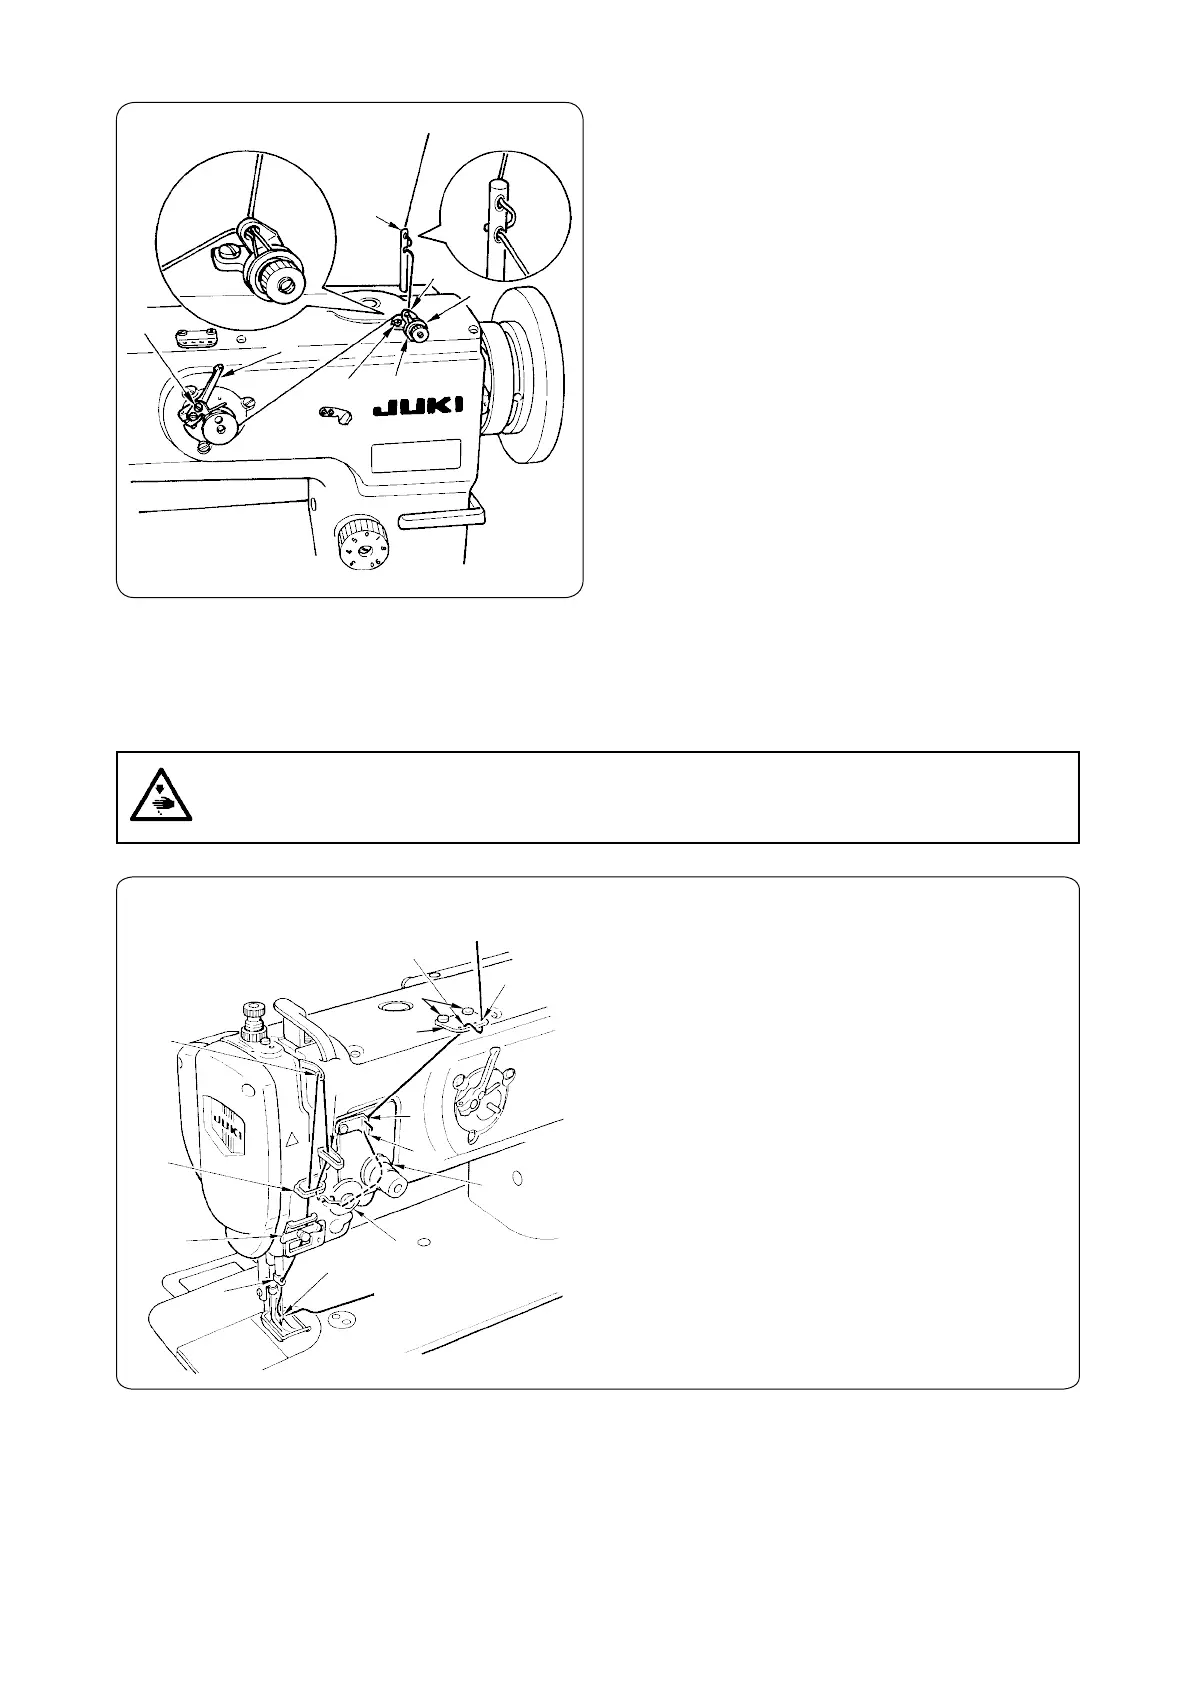
1. Attach arm thread guide
A
to the top cover with
setscrew
B
.
2. Thread the machine head following the order of 1
through
13
as shown in the illustration given above.
*
Pass thread through the right side of thread guide
11
.
DNU-1541
DNU-1541S
1
2
5
6
8
9
* 11
12
13
3
4
10
7
A
B
11. THREADING THE MACHINE HEAD
WARNING :
To protect against possible personal injury due to abrupt start of the machine, be sure to start the follow-
ing work after turning the power off and ascertaining that the motor is at rest.
Edit: Corrects an error. The official manual refers to points 6, 9, 8, 9 & 10 (should be 6, 7, 8, 9 & 10. I.e.,
where the thread passes through the thread-guide twice – going up to the take-up arm, and down to the
needle – is referred to as points 9 & 10 in the manual. Should be 7 & 10 as shown above.). The 1541H
diagram (next page) doesn’t have this error.
– 23 –
 Loading...