-
46
-
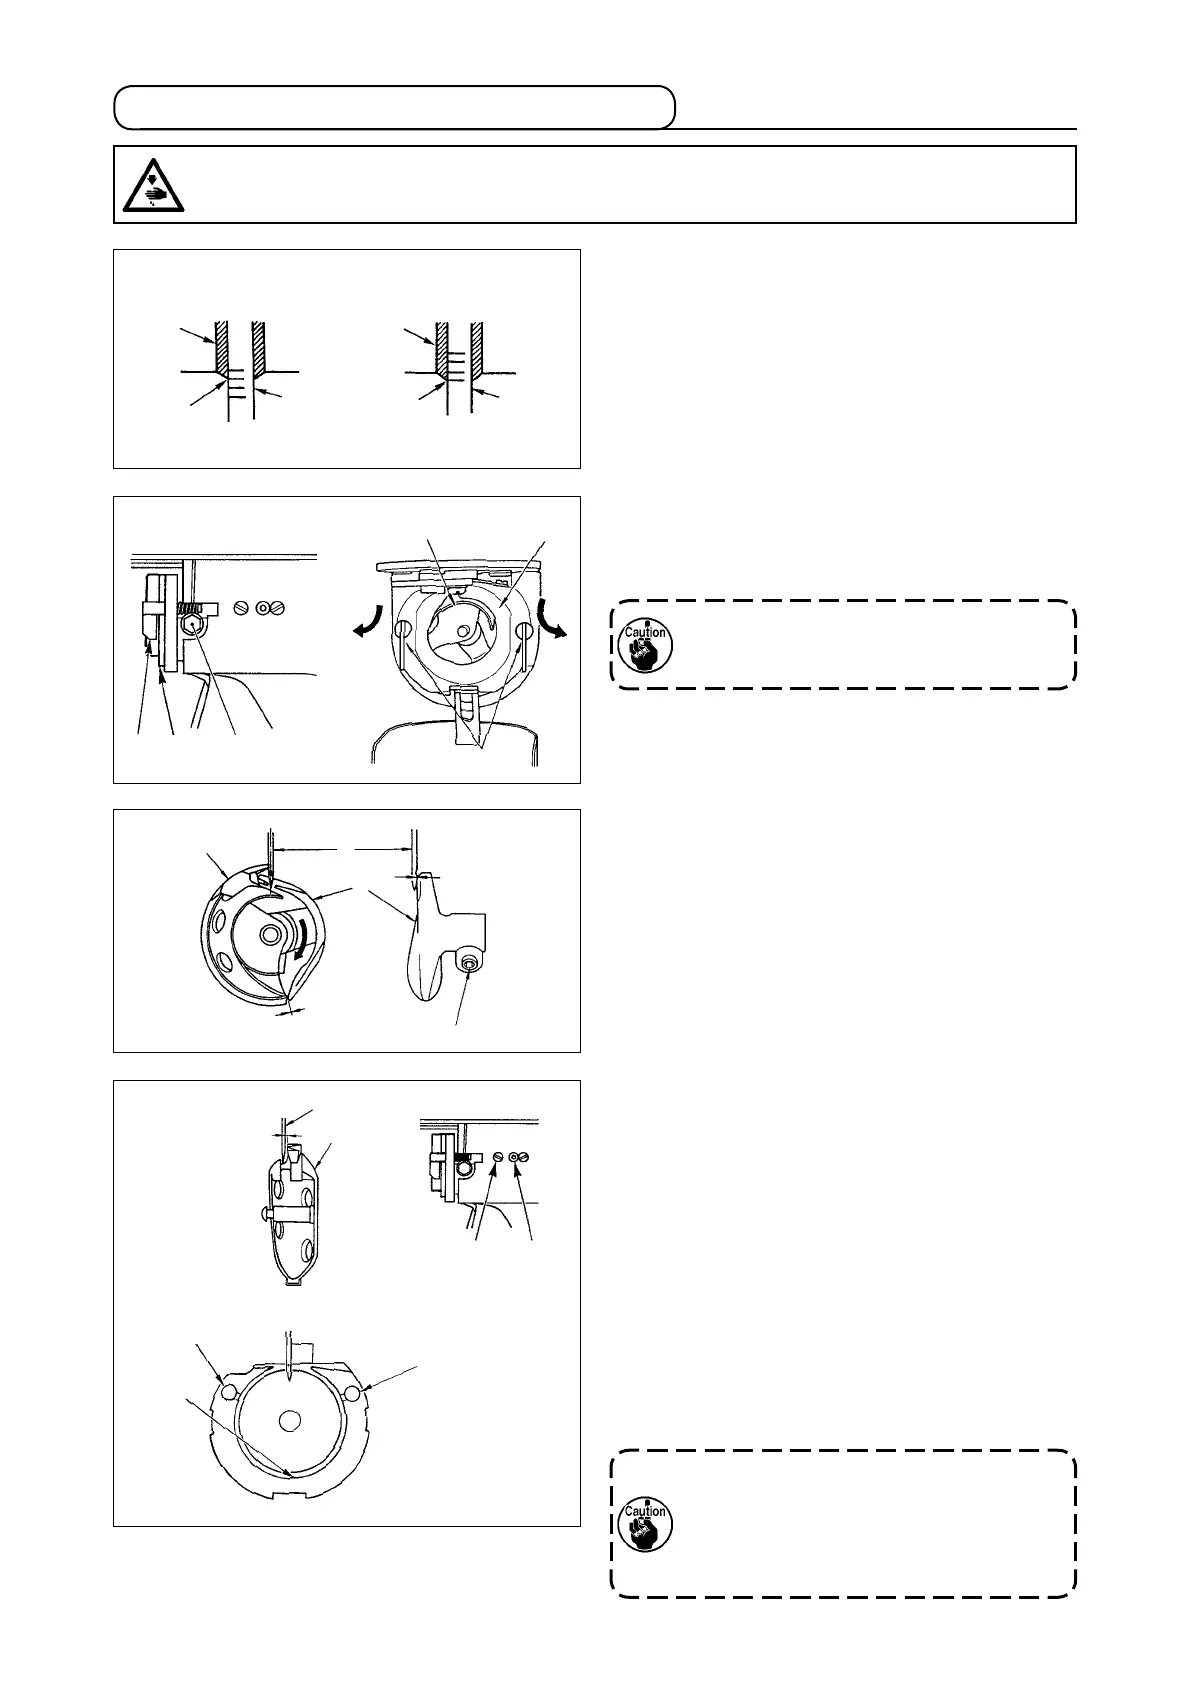
1) Turn the handwheel by hand. When nee-
dle bar
❶
has gone up, adjust so that lower
marker line
❷
engraved on the needle bar
aligns with the bottom end of the needle bar
bushing
❸
, lower.
7-2. Adjusting the needle-to-shuttle relation
❹
Relation between needle and engraved lines
❶
❷
❸
❶
❷
❸
3) Adjust so that the blade point of inner hook
❹
aligns with the center of needle
❺
, and that
a clearance of 0 mm is provided between the
front end of the driver and the needle as the
front end face of driver
❻
receives the needle
to prevent the needle from being bent. Then
tighten setscrew
of the driver.
0.05 to 0.1 mm
7.5 mm
❺
❹
❼
❽
0 mm
0 mm
❺
❹
❻
❾
2) Loosen setscrew
in the driver. Open inner
hook pressers
to the right and left, and
remove inner hook presser
.
At this time, be careful not to let inner
hook
❹
come off and fall.
4) Loosen setscrew
❼
of the shuttle, and adjust
the longitudinal position of the shuttle. To do
this adjustment, turn shuttle race adjusting
shaft
❽
clockwise or counterclockwise to
provide a 0.05 to 0.1 mm clearance between
needle
❺
and the blade point of inner hook
❹
.
5) After adjusting the longitudinal position of the
shuttle, further adjust to provide a 7.5 mm
clearance between the needle and the shuttle
by adjusting the rotating direction. Then tight-
en setscrew
❼
of the shuttle.
If the sewing machine is left unused for a
long time, or after clearing the area sur-
rounding the hook section, apply a little
quantity of oil to race section
❾
and felt
before using the sewing machine.
WARNING :
Turn OFF the power before starting the work so as to prevent accidents caused by abrupt start of the
sewing machine.
 Loading...