 Loading...
Do you have a question about the JUKI LK-1910 and is the answer not in the manual?
| Brand | JUKI |
|---|---|
| Model | LK-1910 |
| Category | Sewing Machine |
| Language | English |
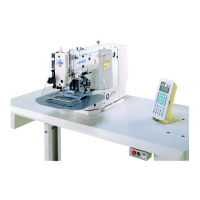
Identifies and explains the main components of the sewing machine.
Details the names and functions of switches on the sewing machine's operation panel.
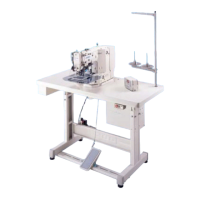
Step-by-step instructions for assembling and installing the sewing machine table.
Detailed steps for installing the electrical box, including mounting plates and screws.
Instructions for connecting single-phase and three-phase power source cords.
Guidance on safely carrying the sewing machine and installing the head unit.
Instructions for installing the motor cover and connecting pedal switches (solenoid/pneumatic).
Procedures for tilting the sewing machine head and mounting the operation panel.
Detailed guide for connecting various internal and external cords to the sewing machine.
Instructions on managing cords and installing the eye protection cover for safety.
Steps for installing the thread stand and the auxiliary throat plate cover.
Procedure for attaching and removing the bolt used for transporting the sewing machine.
Daily and periodic lubrication points for the sewing machine head and components.
Instructions for attaching the needle and threading the machine head, including presser adjustment.
Steps for installing/removing the bobbin case, installing the bobbin, and adjusting thread tension.
Guides for adjusting the thread take-up spring and intermediate presser height/stroke.
Procedure for selecting the sewing machine model upon initial startup or PCB replacement.
How to select the display language for the operation panel.
Instructions for setting the pattern number and modifying item data like X/Y scale.
Procedure to check the sewing pattern's contour to prevent interference and needle breakage.
Instructions for performing sewing with both solenoid and pneumatic types of machines.
Steps for winding a bobbin, both during and separate from sewing.
Adjusting bobbin winder thread tension and winding amount.
How to register and perform sewing using pattern keys (P1-P50).
How to perform sewing using multiple patterns in a cycle sequence.
Procedure for editing, adding, or deleting pattern data within a cycle.
Procedure for setting and using various counters for production tracking.
How to temporarily stop the sewing machine during operation and restart it.
Instructions for copying or deleting standard, user, direct, and cycle pattern data.
Precautions and specifications for using USB thumb drives for data transfer.
Steps for inputting/outputting data using a USB thumb drive.
Important warnings and operational advice, including sewing speed recommendations.
How to enable or disable the invocation of standard patterns to prevent errors.
Procedure for adjusting the height of the needle bar for optimal stitch formation.
Steps to adjust the timing and clearance between the needle and shuttle.
Adjusting the lift of the work clamp foot and the positions of the moving and counter knives.
Adjusting thread tension disk rising amount and the thread breakage detector plate.
Procedures for draining waste oil and safely replacing fuses.
Steps to access and modify settings via the memory switch function.
A comprehensive list of memory switch functions, their settings, and initial values.
Information on the data ROM and its insertion into the MAIN PCB.
Instructions for connecting the optional 2-step pedal to the sewing machine.
Steps for connecting the PK-57 pedal and its associated cables.
Instructions for connecting the 2-step PK pedal unit.
A list of error codes, their indications, descriptions, and corrective measures.
Common troubles, their causes, and corrective actions for sewing issues.
A list of optional parts with their types, part numbers, and descriptions.
Guidance on fixing the silicon oil tank when using synthetic fiber thread.