– 10 –
CN37 CN36
CN30
CN38 CN32
CN20
CN21 CN22
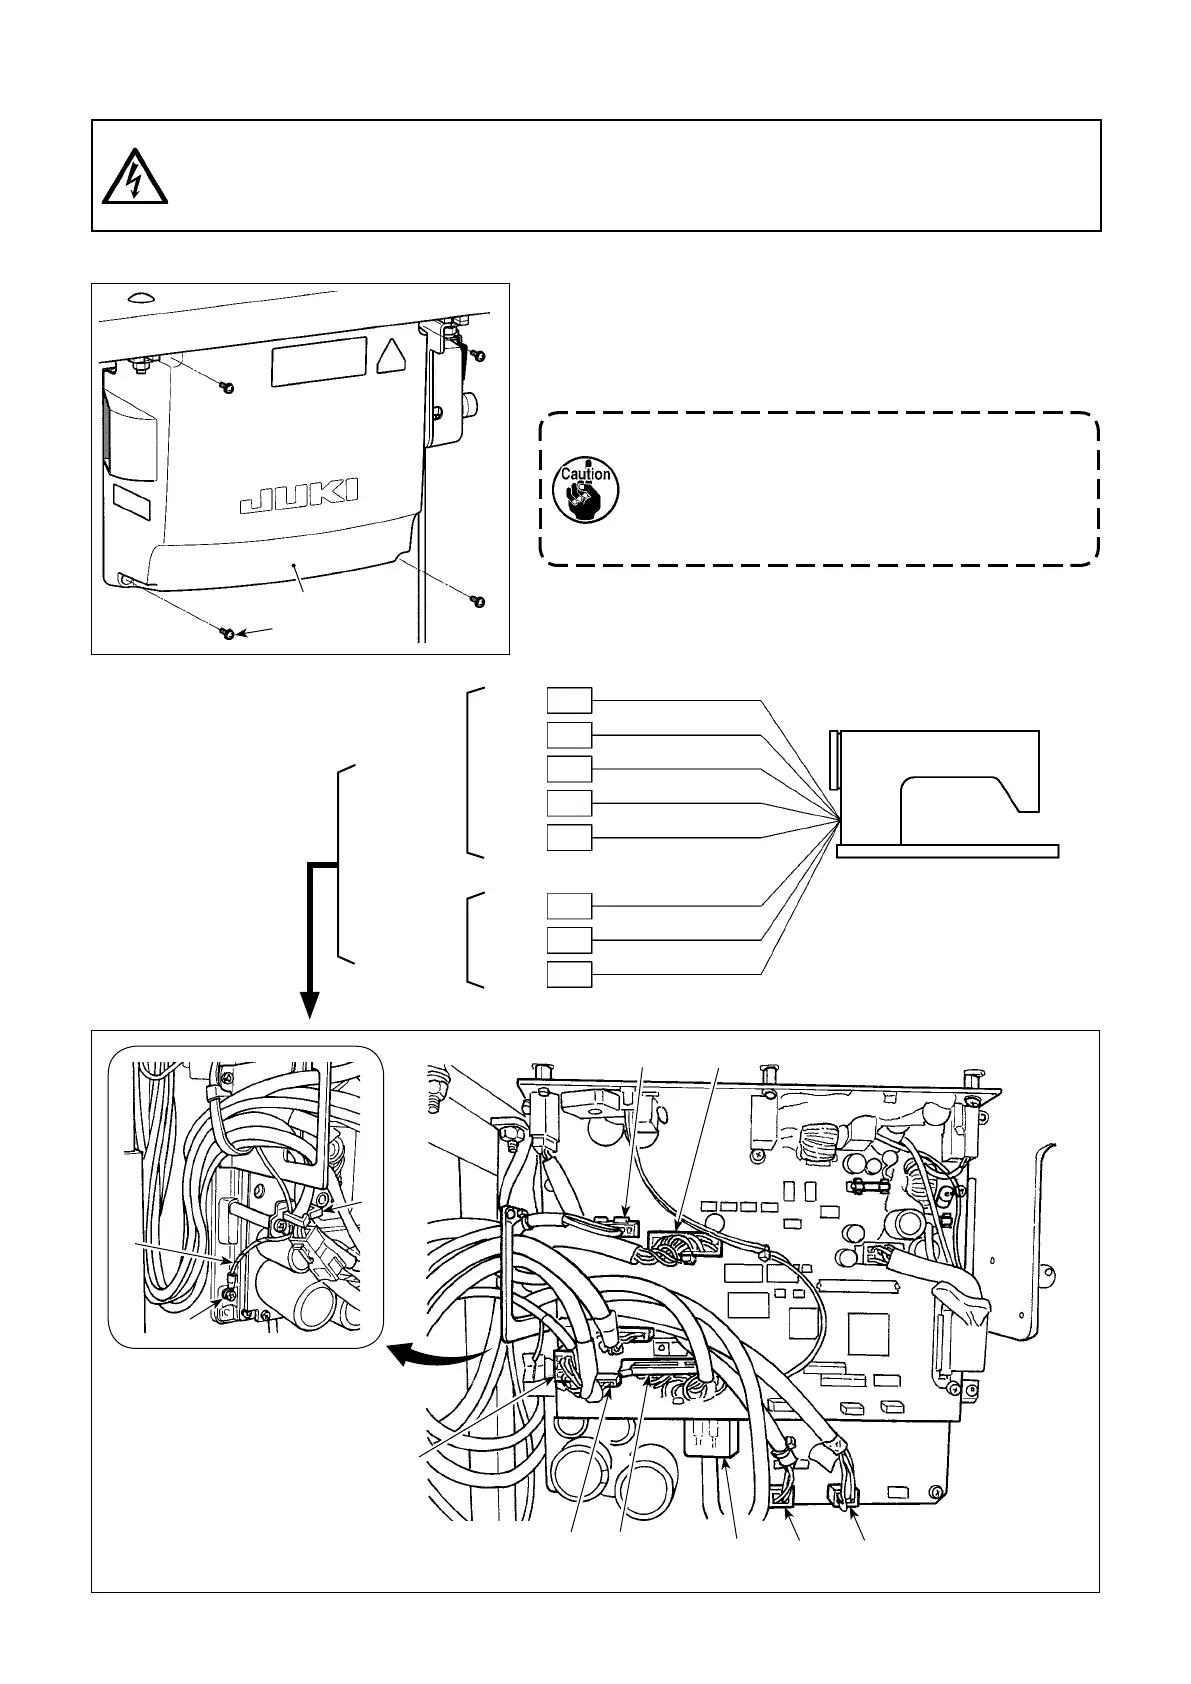
2-13. Connecting the cords
DANGER :
1. To prevent personal injuries caused by electric shock hazards or abrupt start of the sewing machine,
carry out the work after turning OFF the power switch and a lapse of 5 minutes or more.
2. To prevent accidents caused by unaccustomed work or electric shock, request the electric expert or
engineer of our dealers when adjusting the electrical components.
2-13-1. Connecting the cords coming from the sewing machine
1) Loosen four setscrews
of control box cover
. Re-
move control box cover
.
2) Connect cords to the corresponding connectors of the
CTL PCB and PWR PCB. (Fig. 1)
3) Fix the ground wire
on position
of the control box
with a screw. (Fig. 2)
Take care not to incorrectly connect the connec-
tors CN21, CN22 and CN23.
The connector CN22 is provided with a red
marking and the connector CN23 is provided
with a black marking.
Fig. 1
Fig. 2
CN32
CN30
CN36
CN38
CN21
CN37
CN20
CN22
40P
9P
6P
6P
18P
4P
4P
15P
White
White
White
White
White
White
White (Red mark)
Gray
PWR PWB
CTL PWB

 Loading...