– 26 –
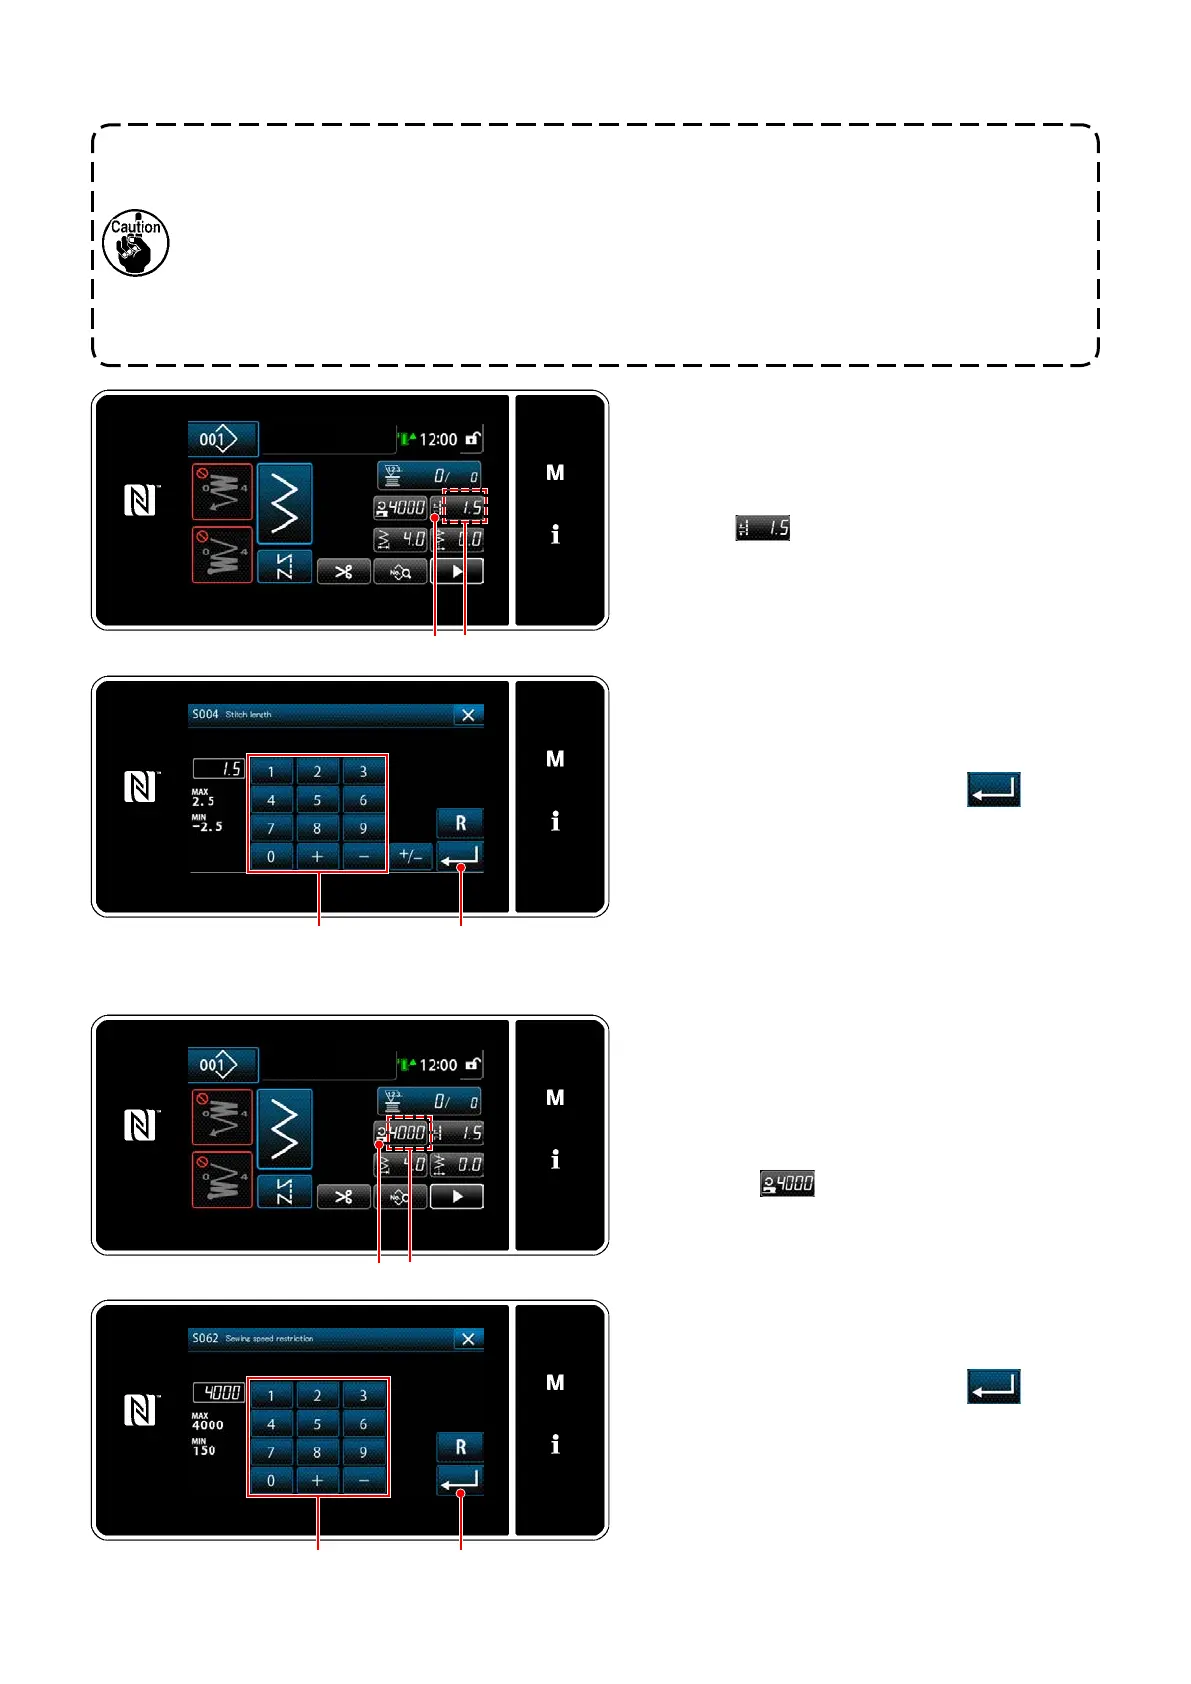
The sewing speed is displayed in section
on
the panel. (Example of display : 4,000 sti/min)
[How to change]
1) Display the sewing speed entry screen by
pressing
.
4-5. Changing the sewing speed
2) Change the sewing speed as desired by
pressing ten keys
.
3) Conrm your entry by pressing
.
Then, the sewing screen is displayed.
Stitch length is displayed in section
on the
panel. (Example of display : 1.5 mm)
[How to adjust]
1) When
is pressed, the stitch length
input screen is displayed.
4-4. Adjusting the stitch length
2) Change the stitch length by pressing numeric
keypad
.
(Input unit: 0.1 mm; Input range: -2.5 to 2.5)
3) Conrm your entry by pressing
.
Then, the sewing screen is displayed.
1.
There may be the cases where the feed amount of the operation panel and the actual sewing
stitch length are dierent from each other in case of the use in the state other than the standard
delivery or material used. Compensate the stitch length in accordance with the sewing product.
2. Be aware that interference between the throat plate and feed dog can occur depending on
the gauge used. Be sure to check the clearance in the gauge to be used. (The clearance must
be 0.5 mm or more.)
3.
When you have changed the stitch length, feed dog height or feed timing, run the sewing
machine at a low speed to make sure that the gauge does not interfere with the changed part.

 Loading...