25
English |
Installation
Continued on the next page...
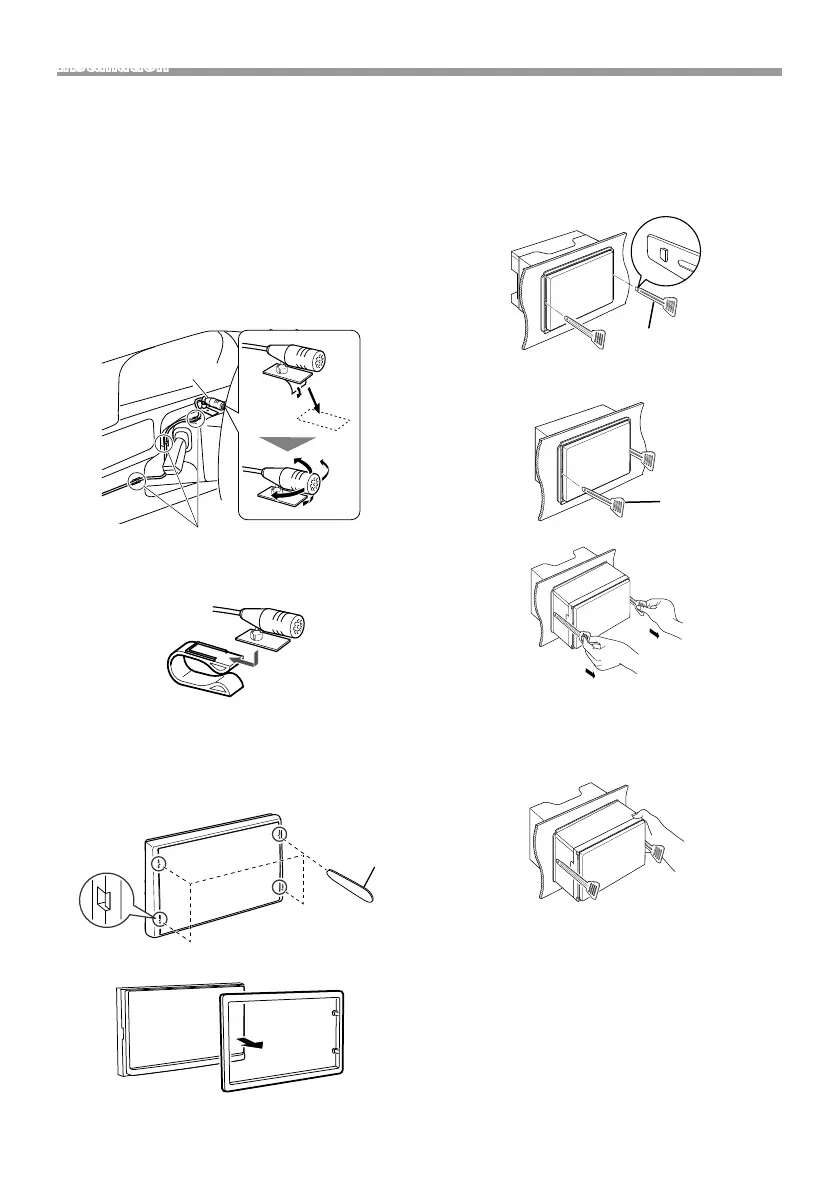
Ñ Microphone unit
1) Check the installation position of the microphone
(accessory 4).
2) Clean the installation surface.
3) Remove the separator of the microphone
(accessory 4), and stick the microphone to the
place shown below.
4) Wire the microphone cable up to the unit with it
secured at several positions using tape or other
desired method.
5) Adjust the direction of the microphone (accessory
4) to the driver.
4
Fix a cable with a commercial item of tape.
✎ NOTE
• Swap the clips if necessary.
Ñ Removing the trim plate
1) Use the extraction key (accessory 3) to lever out
the four tabs (two on the left part, two on the right
part).
3
2) Pull the trim plate forward.
Ñ Removing the unit
1) Remove the trim plate by referring to step 1 in
“Removing the trim plate”.
2) Insert the extraction key (accessory 2) deeply into
the slot as shown. (The protrusion at the tip of the
extraction key must face toward the unit.)
2
3) With the inserted extraction key secured, insert the
other extraction key into the slot.
2
4) Pull out the unit halfway.
✎ NOTE
• Be careful to avoid injury from the catch pins on
the extraction key.
5) Pull the unit all the way out with your hands, being
careful not to drop it.
19DMX_E_Ref_1En.indd 25 2019/07/23 21:04
 Loading...