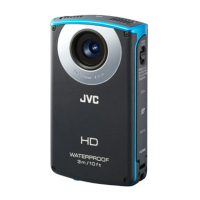
.
5
Start making a connection.
(Operation on this camera)
.
0
Name (SSID) of the access point (wireless LAN router) in connection
is displayed.
6
The following is displayed when the camera is connected to the access
point.
.
0
The URL (WAN) for the smartphone to connect to appears.
(Does not appear if DDNS is not set or set incorrectly.)
0
“LUPnP” is displayed when UPnP cannot be used.
7
Check the URL (WAN).
.
0
After checking the URL, tap “QUIT” to return to the previous screen.
0
“LUPnP” is displayed when UPnP cannot be used.
o
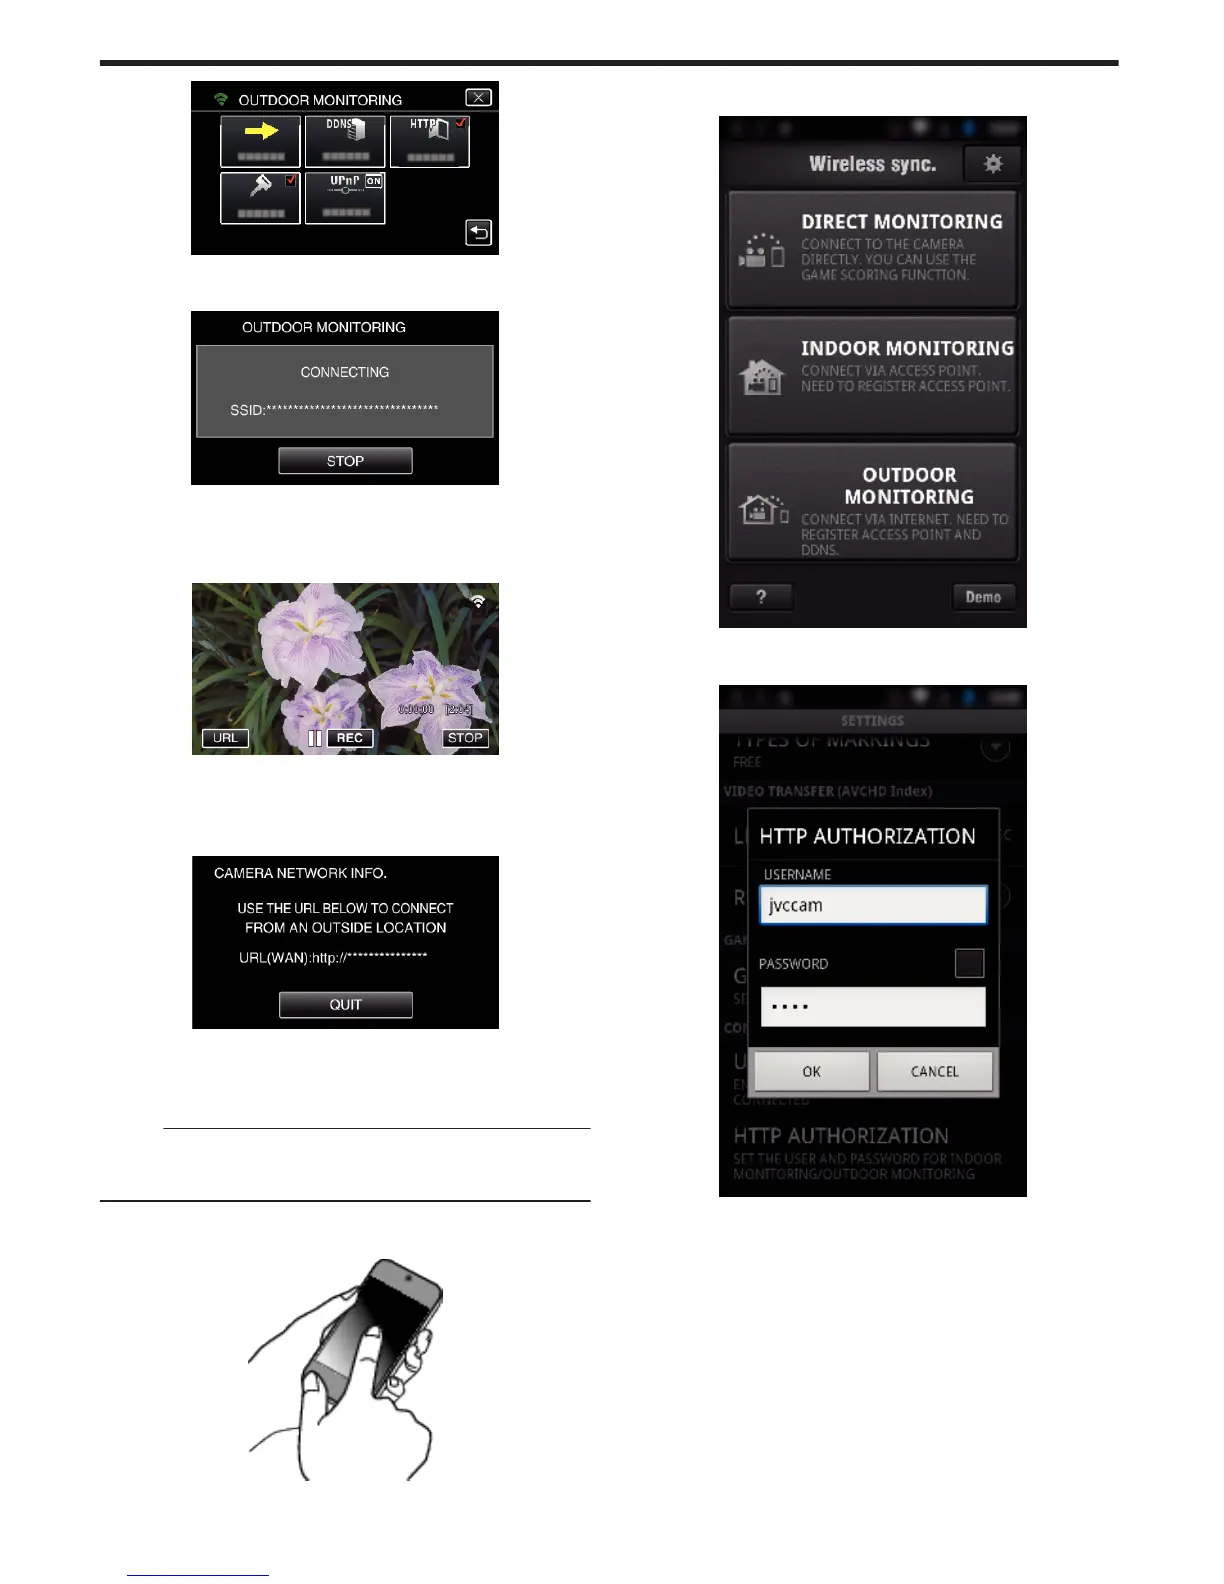
Operation on the smartphone
Memo :
0
Prior to use this function, a smartphone application needs to be installed
on the smartphone.
“Installing Smartphone Applications” (A p. 122)
1
Start “Wireless sync.” on the smartphone after setting OUTDOOR
MONITORING.
.
0
Tap “START” in OUTDOOR MONITORING on the camera to start.
2
Tap “OUTDOOR MONITORING”.
.
3
Log in with your username and password.
(if authentication cannot be achieved)
.
0
The username is “jvccam” and the default password is “0000”.
“Changing the Settings” (A p. 104)
4
The recording screen is displayed.
Using Wi-Fi by Creating a QR Code
160
 Loading...