.
0
Other methods, such as “Manual Registration” and “WPS PIN
Registration” are also available. Refer to the following link for details.
“Registering the Access Points of the Camera to Connect (ACCESS
POINTS)” (A p. 115)
o
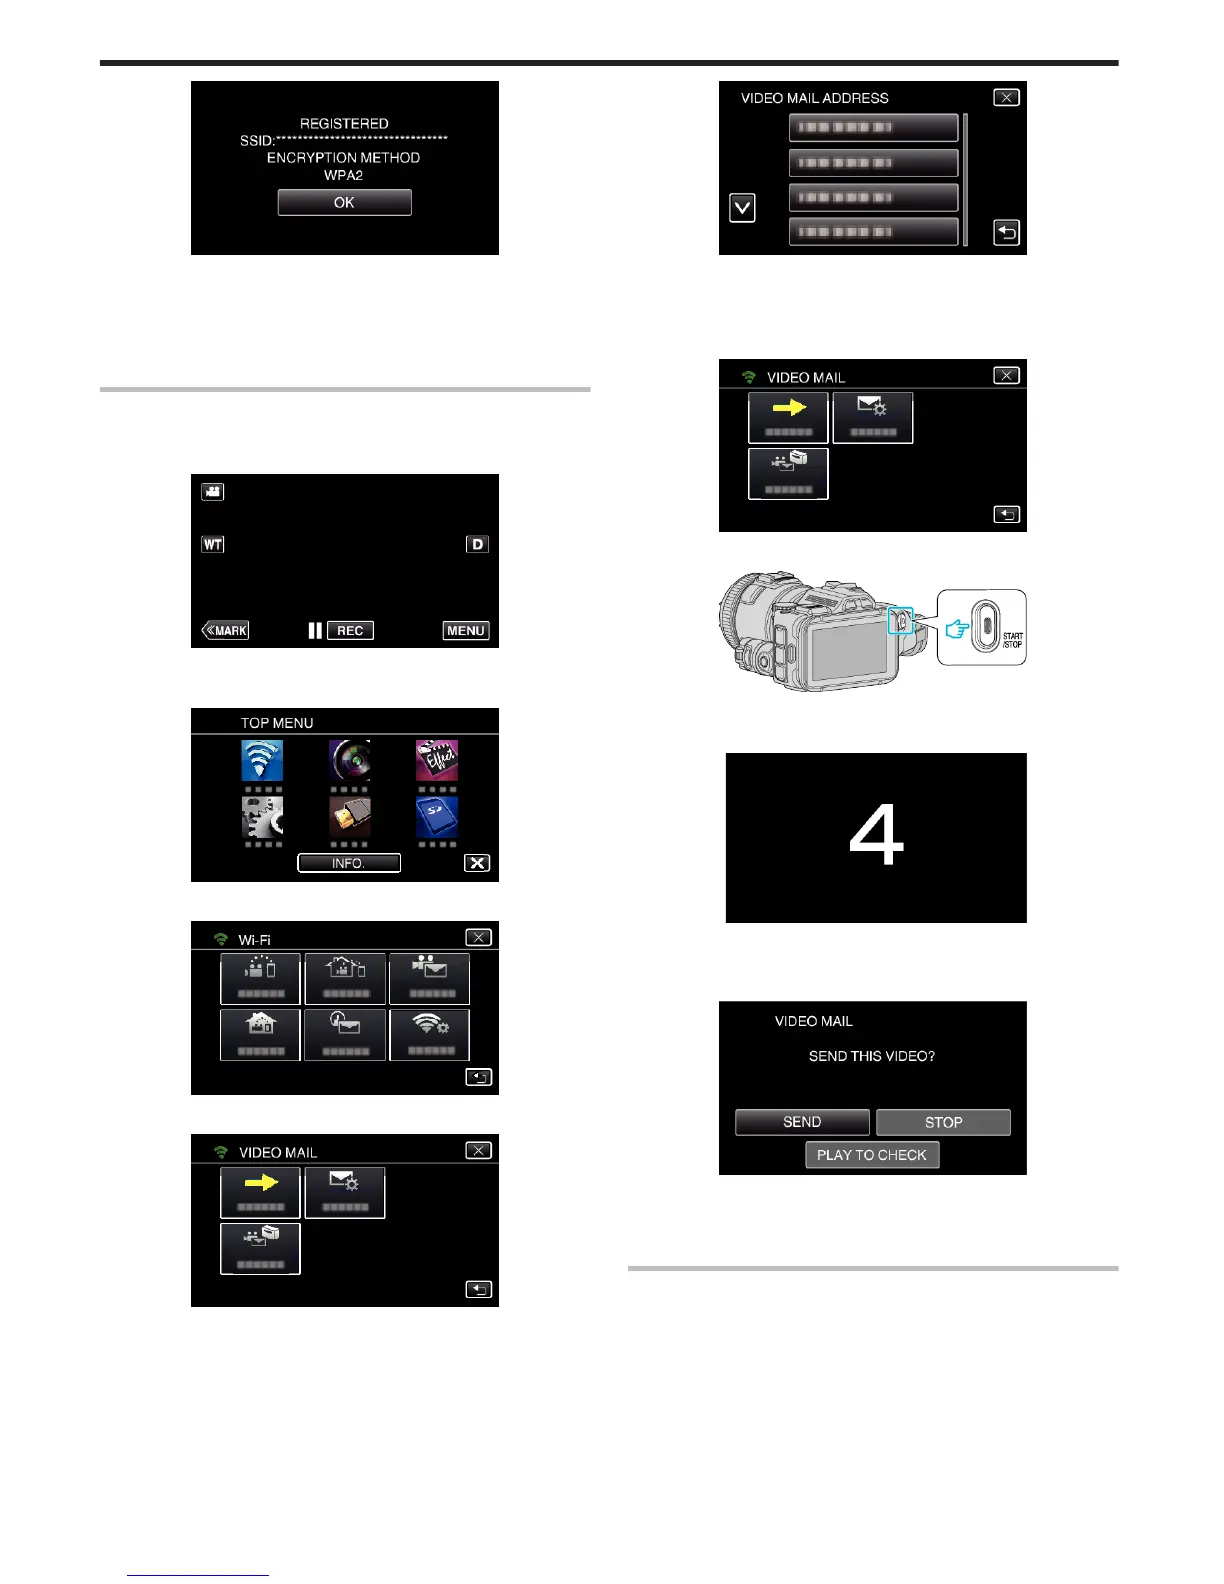
Regular Operation
Record videos to send a video mail.
1
Tap “MENU”.
Set the camera to the recording mode.
.
0
The top menu appears.
2
Tap the “Wi-Fi” (
Q
) icon.
.
3
Tap “VIDEO MAIL” (L).
.
4
Tap “VIDEO MAIL ADDRESS”.
.
5
Select “VIDEO MAIL ADDRESS”, then tap J.
.
0
To display the L icon, tap the e-mail address.
0
To cancel the e-mail address, press the icon one more time.
0
Up to 8 e-mail addresses can be selected.
6
Tap “START” (I).
.
7
Press the START/STOP button to start recording.
.
0
Or, tap the REC on screen.
8
Recording starts after the 5-second countdown.
.
0
You can allow the recording to be performed for 15 seconds or press
the START/STOP button to stop.
9
Tap “SEND”.
.
0
Sending of the video mail starts.
0
To check the file, tap “PLAY TO CHECK”.
0
When it is complete, tap “OK”.
Check the incoming e-mail.
Using Wi-Fi by Creating a QR Code
168
 Loading...