9
ENGLISH
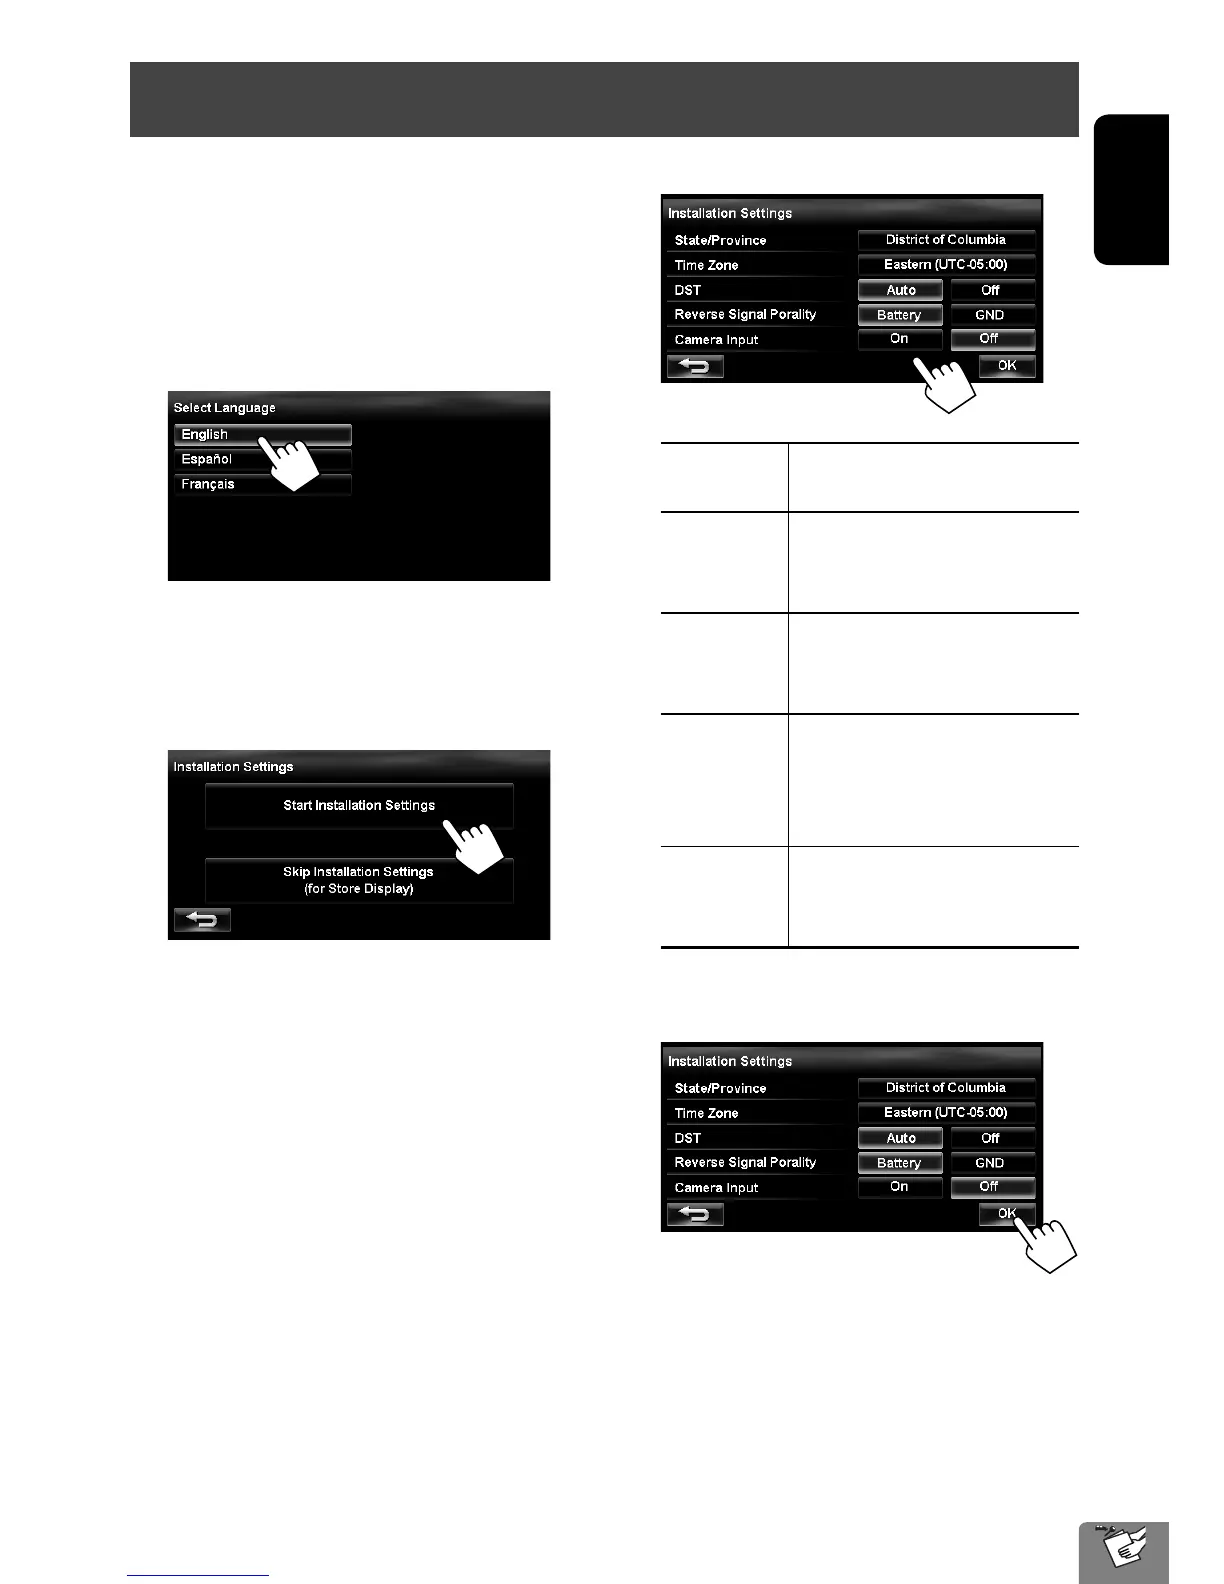
Installation settings
When you turn on the unit for the first time, the initial
setup screen appears.
1 Turn on the ignition switch.
The power is turned on, and the startup screen is
displayed for about 5 seconds.
2 Select the language you want for the display
and the voice guidance.
• You can also select the system language through
the AV menu (<Settings> - <System> -
<Language>, ☞ page 75)
3 Display installation settings screen.
• If you select [Skip Installation Settings (for
Store Display)], the System starts in the store
display mode.
You need to make the installation settings next
time you turn on the power.
– When you turn on the power, <Select
Language> appears. After selecting
the language, the confirmation message
appears. Press [Yes] so that the System starts
initialization. When initialization is complete,
<Select Language> (☞ Step 2 above) is
displayed.
4 Adjust the settings.
State/
Province
Select the State or Province where
you are now.
Time Zone * Select your residential area for
automatic clock adjustment by
GPS signal.
DST * Select <Auto> if your residential
area is subject to Daylight Saving
Time.
Reverse
Signal
Polarity *
Select the reverse signal polarity
(<Battery> or <GND>)
according to the connection of
your car.
Camera
Input *
Select <On> when connecting
the rear view camera to the
CAMERA IN jack.
* You can also change these settings through the AV
menu (<Settings>, ☞ page 75).
5
EN_KW-NT30_50[J].indb 9 2/3/2011 9:27:33 AM
 Loading...