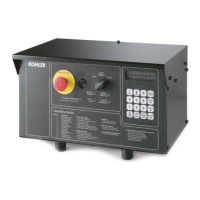
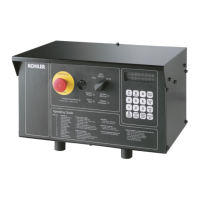
80 Section 5 Decision-Makerr 550 Controller TP-6356 4/12
15. Perform the Menu 14, Programming mode entries.
a. Press the RESET MENU key on the controller
keypad.
b. Use the controller keypad to go to Menu 14,
Programming Mode, and select programming
mode—local. Use the information from the
controller operation manual as necessary.
16. Perform the Menu 4, Operational Records.
a. Press the RESET MENU key on controller
keypad.
b. Use the controller keypad to go to Menu 4,
Operational Records.
c. Complete the operational records entries as
necessary. Use the information from the
controller operation manual as necessary.
17. Lock the Menu 20, Factory Setup entries.
a. Press the SETUP MENU key on the controller
keypad.
b. Use the controller keypad to go to Menu 20,
Factory Setup.
c. Arrow down to the SETUP LOCK display.
d. Press the YES key to lock the setup and
prevent alterations to Menu 20, Factory Setup.
18. Enter the Menu 6, Time and Date, settings.
a. Press the RESET MENU key on the controller
keypad.
b. Use the controller keypad to go to Menu 6, Time
and Date. Use the information from the
controller operation manual as necessary to set
the time and date.
19. Perform the Menu 7, Generator System, entries for
English or metric displays.
a. Press the RESET MENU key on the controller
keypad.
b. Use the controller keypad to go to Menu 7,
Generator System. Use the information from
the controller operation manual as necessary
to change metric unit, yes or no.
20. Perform the Menu 12, Calibration, entries.
a. See the controller operation manual for
disconnecting the ribbon connector.
Disconnect ribbon connector P2 prior to
zeroing out (resetting) the auxiliary analog
inputs.
b. Press the RESET MENU key on the controller
keypad.
c. Use the controller keypad to go to Menu 12,
Calibration. Use the information from the
controller operation manual as necessary to
scale AC analog inputs.
d. With the information previously recorded from
step 2, scale the auxiliary analog inputs. Use
the information from the controller operation
manual as necessary.
21. Perform the Menu 14, Programming Mode entries.
a. Press the RESET MENU key on the controller
keypad.
b. Use the controller keypad to go to Menu 14,
Programming Mode.
D Select programming mode—remote when
adding user parameter from a backup disk or
PC.
D Select programming mode—local for
keypad entries. Use the information from the
controller operation manual as necessary.
22. Add the user parameters.
a. Choose one of the following methods to load
the user parameters.
D Backup disk. Use a PC to load the data from
the user parameter backup disk. Enable
Menu 14, Programming Mode—Remote.
See the information from the Monitor II
software manual.
D Paper form. Use a PC to enter the user
parameter data from the filled-out controller
operation manual appendix, User-Defined
Settings form, or other similar form. Enable
Menu 14, Programming Mode—Remote.
See the information supplied with the
Monitor II software manual.
D Controller menu. Use the controller keypad
to manually enter the user parameter data
from the filled-out controller operation
manual appendix, User-Defined Settings
form. Enable Menu 14, Programming
Mode—Local. Use the information from the
controller operation manual as necessary.
 Loading...