(4) ENTER switch
Proceeds to setting for minute.
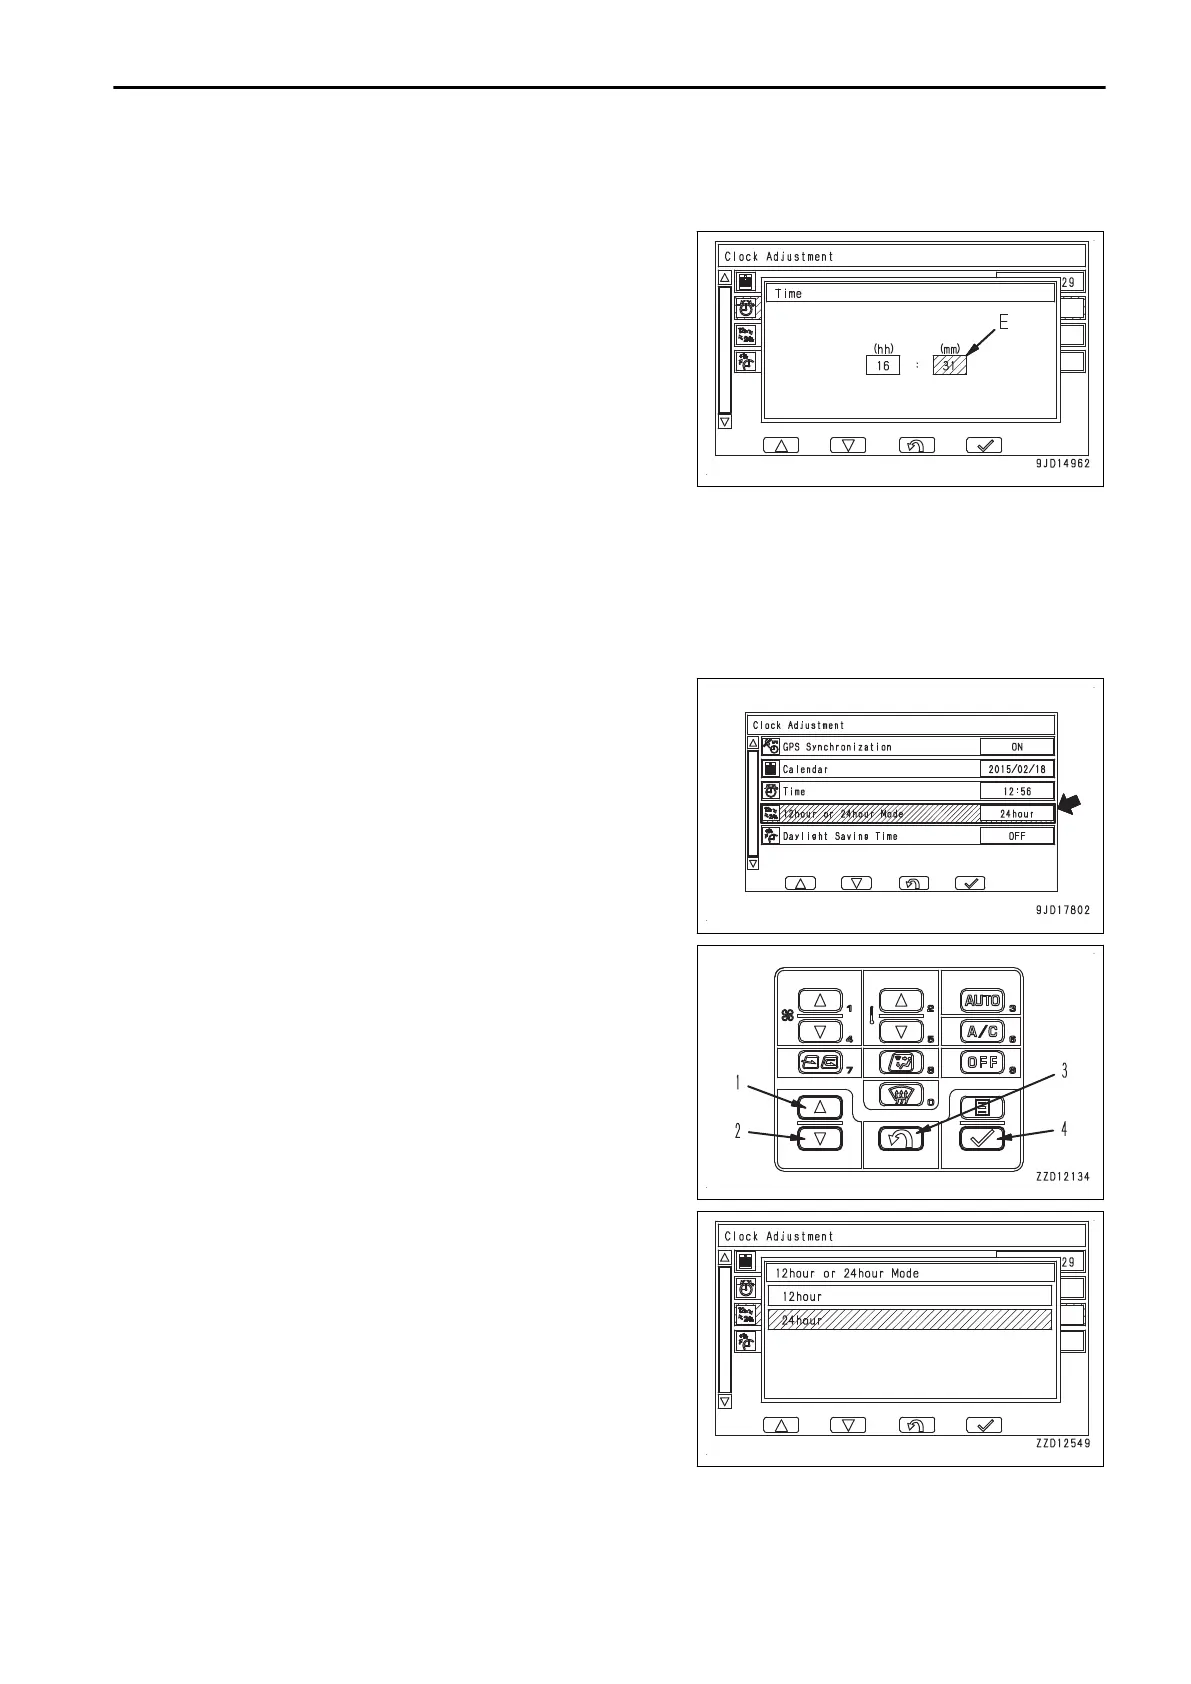
3.
When minute display (E) is highlighted in yellow, operate
the switches as follows to change minute display.
When it is not necessary to change minute display, press
ENTER switch (4).
(1) UP switch
Advances the numeral by 1.
(2) DOWN switch
Puts back the numeral by 1.
(3) RETURN switch
Cancels the change and returns the screen to the time setting screen.
(4) ENTER switch
Allocates the change and returns the screen to “Clock Adjustment” menu screen.
12-HOUR AND 24-HOUR DISPLAY MODE
On “12hour or 24hour Mode” screen, you can set the display mode of clock.
1.
Select “12hour or 24hour Mode” from “Clock Adjustment”
menu screen, then press ENTER switch (4).
2.
“12hour or 24hour Mode” screen is displayed.
Select “12hour” or “24hour”, then press ENTER switch (4).
“12hour”
Select 12-hour display (AM, PM).
“24hour”
Select 24-hour display.
You can perform the following operations with switches (1)
to (4) on the switch panel.
(1) UP switch
Moves to the previous item (1 line above).
When on the first line, it moves to the last line.
OPERATION EXPLANATION OF COMPONENTS
3-89

 Loading...