3-51
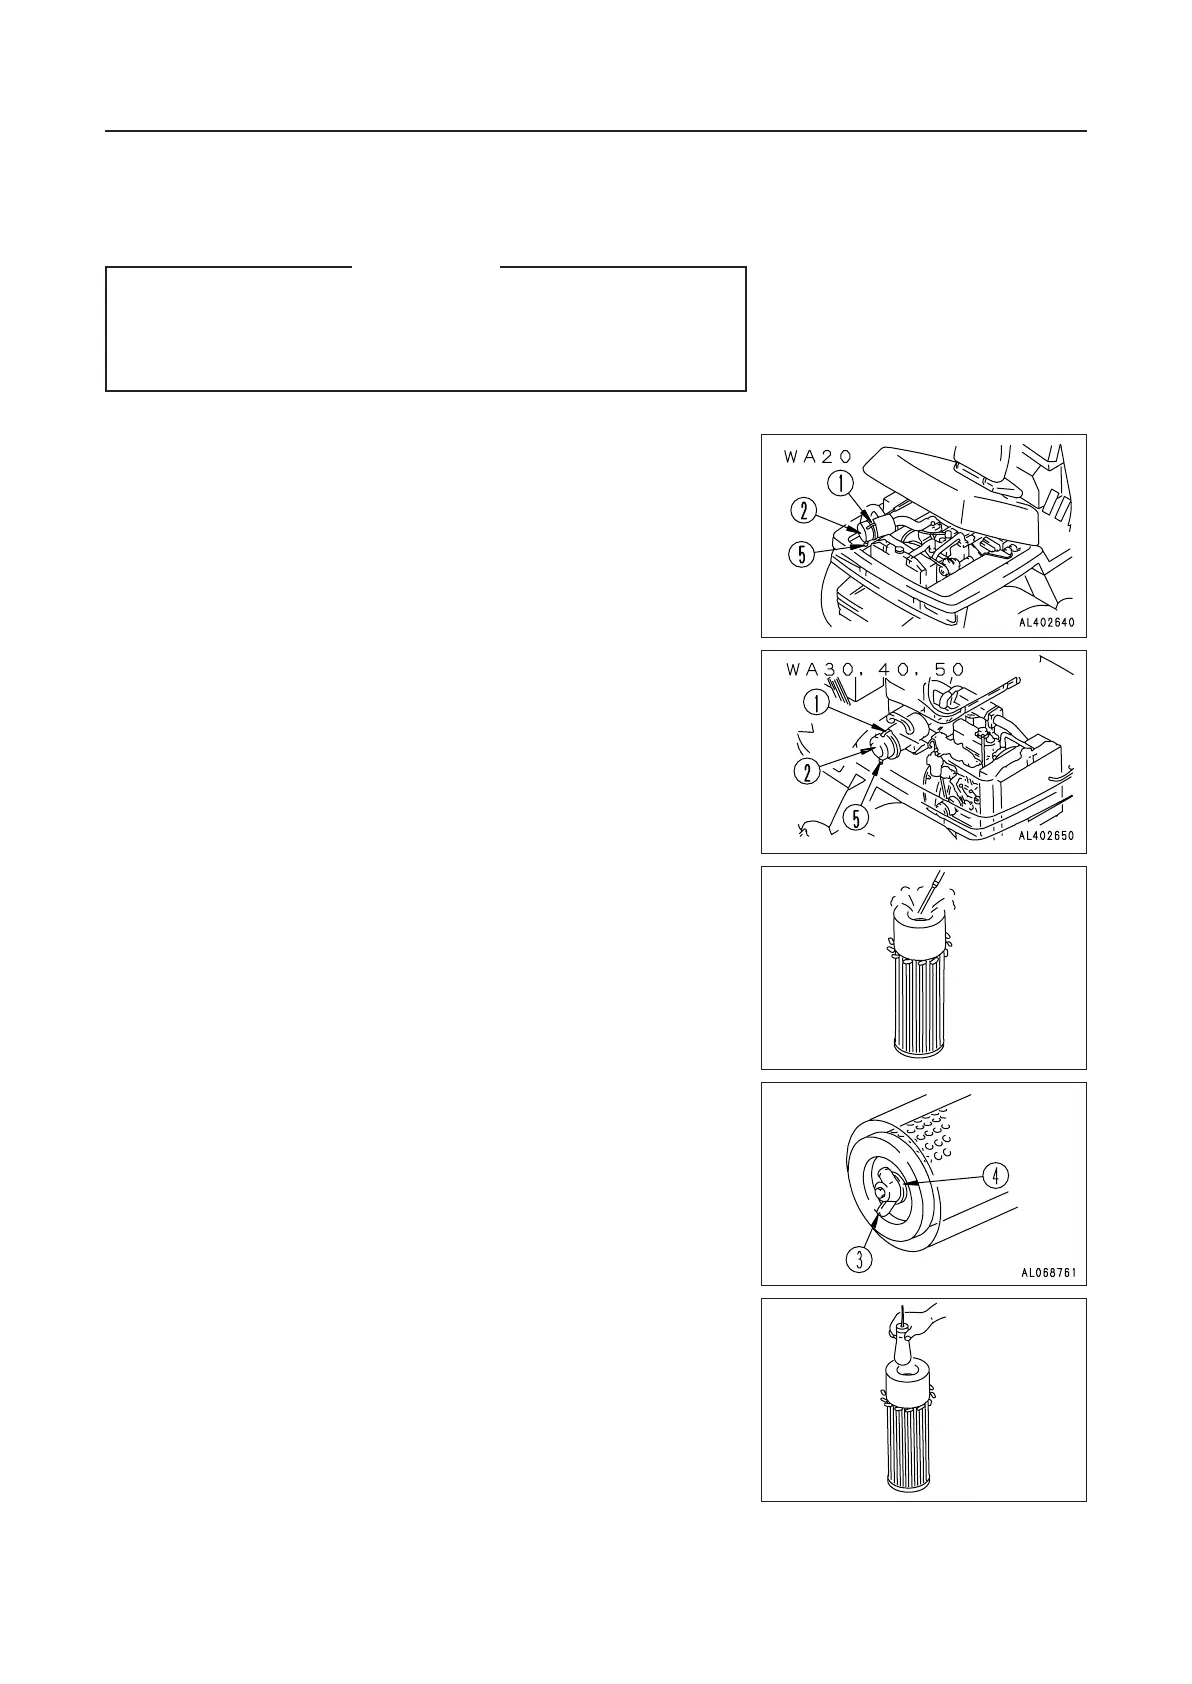
24.5.3 CHECK AND CLEAN AIR CLEANER ELEMENT
WARNING
‡ Never clean or replace the air cleaner element with the engine
running.
‡ When using pressure air to clean the element wear safety
glasses or goggles to protect the eyes.
Cleaning
1. Loosen clip 1 and remove dust cup 2.
2. Loosen wing nut 3 and take out the element, then clean the
element and dust cup 2.
3. Blow with dry compressed air (max. 0.7 MPa (7 kgf/cm
2
)) from
the inside of the element along its folds, then blow from the
outside along the folds, and again from the inside.
(1) Install a cover to the air intake after removing the element.
(2) When installing the element, be sure to assemble the seal
washer.
(3) When installing the dust cup, install with the arrow mark on
the dust cup pointing up.
(4) Replace the element if it has been cleaned six times or used
for one year.
(5) Never remove the air cleaner element when the engine is
running.
(6) If seal washer 4 is damaged or the thread of wing nut 3 is
damaged, replace with new parts.
(7) Remove evacuator valve 5 and clean with compressed air.
NOTICE
If small holes or thinner parts are found on element when it is
checked with an electric bulb after cleaning and drying, replace the
element.
When cleaning the element, do not hit it or beat it against
anything.
Do not use element whose folds or gasket or seal are damaged.
4. After cleaning, assemble the new element and install the dust
cup.
When carrying out this operation in a dusty place, clean the parts
quickly.
24. SERVICE PROCEDURE 24. SERVICE PROCEDURE
AL068740
AL068750
 Loading...