Repair manual KTM 125 / 200
Art No 3.206.005 -E
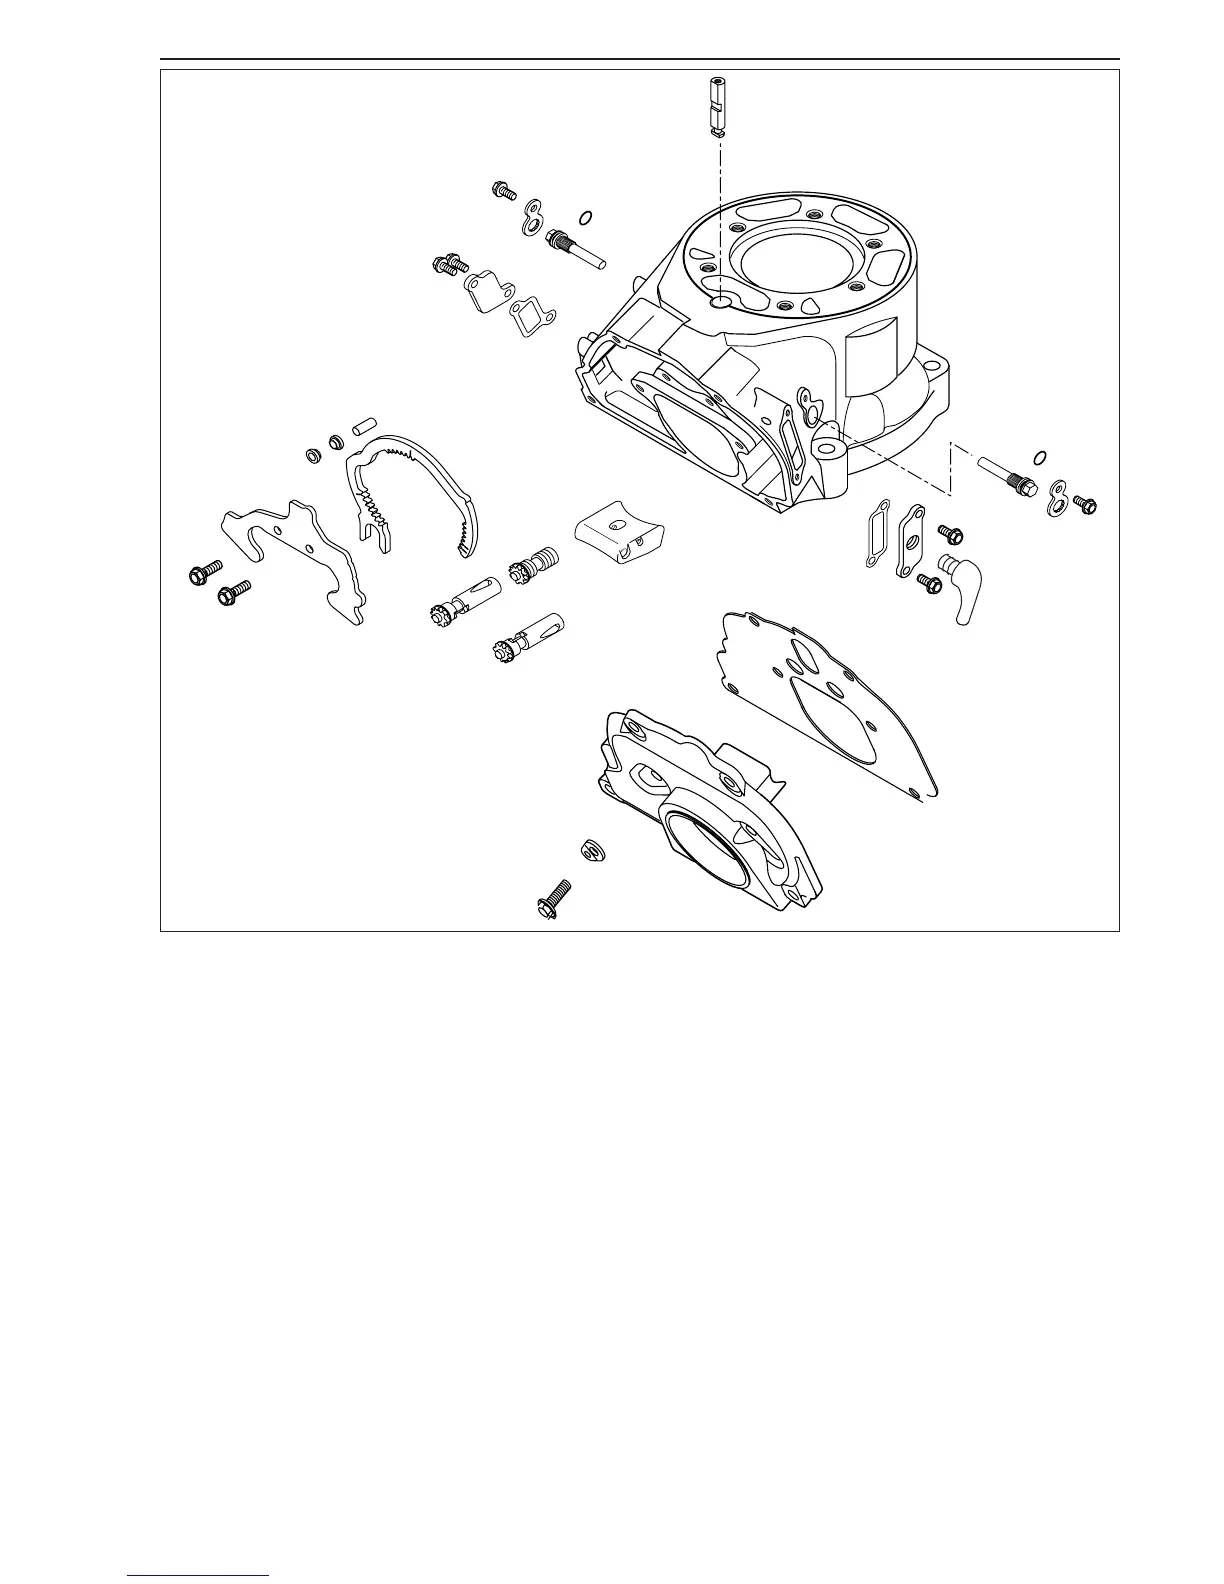
Dismounting and checking the exhaust control system in the cylinder
– Remove the 6 bolts bo and take off the exhaust flange 1 together with the gasket.
– Undo 2 bolts
2 and take the guide plate 3 out of the cylinder.
– Remove 3 collar bushings
4 and the control segment bm. To prevent subsequent jamming of the exhaust control, do not
damage the bearing surfaces of the collar bushings and the control segment bm.
–Take the three roller guides
4 behind out of the cylinder.
–Pull the two control rollers
5 and the eccentric shaft 6 out of the bores in the cylinder.
– Undo the bolts 7 to the left and to the right and remove them together with the locking plates 8.
–Twist out the left and the right control flap axles
9.
– Slightly push the control flap
bk upwards through the exhaust port. Turn the lifting bolt bl of the control flap a quarter of a full
rotation (for this purpose, it is recommended to twist a M5x40 bolt into the thread of the lifting bolt) and pull it upwards out of
the cylinder. Now the control flap can be taken out of the cylinder.
– Clean all parts of the exhaust control and check for wear and damage.
Roller guides
4
Check the contact surface between the roller guides and the control roller segment for grooves and exchange them, if necessary.
Control rollers
5
Check bearing for play.
Check the teeth of the control rollers for wear.
Control flap axles
9
Check the control flap axles for wear, especially at the pins.
NOTE: to prevent sticking of the control flap on 125 EXE- and 125 Supermoto models, there are nitrogenized control flap axles
(bright surface) available which subseed the original fitted axles (dark surface).
Control segment
bm
Check the contact surface between the control segment and the roller guides for grooves and exchange them, if necessary.
O-rings
bn
Check the O-rings of the control flap axles for wear and brittleness and exchange them, if necessary.
NOTE: from model 2002 the left side cover
bp is drilled for the crank case ventilation.
5-6C
14
15
2
7
7
8
8
10
9
9
11
12
13
13
6
5
5
4
3
1
 Loading...