3 WORK 17
402424-10
–
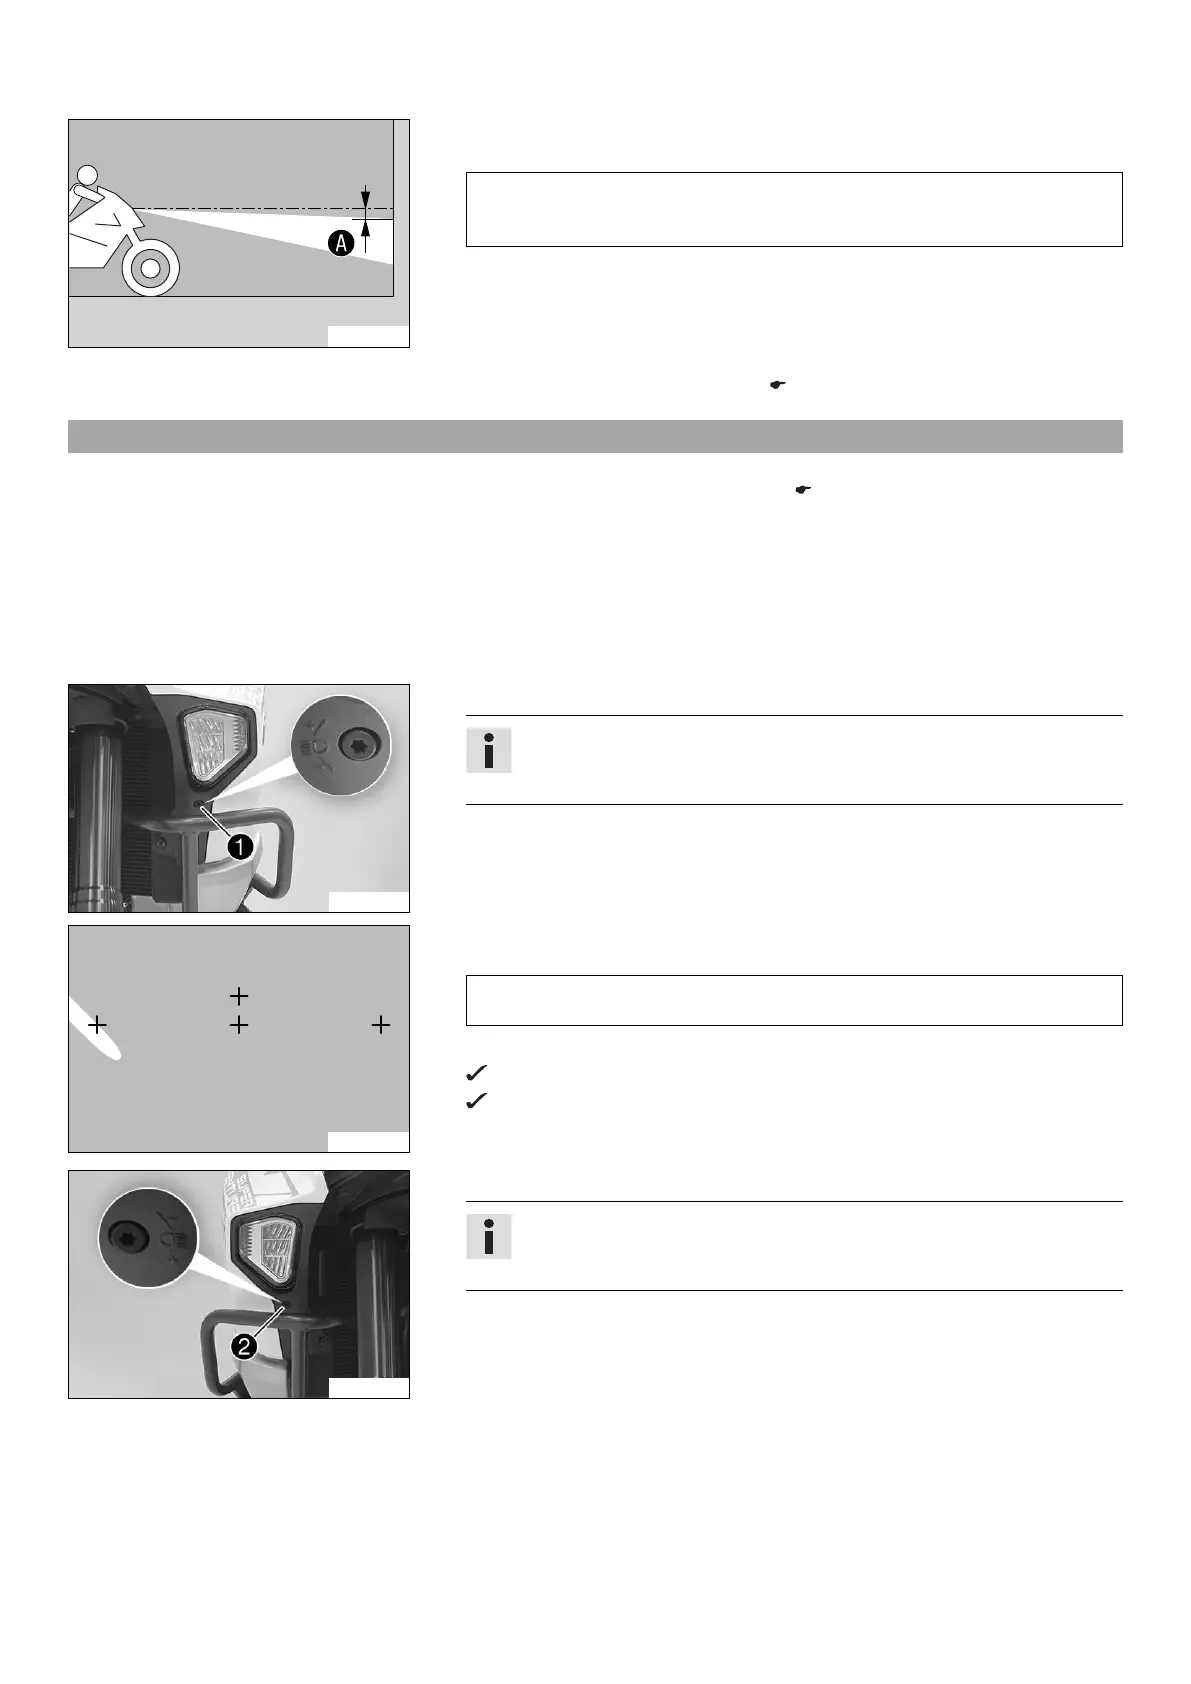
Set the headlight to marking
.
Guideline
The light-dark boundary must lie exactly on the lower mark
when the motor-
cycle is ready to operate with the rider mounted along with any luggage and a
passenger if applicable.
Finishing work
– Install the bottom triple clamp cover. ( p. 9)
3.20 Adjusting the cornering light range
Preparatory work
– Check the setting of the lighting system. ( p. 15)
Main work
– Press the UP or DOWN button until the "Settings" menu appears on the matrix dis-
play. Pressing the SET button opens the menu.
– Press the UP or DOWN button until "cLightTest" is highlighted in black on the matrix
display. Pressing the SET button again starts the cornering light test.
– Wait for a few seconds until the upper segment of the left cornering light lights up
continuously.
V00106-10
–
Turn adjusting screw
to adjust the left cornering light range.
Info
Turn clockwise to increase the headlight range; turn counterclockwise to
reduce the headlight range.
402427-01
– Set the upper segment on the left marking.
Guideline
The light-dark boundary of the upper segment must run exactly through the left
marking.
– Press the SET button.
The left cornering light is switched off.
The right cornering light test is started.
– Wait for a few seconds until the upper segment of the right cornering light lights up
continuously.
V00107-10
–
Turn adjusting screw
to adjust the right cornering light range.
Info
Turn clockwise to increase the headlight range; turn counterclockwise to
reduce the headlight range.
 Loading...