Rugby 620, Applications
25
5 Applications
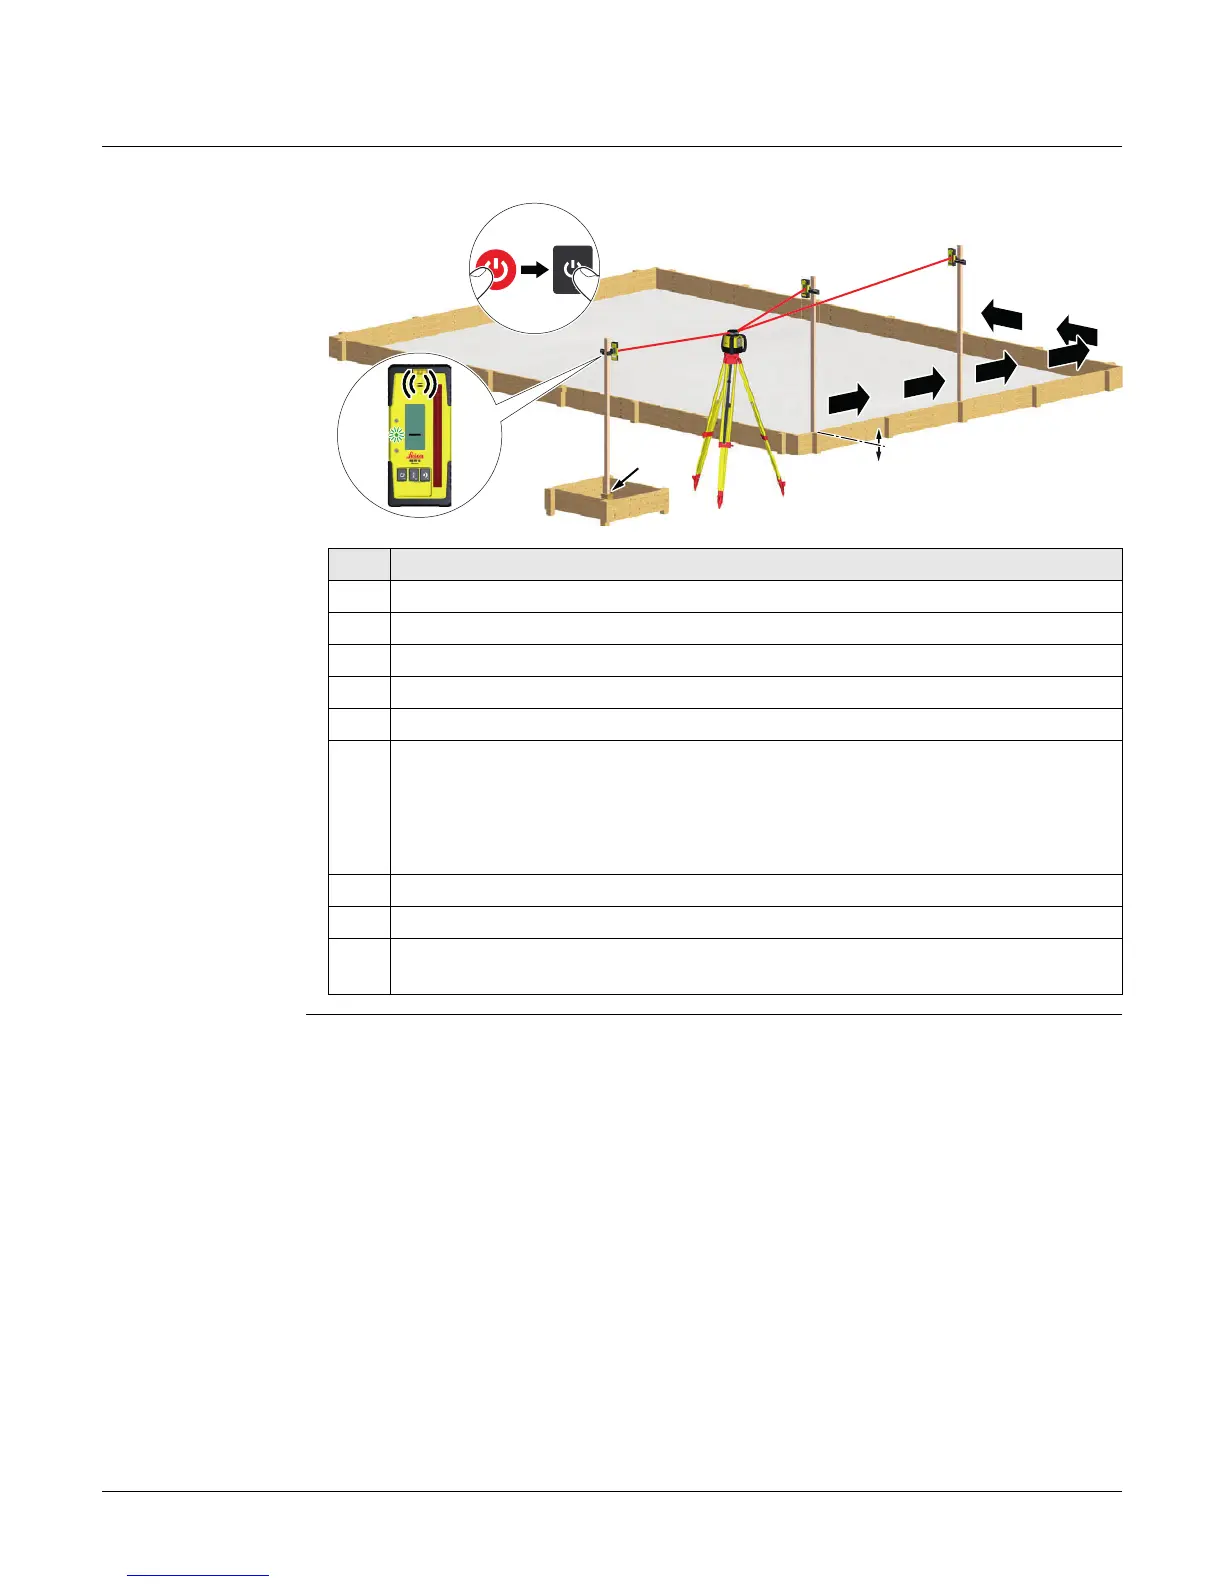
5.1 Setting Forms
Setting Forms
step-by-step
Application shown using the Rod Eye 140, Classic Receiver.
Step Description
1. Set up the Rugby on a tripod.
2. Set up the tripod on a stable surface outside the working area.
3. Attach the receiver to a rod.
4. Turn on the Rugby and the receiver.
5. Set the base of the rod on a known point for the finished height of forms.
6. Adjust the height of the receiver on the rod until the on-grade (centre-line)
position is indicated on the receiver by:
•the centre bar
• the green flashing LED
• a solid audio tone
7. Set the rod with the attached receiver on top of the form.
8. Adjust the height of the form until the on-grade position is again indicated.
9. Continue to additional positions until the forms are levelled to the rotating
plane of the Rugby.

 Loading...