EasyManua.ls Logo

LG 55UK6500AUA Service Manual

LG 55UK6500AUA
97 pages
To Next Page IconTo Next Page
To Previous Page IconTo Previous Page
Page #5 background imageLoading...
Page #5 background image
- 5 -
Copyright © LG Electronics Inc. All rights reserved.
Only for training and service purposes.
IC Remove/Replacement
Some chassis circuit boards have slotted holes (oblong) through
which the IC leads are inserted and then bent at against the cir-
cuit foil. When holes are the slotted type, the following technique
should be used to remove and replace the IC. When working with
boards using the familiar round hole, use the standard technique
as outlined in paragraphs 5 and 6 above.
Removal
1. Desolder and straighten each IC lead in one operation by
gently prying up on the lead with the soldering iron tip as the
solder melts.
2. Draw away the melted solder with an anti-static suction-type
solder removal device (or with solder braid) before removing
the IC.
Replacement
1. Carefully insert the replacement IC in the circuit board.
2. Carefully bend each IC lead against the circuit foil pad and
solder it.
3. Clean the soldered areas with a small wire-bristle brush.
(It is not necessary to reapply acrylic coating to the areas).
"Small-Signal" Discrete Transistor
Removal/Replacement
1. Remove the defective transistor by clipping its leads as close
as possible to the component body.
2. Bend into a "U" shape the end of each of three leads remaining
on the circuit board.
3. Bend into a "U" shape the replacement transistor leads.
4. Connect the replacement transistor leads to the corresponding
leads extending from the circuit board and crimp the "U" with
long nose pliers to insure metal to metal contact then solder
each connection.
Power Output, Transistor Device
Removal/Replacement
1. Heat and remove all solder from around the transistor leads.
2. Remove the heat sink mounting screw (if so equipped).
3. Carefully remove the transistor from the heat sink of the circuit
board.
4. Insert new transistor in the circuit board.
5. Solder each transistor lead, and clip off excess lead.
6. Replace heat sink.
Diode Removal/Replacement
1. Remove defective diode by clipping its leads as close as pos-
sible to diode body.
2. Bend the two remaining leads perpendicular y to the circuit
board.
3. Observing diode polarity, wrap each lead of the new diode
around the corresponding lead on the circuit board.
4. Securely crimp each connection and solder it.
5. Inspect (on the circuit board copper side) the solder joints of
the two "original" leads. If they are not shiny, reheat them and if
necessary, apply additional solder.
Fuse and Conventional Resistor
Removal/Replacement
1. Clip each fuse or resistor lead at top of the circuit board hollow
stake.
2. Securely crimp the leads of replacement component around
notch at stake top.
3. Solder the connections.
CAUTION: Maintain original spacing between the replaced
component and adjacent components and the circuit board to
prevent excessive component temperatures.
Circuit Board Foil Repair
Excessive heat applied to the copper foil of any printed circuit
board will weaken the adhesive that bonds the foil to the circuit
board causing the foil to separate from or "lift-off" the board. The
following guidelines and procedures should be followed whenever
this condition is encountered.
At IC Connections
To repair a defective copper pattern at IC connections use the
following procedure to install a jumper wire on the copper pattern
side of the circuit board. (Use this technique only on IC connec-
tions).
1. Carefully remove the damaged copper pattern with a sharp
knife. (Remove only as much copper as absolutely necessary).
2. carefully scratch away the solder resist and acrylic coating (if
used) from the end of the remaining copper pattern.
3. Bend a small "U" in one end of a small gauge jumper wire and
carefully crimp it around the IC pin. Solder the IC connection.
4. Route the jumper wire along the path of the out-away copper
pattern and let it overlap the previously scraped end of the
good copper pattern. Solder the overlapped area and clip off
any excess jumper wire.
At Other Connections
Use the following technique to repair the defective copper pattern
at connections other than IC Pins. This technique involves the
installation of a jumper wire on the component side of the circuit
board.
1. Remove the defective copper pattern with a sharp knife.
Remove at least 1/4 inch of copper, to ensure that a hazardous
condition will not exist if the jumper wire opens.
2. Trace along the copper pattern from both sides of the pattern
break and locate the nearest component that is directly con-
nected to the affected copper pattern.
3. Connect insulated 20-gauge jumper wire from the lead of the
nearest component on one side of the pattern break to the lead
of the nearest component on the other side.
Carefully crimp and solder the connections.
CAUTION: Be sure the insulated jumper wire is dressed so the
it does not touch components or sharp edges.

Table of Contents

Other manuals for LG 55UK6500AUA

Question and Answer IconNeed help?

Do you have a question about the LG 55UK6500AUA and is the answer not in the manual?
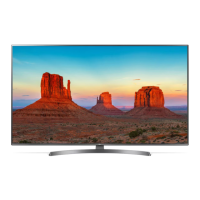
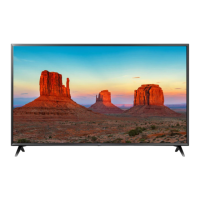
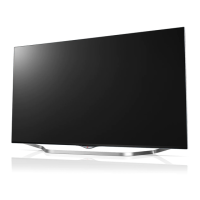
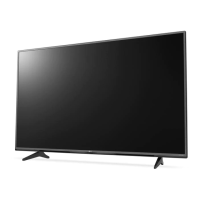
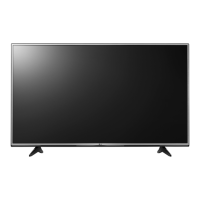
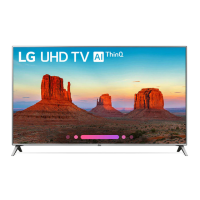
LG 55UK6500AUA Specifications

General IconGeneral
Screen Size55 inches
Display TypeLED
Smart TVYes
HDMI Ports4
USB Ports2
Audio Output Power20W
Refresh Rate60Hz
Wi-FiYes
Speaker System2.0 Channel
ProcessorQuad Core Processor
BluetoothYes
Resolution3840 x 2160
HDRYes (HDR10, HLG)

Summary

Safety Precautions and Guidelines

General Safety Guidance

General safety procedures for servicing, including using isolation transformers and handling fuses.

AC Leakage Current Checks

Procedures for performing AC leakage current checks (cold and hot) to ensure safety.

Servicing Precautions and Procedures

General Servicing Procedures

Essential procedures for safe and effective servicing of the TV, including handling components and tools.

Handling Electrostatic Sensitive Devices

Guidelines for safely handling components sensitive to static electricity to prevent damage.

Soldering Techniques and Guidelines

Best practices for soldering, including temperature, solder type, and tip maintenance.

Component Replacement and Repair

IC, Transistor, and Diode Replacement

Step-by-step guides for replacing integrated circuits, transistors, and diodes.

Fuse, Resistor, and Foil Repair

Procedures for replacing fuses and resistors, and repairing damaged circuit board foil.

Television Specifications

General System Specifications

Details on market, broadcasting systems, channel support, and input/output interfaces.

External Input Support Formats

Component Input Formats

Supported signal formats for Component (Y, PB, PR) inputs, including resolution and timing.

HDMI Input Formats

Supported signal formats for HDMI inputs (PC/DTV), including resolution and timing.

Software Update Procedures

USB Software Update

Instructions for updating the TV's software using a USB drive.

Network Software Update (NSU)

Instructions for updating the TV's software over a network connection.

System Architecture and Block Diagrams

Main IC and Panel Interface

Diagram of the main IC and its interface with panel technologies like EPI and CEDS.

Input/Output Interfaces

Diagrams detailing video, audio, HDMI, USB, Wi-Fi, and tuner interfaces.

Communication and Control Maps

Maps illustrating I2C bus and GPIO pin assignments for system control.

Power Management and Distribution

Power Supply Voltage Specifications

Specifies key voltage rails and test points for power supply diagnostics.

External View and Component Identification

Exploded View of the Television Set

Visual diagram showing the physical layout and assembly of the TV set.

Disassembly and Reassembly Procedures

Initial Screw Disassembly

Step-by-step guide for disassembling the TV by removing specific screws.

Troubleshooting Methodology

Video Error Diagnostics

Procedures for diagnosing and resolving video-related problems like no video, picture distortion, or freezing.

Power Error Diagnostics

Steps to troubleshoot power-related faults, including no power and intermittent operation.

Audio Error Diagnostics

Diagnostic flowcharts for resolving audio problems such as no sound or distorted audio.

Function Error Diagnostics

Troubleshooting guides for functional errors like remote control, Wi-Fi, and device connectivity issues.

Noise and Exterior Defect Resolution

Methods for diagnosing and fixing noise issues and external physical defects on the TV.

Power Board Diagnostic and Testing

General Power Board Voltage Checks

Procedures for checking power board voltages and sequences on the main power board.

Model-Specific Power Board Diagnostics

Detailed diagnostic methods for different power board models using specialized JIGs and tests.

Related product manuals