Rev: 10.22.19 Page 10
CCD-0001541
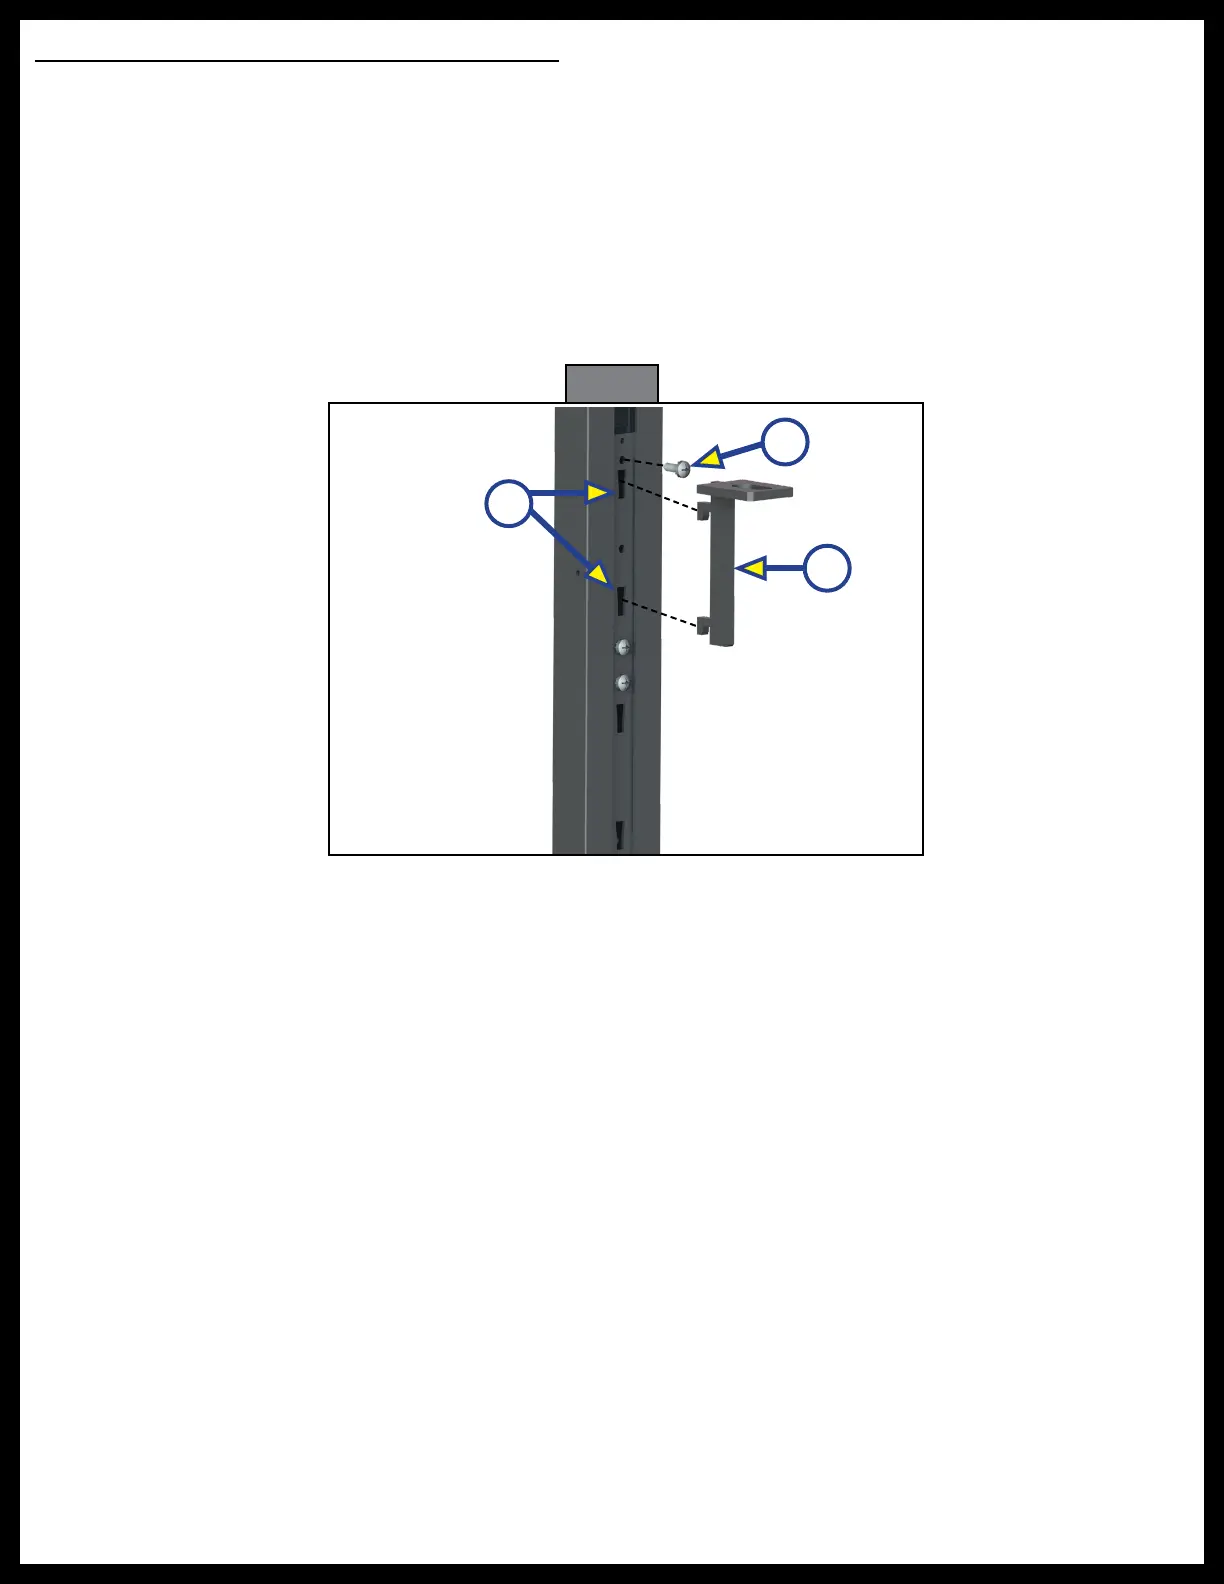
Fig. 16
Slotted Lower Trolley Tab Bracket Installation
Slotted lower trolley tab brackets can be installed in place of the sofa/dinette brackets if a lower bunk
configuration is required.
NOTE: There are four slots in the lower trolley. This trolley tab can only go into the top slots and can only
be installed with the trolley tab at the top.
1. Line up the hooks on the edge of the trolley tab bracket (Fig. 16A) with the top two slots (Fig. 16B) in
the slotted trolley, then push the brackets into the channels.
2. Push the bracket down so it locks into the trolley tab channels and secure with provided 1/4" Phillips
head locking screw (Fig. 16C). If the optional automatic bunk lock-up mechanism is installed, this
screw will be installed during the automatic bunk lock-up mechanism installation.
3. Repeat steps 1 through 3 for the other lower trolleys.
B
A
C
 Loading...