Rev: 10.22.19 Page 17
CCD-0001541
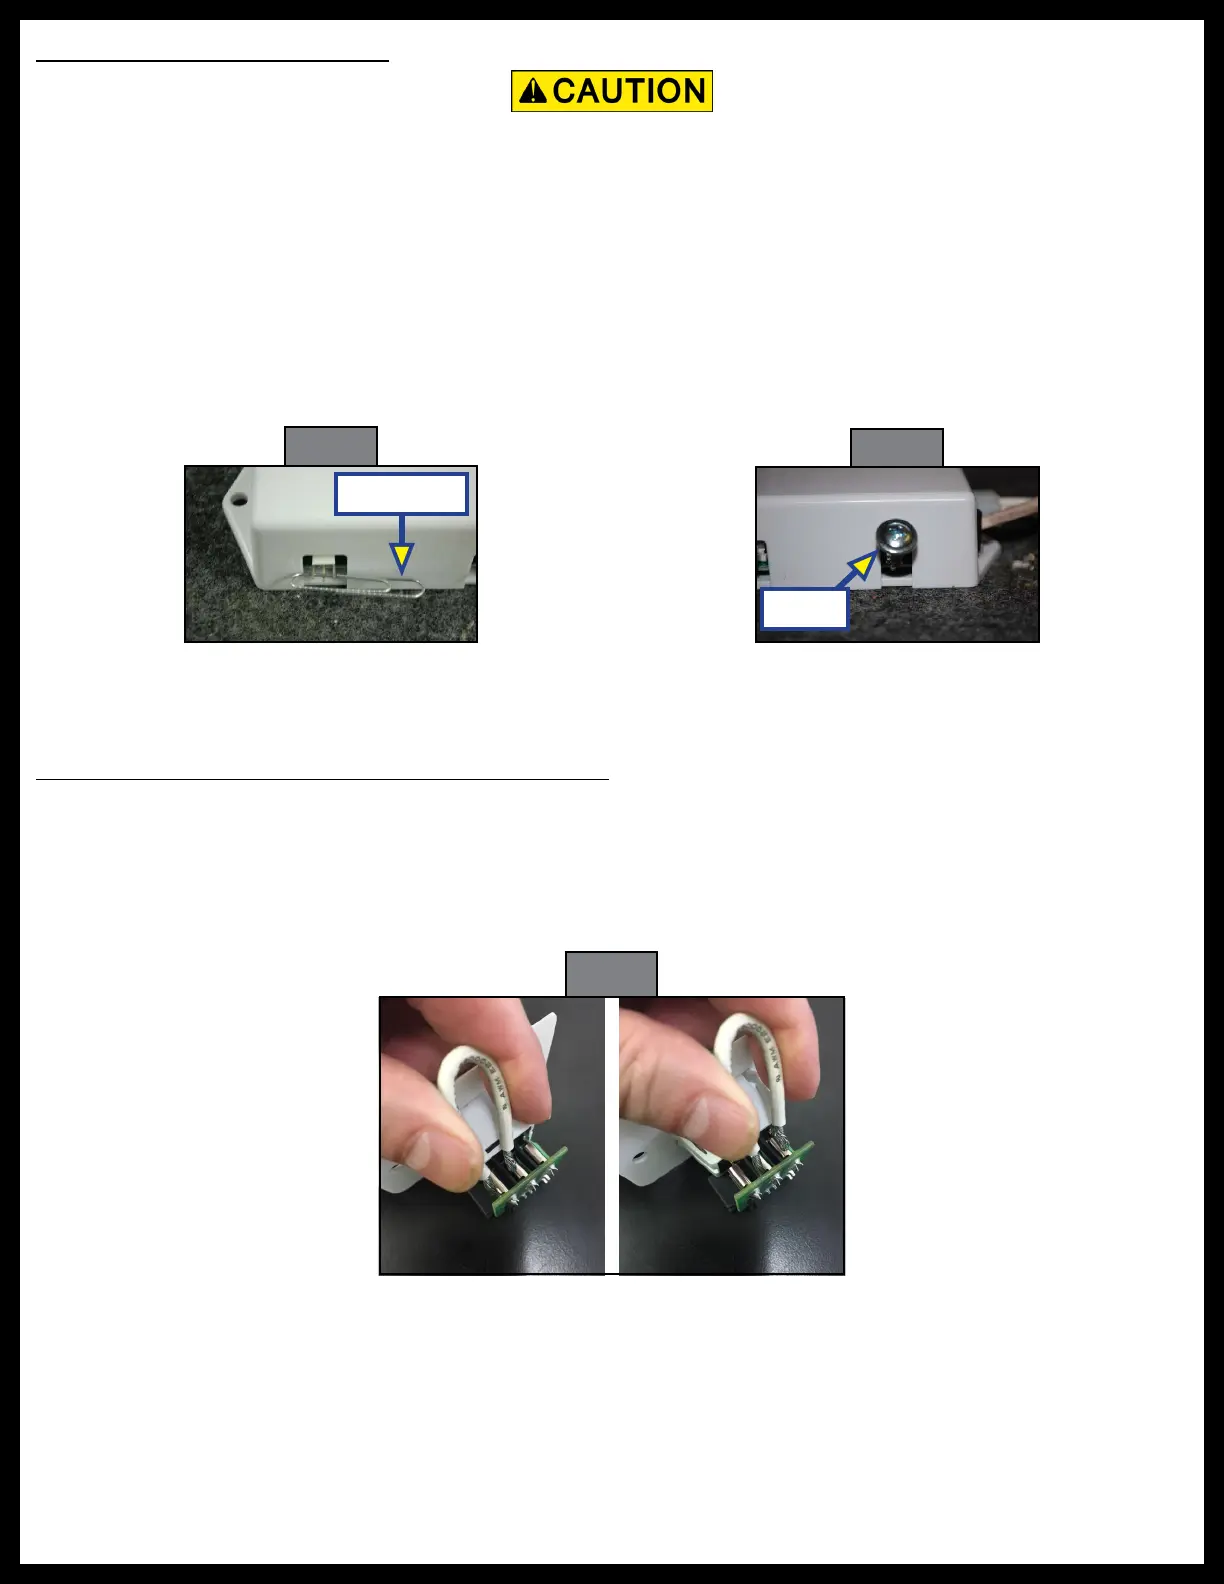
Limit switches - Microswitches
Fig. 31
Fig. 32
3. Briefly depress the UP/DOWN buttons on the control switch to see if the motor energizes.
A. If the motor energizes, then the problem is with the limit switch circuit. Replace the limit switch.
B. If the motor does not energize, then the problem is not in the limit switch, but elsewhere.
Bed Lift Control Switch - LCI-supplied Switch only
The bed lift relay control switch (rocker switch) (Fig. 25) is plugged into a circuit board which transitions the
signal from the switch to the communication cord.
Bypass the switch for testing purposes as follows:
1. Remove the screws from the switch bezel to gain access to the back of the switch.
2. Use a loop of wire to short the switch's center contact to the outer contacts (Fig. 33).
The limit switches are no longer active in the circuit and will not stop the bed. Damage to the
switches, mechanism, or unit could occur. Reversing the wire leads will reverse the motor direction.
Fig. 33
A. Short from center silver lug to each outside lug. One side should move beds up - the other side down.
B. If the bed(s) move while contacts are being shorted, but not when the switch is depressed, the
switch is defective. Replace bed lift control switch.
3. Install switch bezel to the back of the switch with previously removed screws.
Paper Clip
Screw
To determine if there is a limit switch problem, eliminate the switches from the circuit.
1. Remove the small 3-pin and 2-pin red limit switch from the relay control module.
2. Short the connector pins of the module. See Wiring Diagram (Fig. 27).
A. Lace a paper clip over and under the output pins of the 3-pin connector to create a short (Fig. 31).
NOTE: Alternatively, an alligator clip may be used instead of a paper clip.
B. Wedge a small screw, or other metallic object, between the output pins of the 2-pin connector to
create a short (Fig. 32).
 Loading...