24 Chapter 5: Patching
PRO6 Control Centre
Quick Reference Guide
>> To access the Patching screen
Do one of the following:
• At the GUI, choose home
Patching.
• Press the routing/metering button in the primary navigation zone.
• At the appropriate GUI screen, click the src (source) or dest (destination) button.
The Patching screen will open at the appropriate tab/configuration window.
Function buttons
The function buttons are described in Table 1 “Description of the function buttons”.
Click a function button to select it; its background colour will change to a lighter shade
when selected.
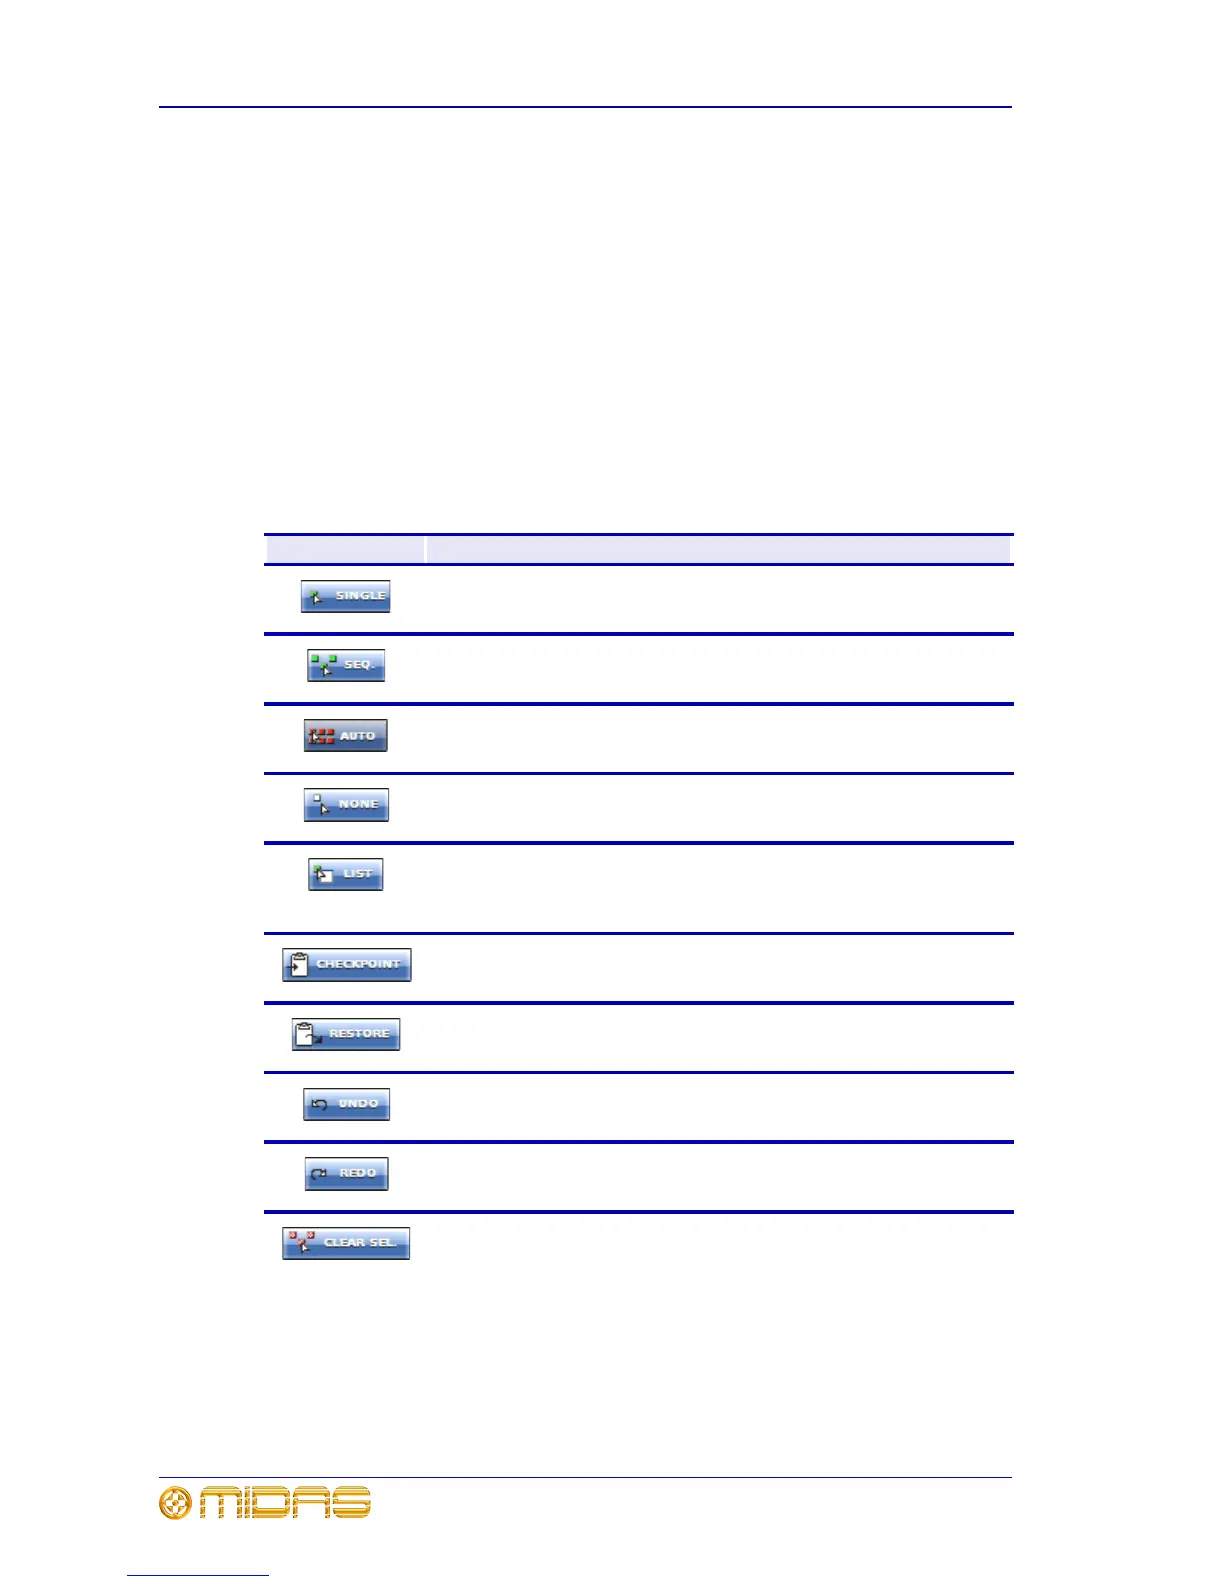
Table 1: Description of the function buttons
Button Description
Allows you to patch a single source to a single destination or multiple destinations.
See “Single patching (SINGLE)” on page 30.
Lets you select multiple sources and patch them one by one to their destinations. In
this method, each source can only have one destination. See “Sequence patching
(SEQ.)” on page 30.
Allows you to select a block of sources and patch them all automatically, simply by
selecting a single destination. Any existing patches within the destination range will
be replaced by the new ones.
Clears all currently selected patch connectors from all tabs in the From and To
sections. The green triangles will disappear accordingly.
Changes the tooltip type from standard to list, but is only available when carrying out
a sequence patching operating via the SEQ. button. The list tooltip, which has a
distinctive translucent orange background, appears in the To section when you are
patching the destinations of a number of selected sources. The list contains a queue
of sources waiting to be patched; the first in the queue is at the bottom of the list.
Sets a patching store point that contains the patching status at that instant. There is
only one checkpoint available, so each time CHECKPOINT is clicked the previous
checkpoint is overwritten.
Reverts patching status to the last checkpoint or, if no checkpoints have been
created, it will revert patching status to the power up condition. All patching done in
the intervening period will be lost.
Undoes the latest single patch, even if it was part of a multiple patching operation.
Repeated clicks will undo the preceding patching operations, going back to the last
checkpoint, or power up if no checkpoints have been created.
Redoes an undo. This can be repeated for each undo in the previous undo operation.
Clears all current selections and their patches.
Important:
Unlike the NONE button, which merely removes the current selections
(highlighted in yellow), CLEAR SEL. goes a step further by removing the
patch as well. This will stop any audio that may have been going through
the patched signal.

 Loading...

